AstroBin is the home of astrophotography - Share full resolution images, preserve acquisition details, discover equipment, discuss techniques, and learn from the community.Discover AstroBin

Full imaging train, tidily engineered setup with long fracs - please show your solution

11 replies383 views
kullumm avatar

Looking for inspiration or pictorial advice on imaging train setups for long refractors on a backyard mount.

For context, I use a HAE 29, balance and weight not a consideration for this request. I use a clone of the sharpstar 15028HNT, and have a nice tidy and 5-7 min setup with everything on board (MELE PC, powerbox etc. with a power cable and a mount connection as the only two cables coming down to the mount from the short tube stout scope.

So, for scopes in the folliwng category (SW esprit 120, Tak TSA 120, FS 102NSV, Askar 120 APO, TS 115 or 130 triplet variants for example), with OTA lengths ranging from 680 to 950 mm or thereabouts (it could even be a Tak TOA behemoth), what do your imaging trains look like. It is a big difference to stout and stacked like the fast mirror scope, and with flattener/reducer, and all camera additions, it is quite long(er).

I’d lke to see well engineered, tidy (no cable mess) solutions that involve a PC and powerbox, full setup with calble management (no ASI air options, no AIR or wireless cameras within inbuilt computers etc, please). some of you have wonderfully organized and well thought out solutions - please show them off.

Let's see them. Looking to get inspired and remove the (ir)rational fear I have about setting one of these up again :)

Well written Respectful Engaging
Dave Ek avatar

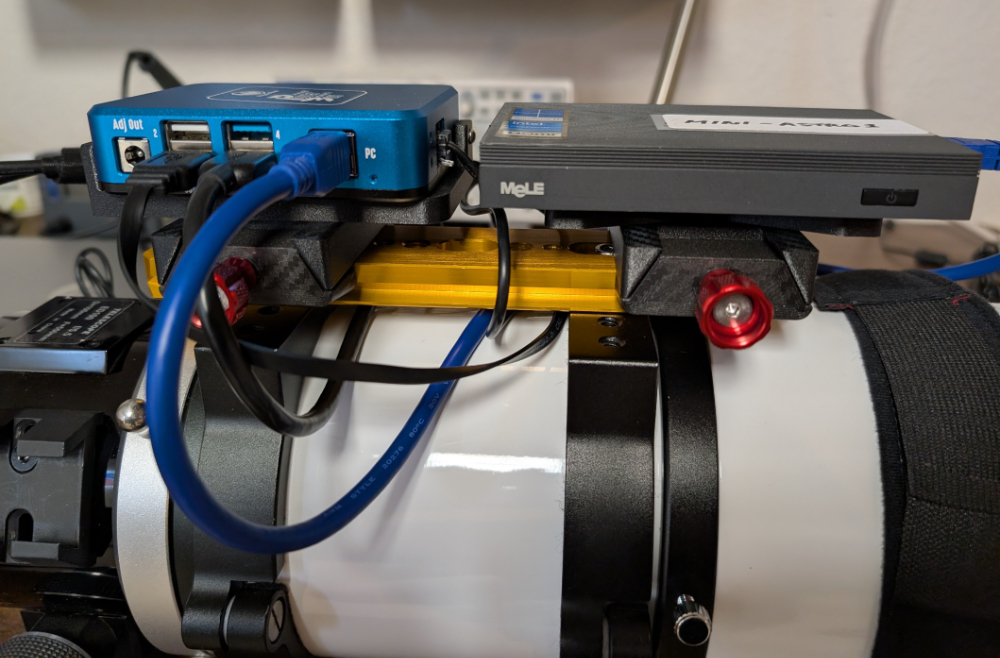
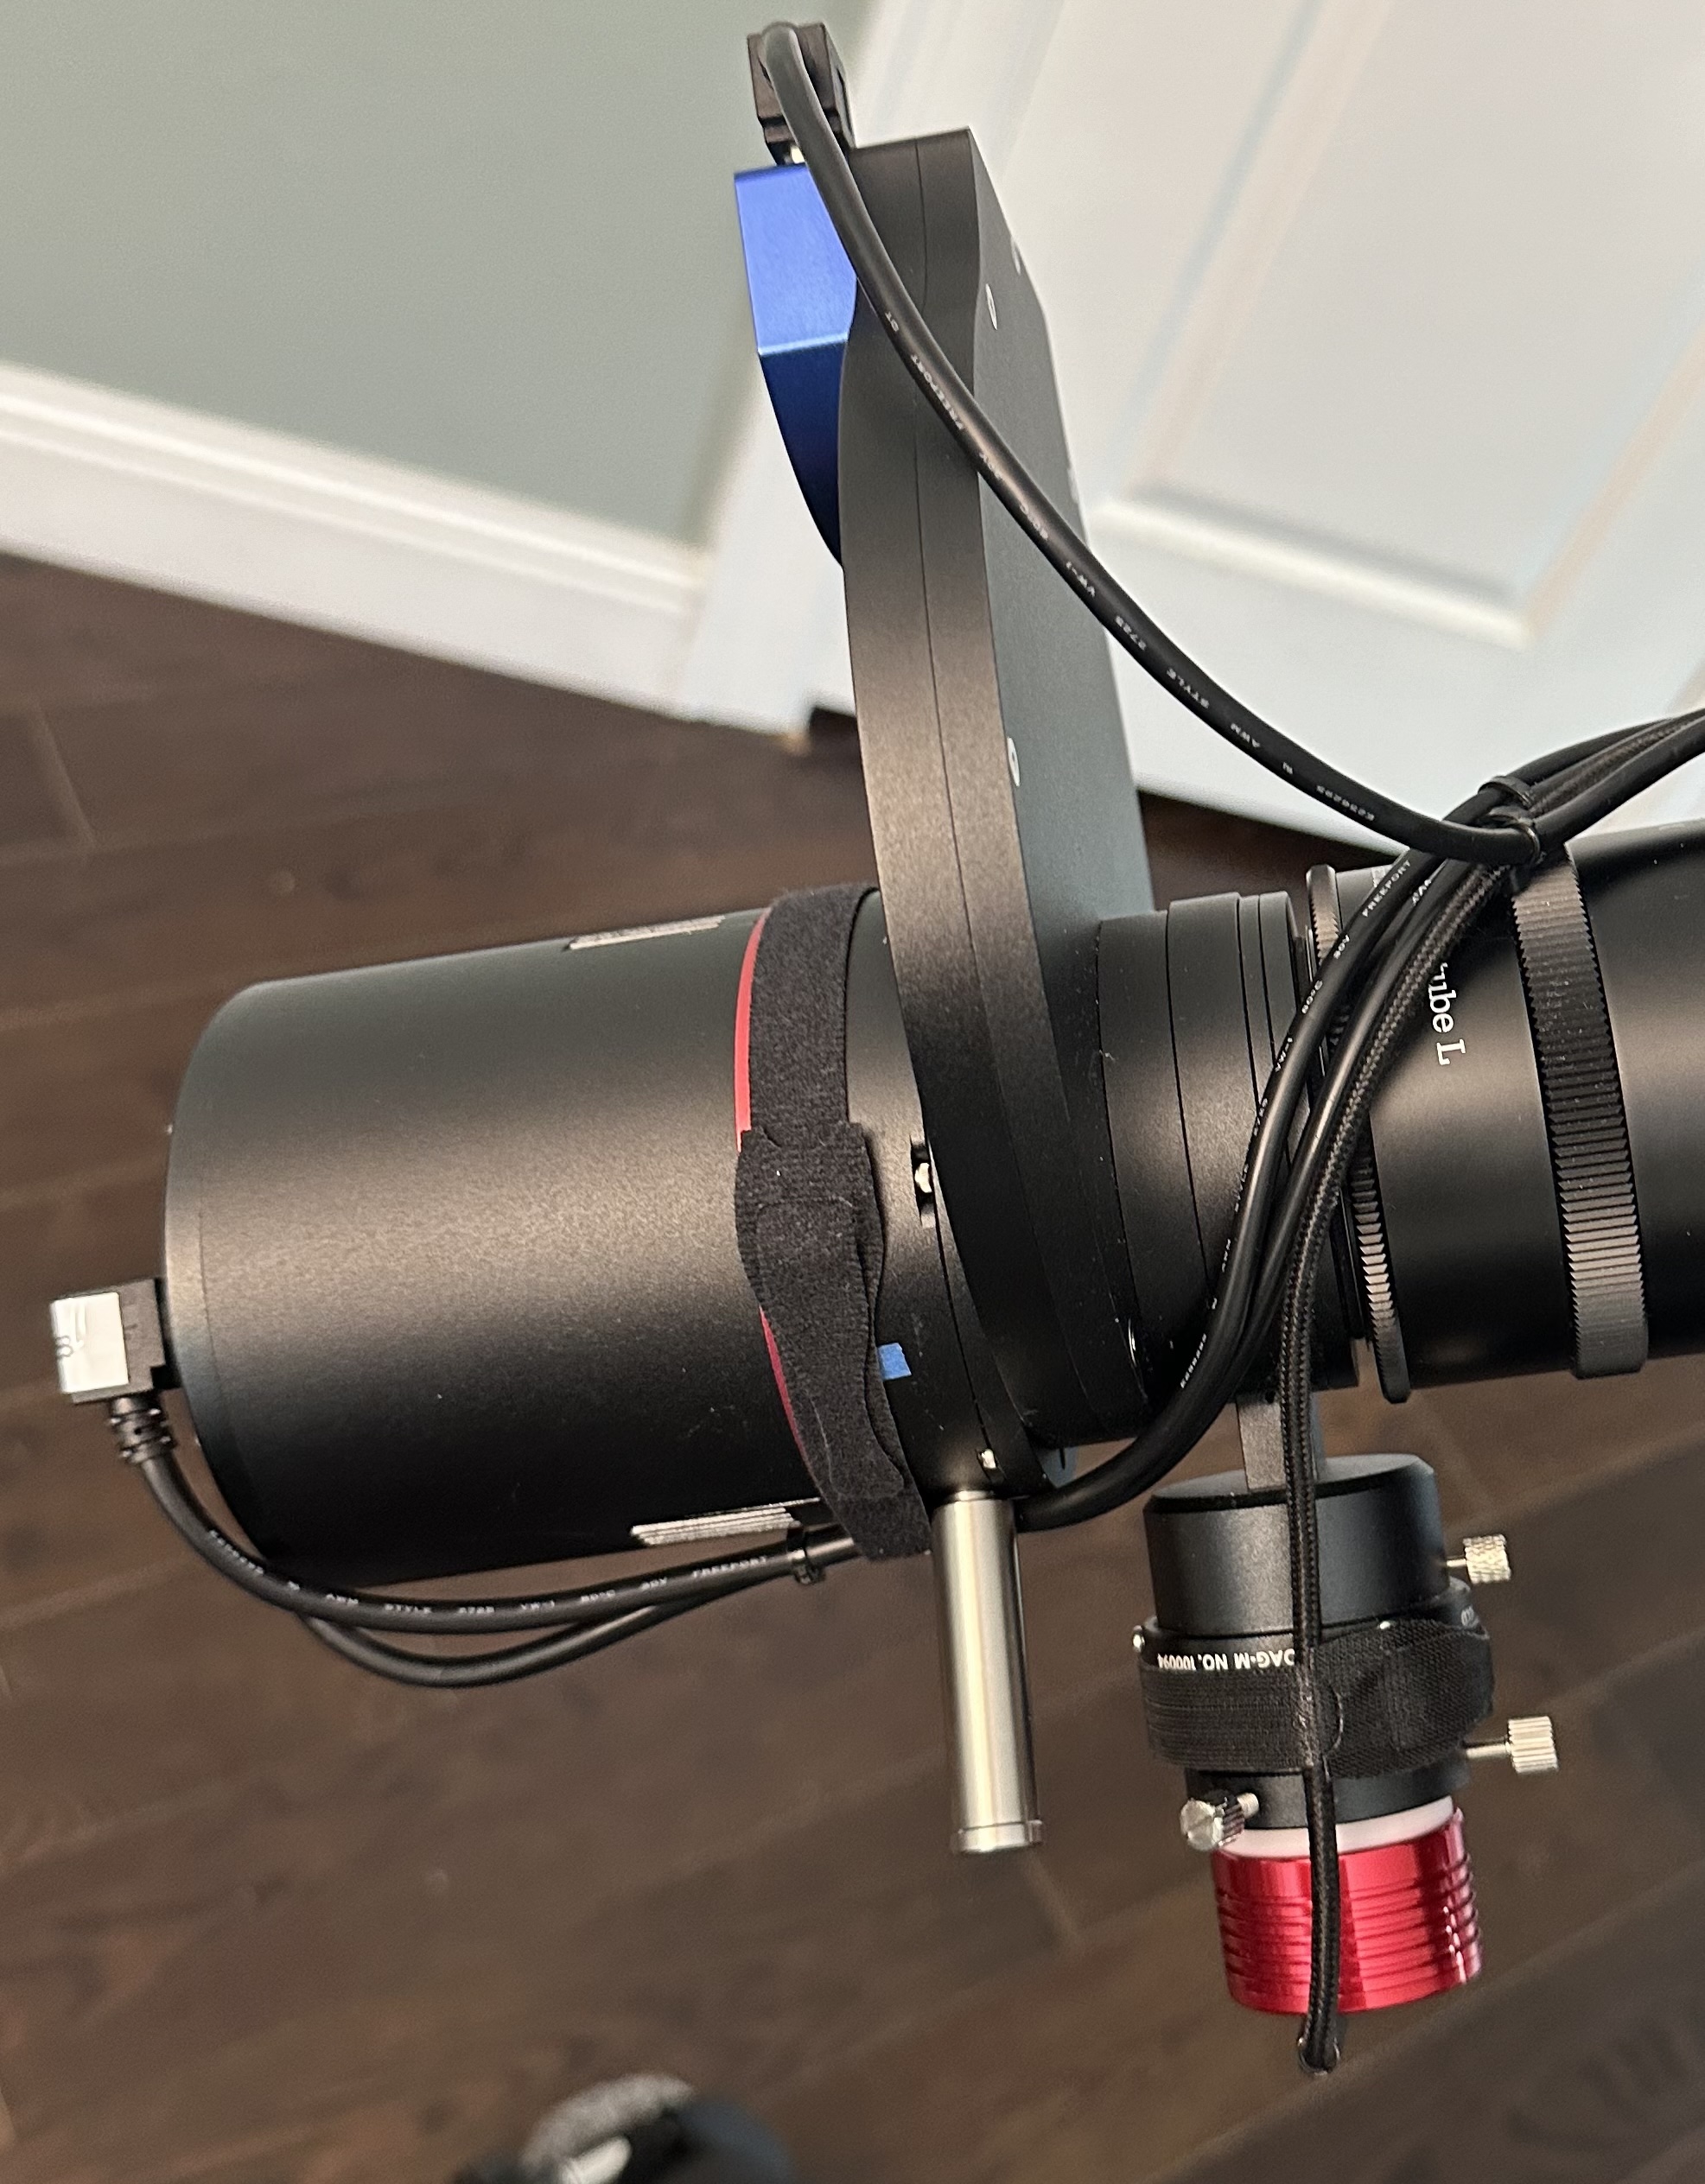
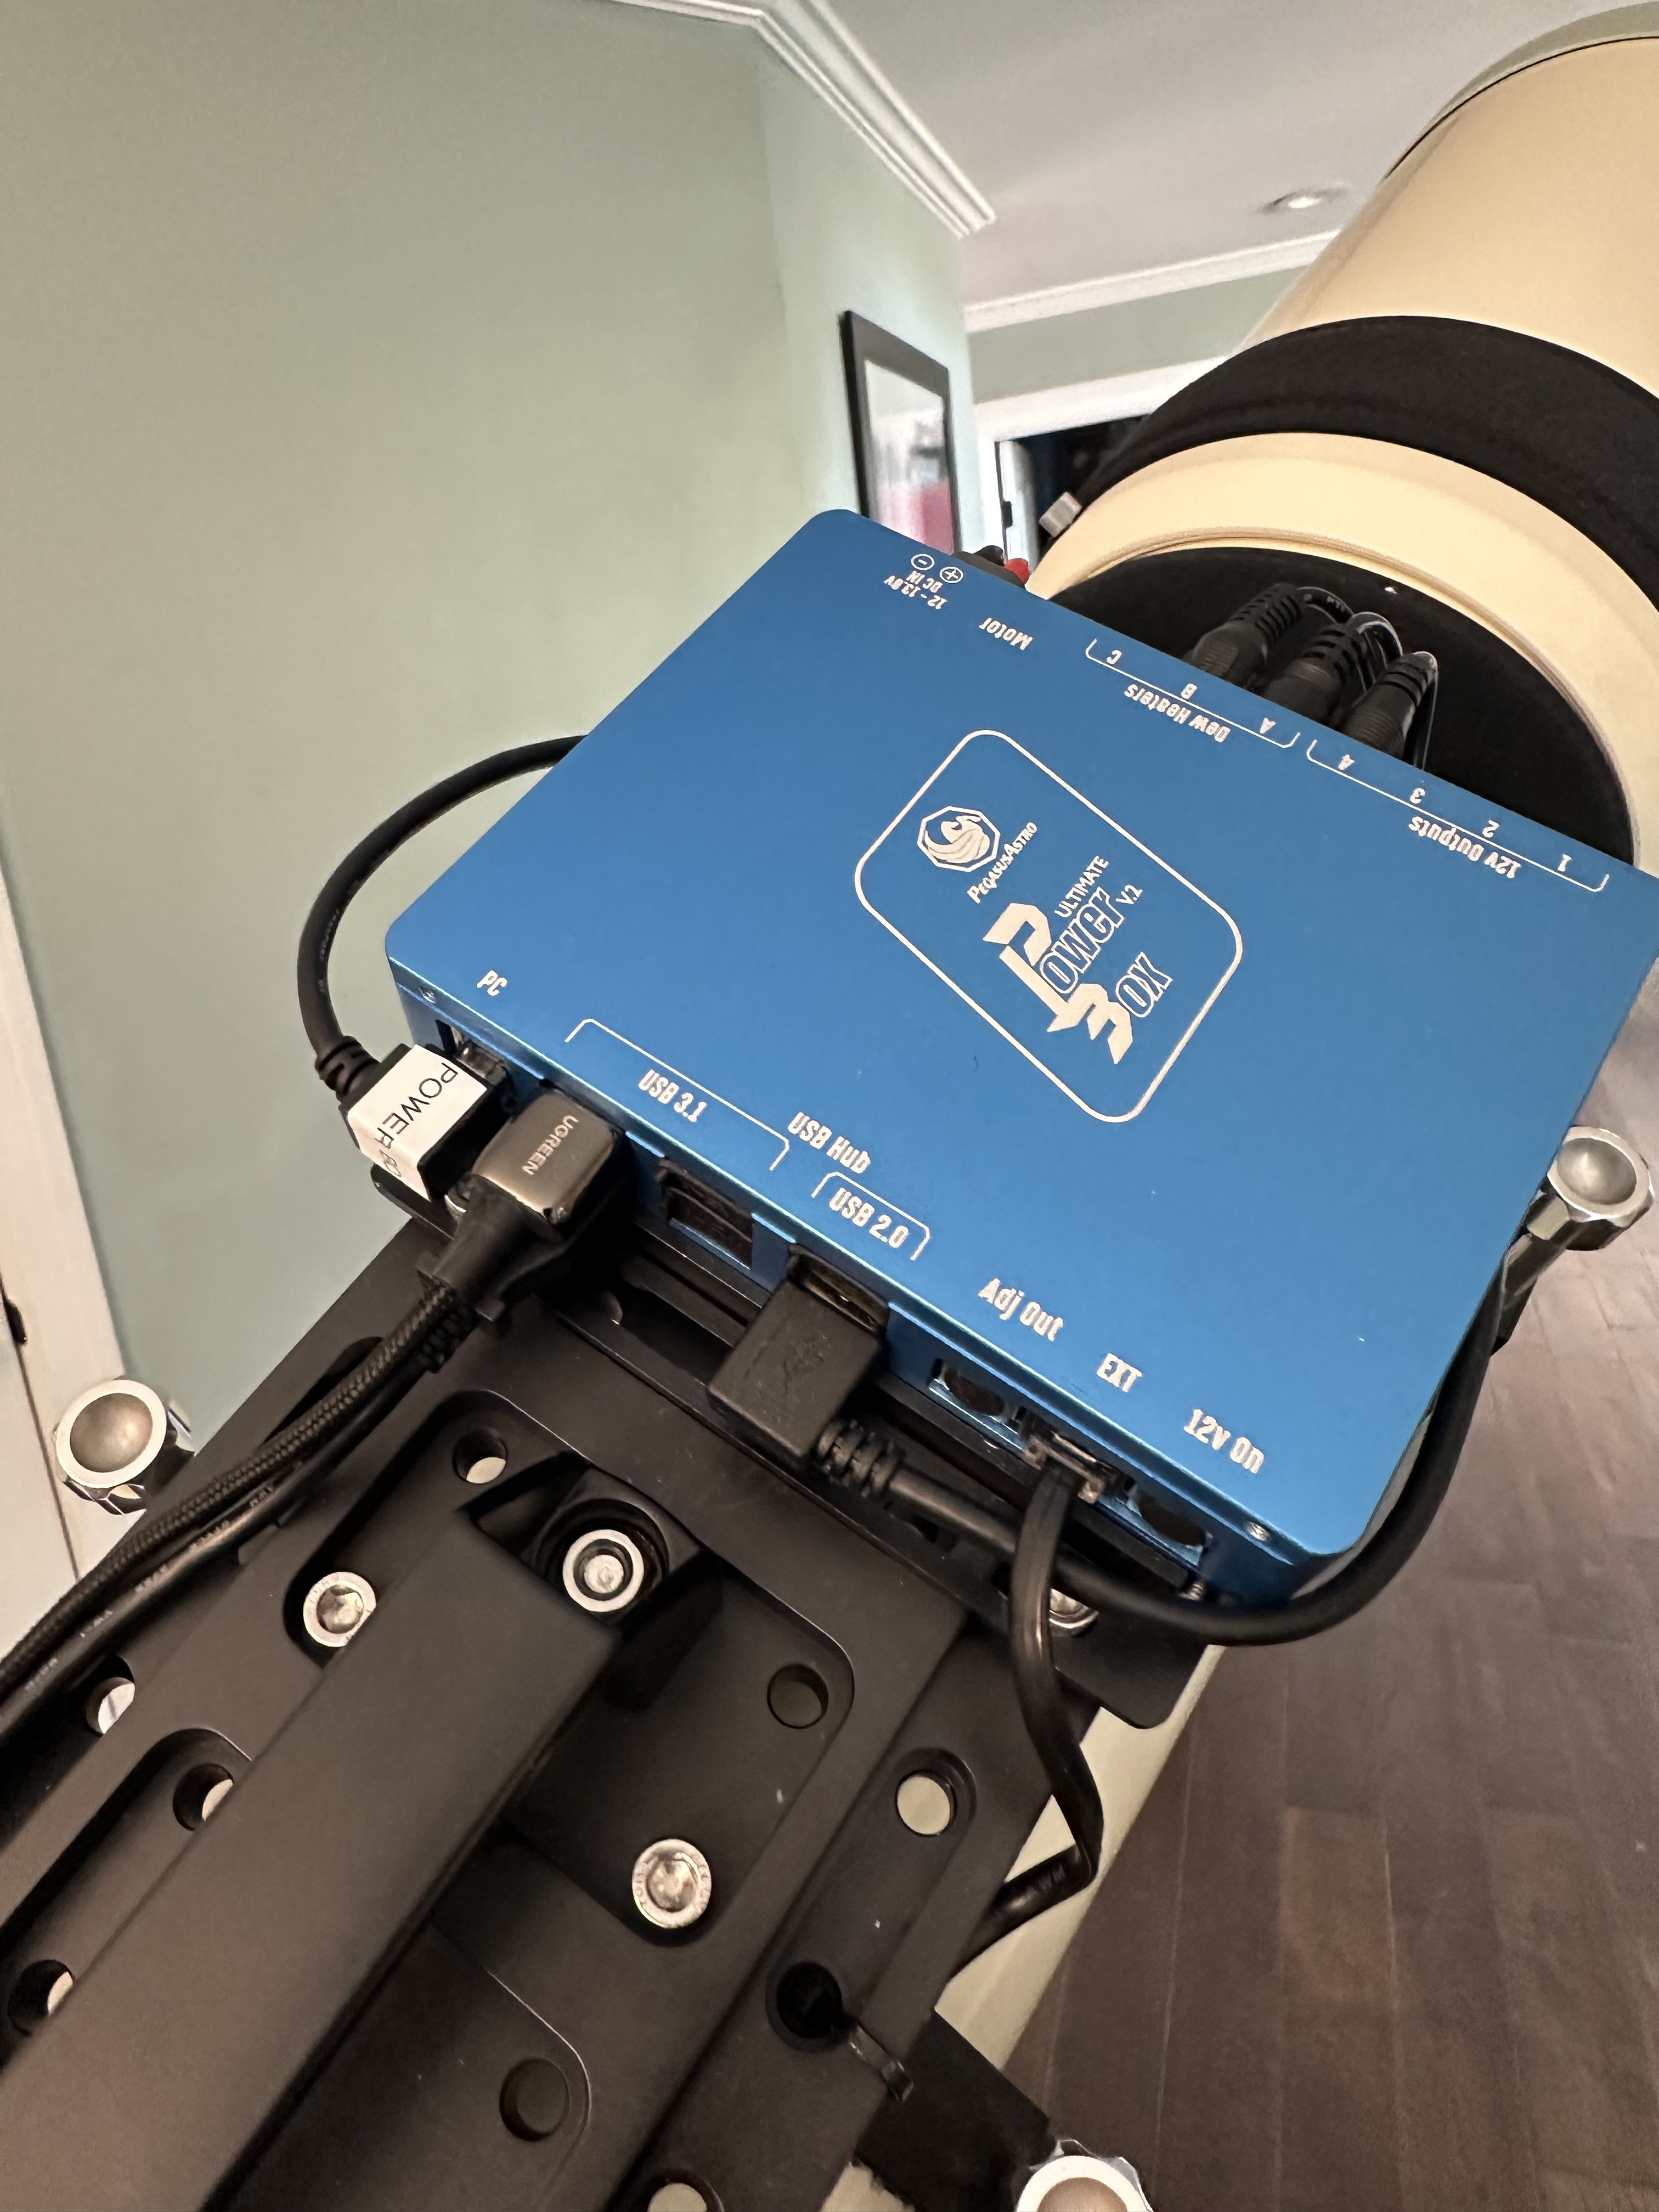
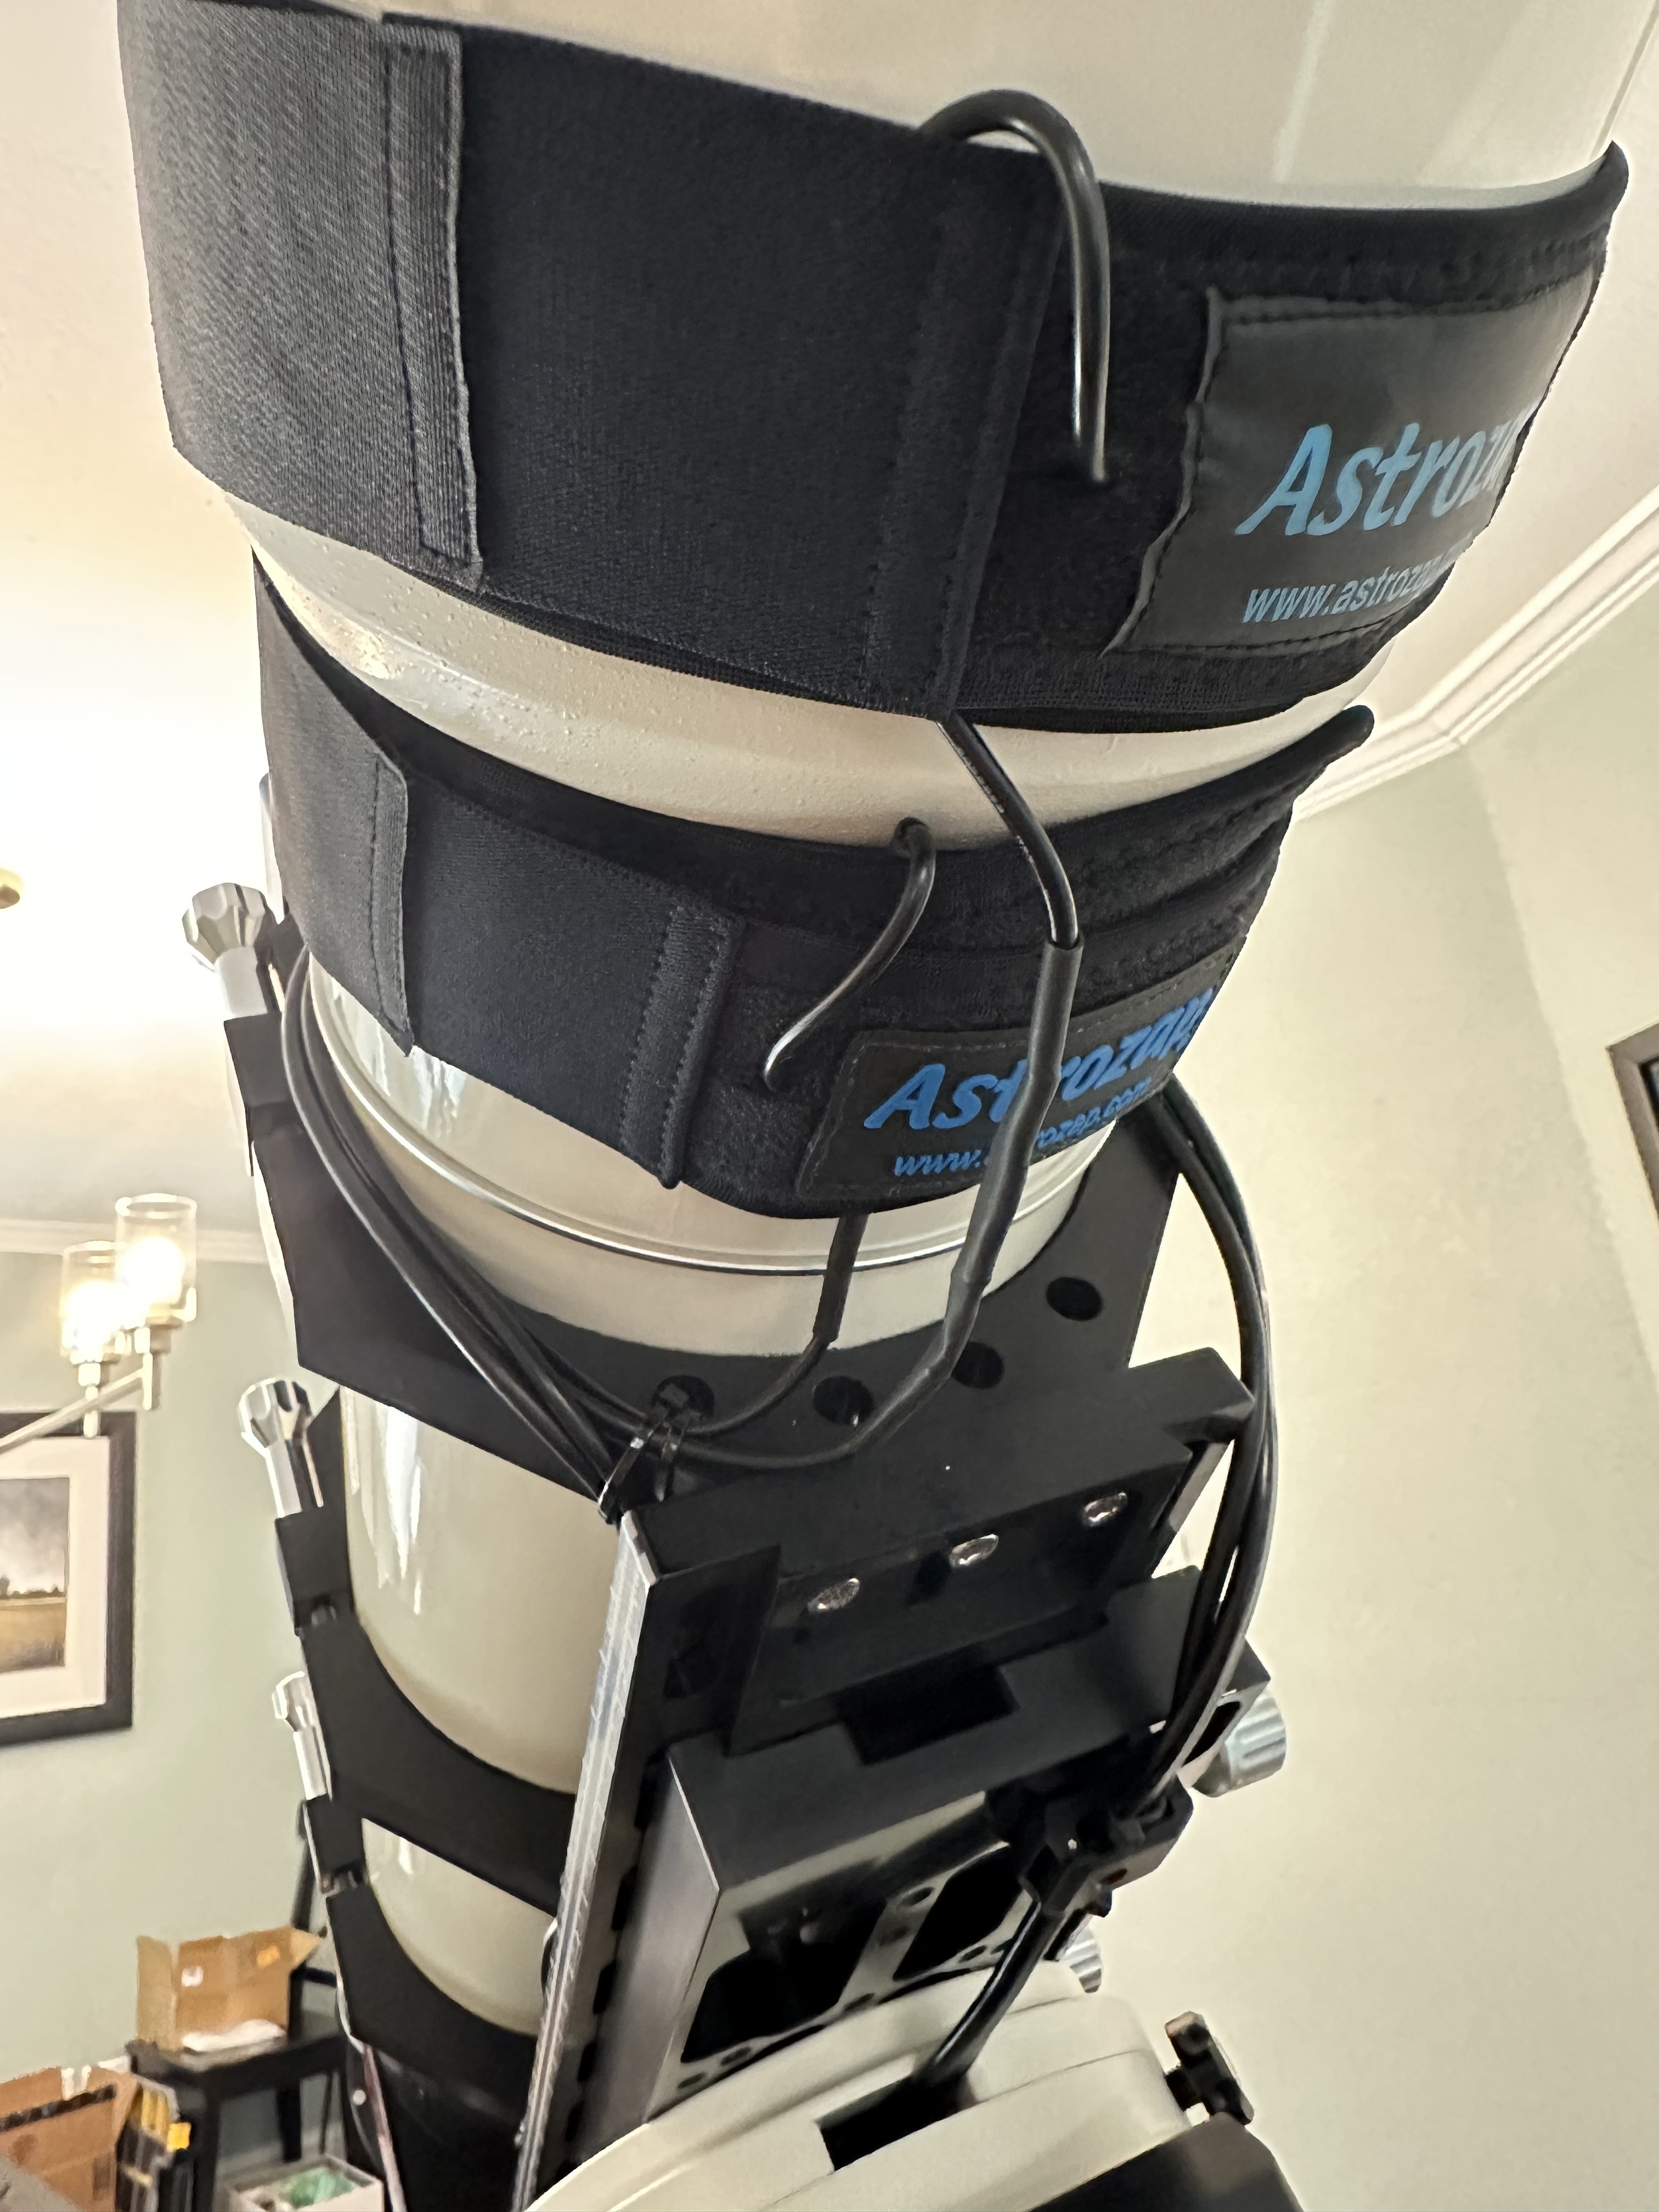
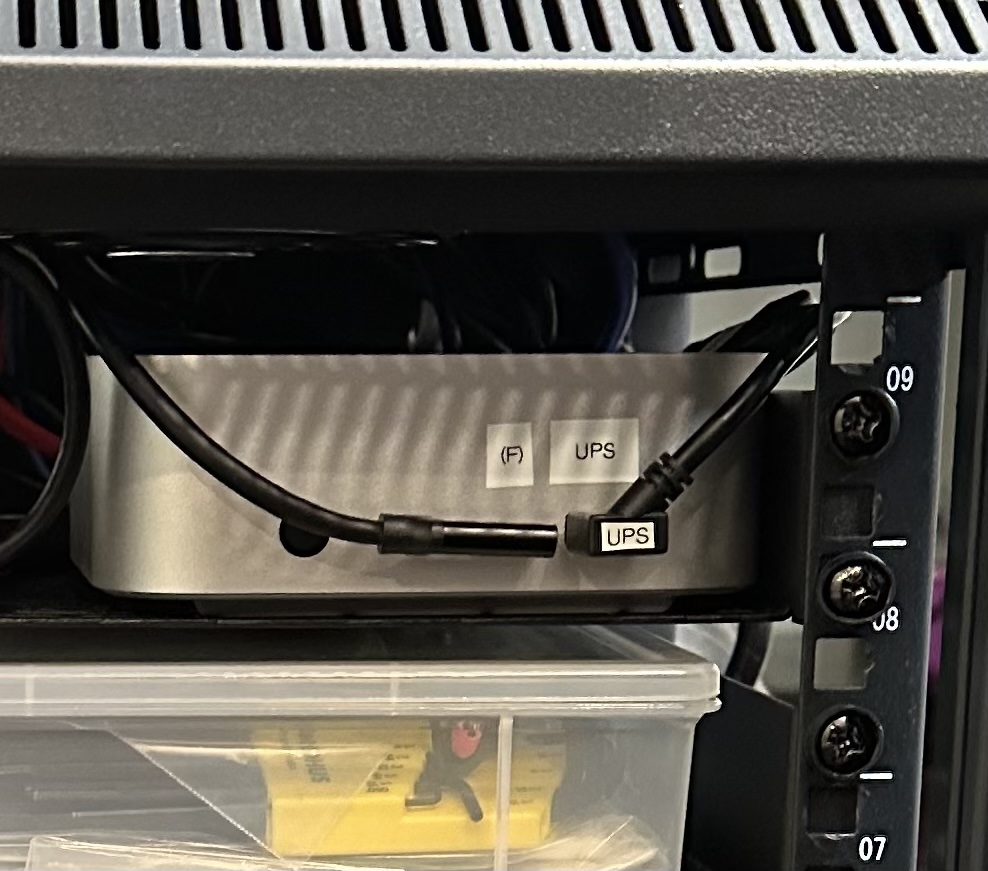
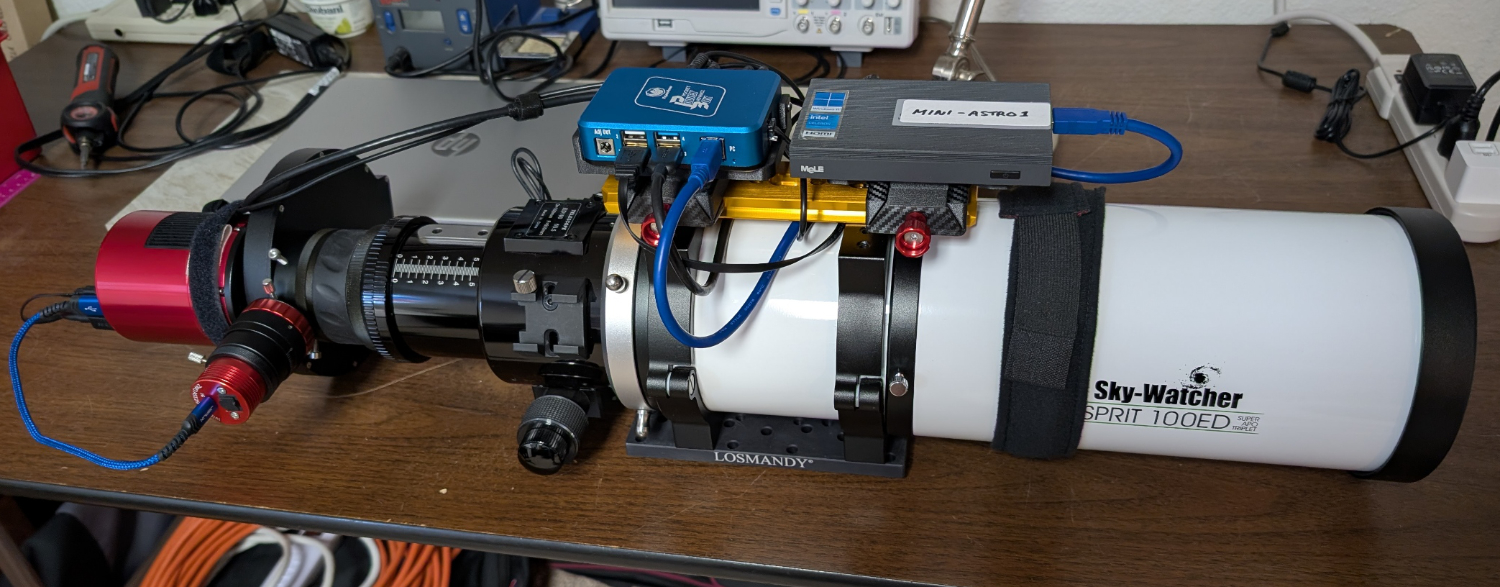
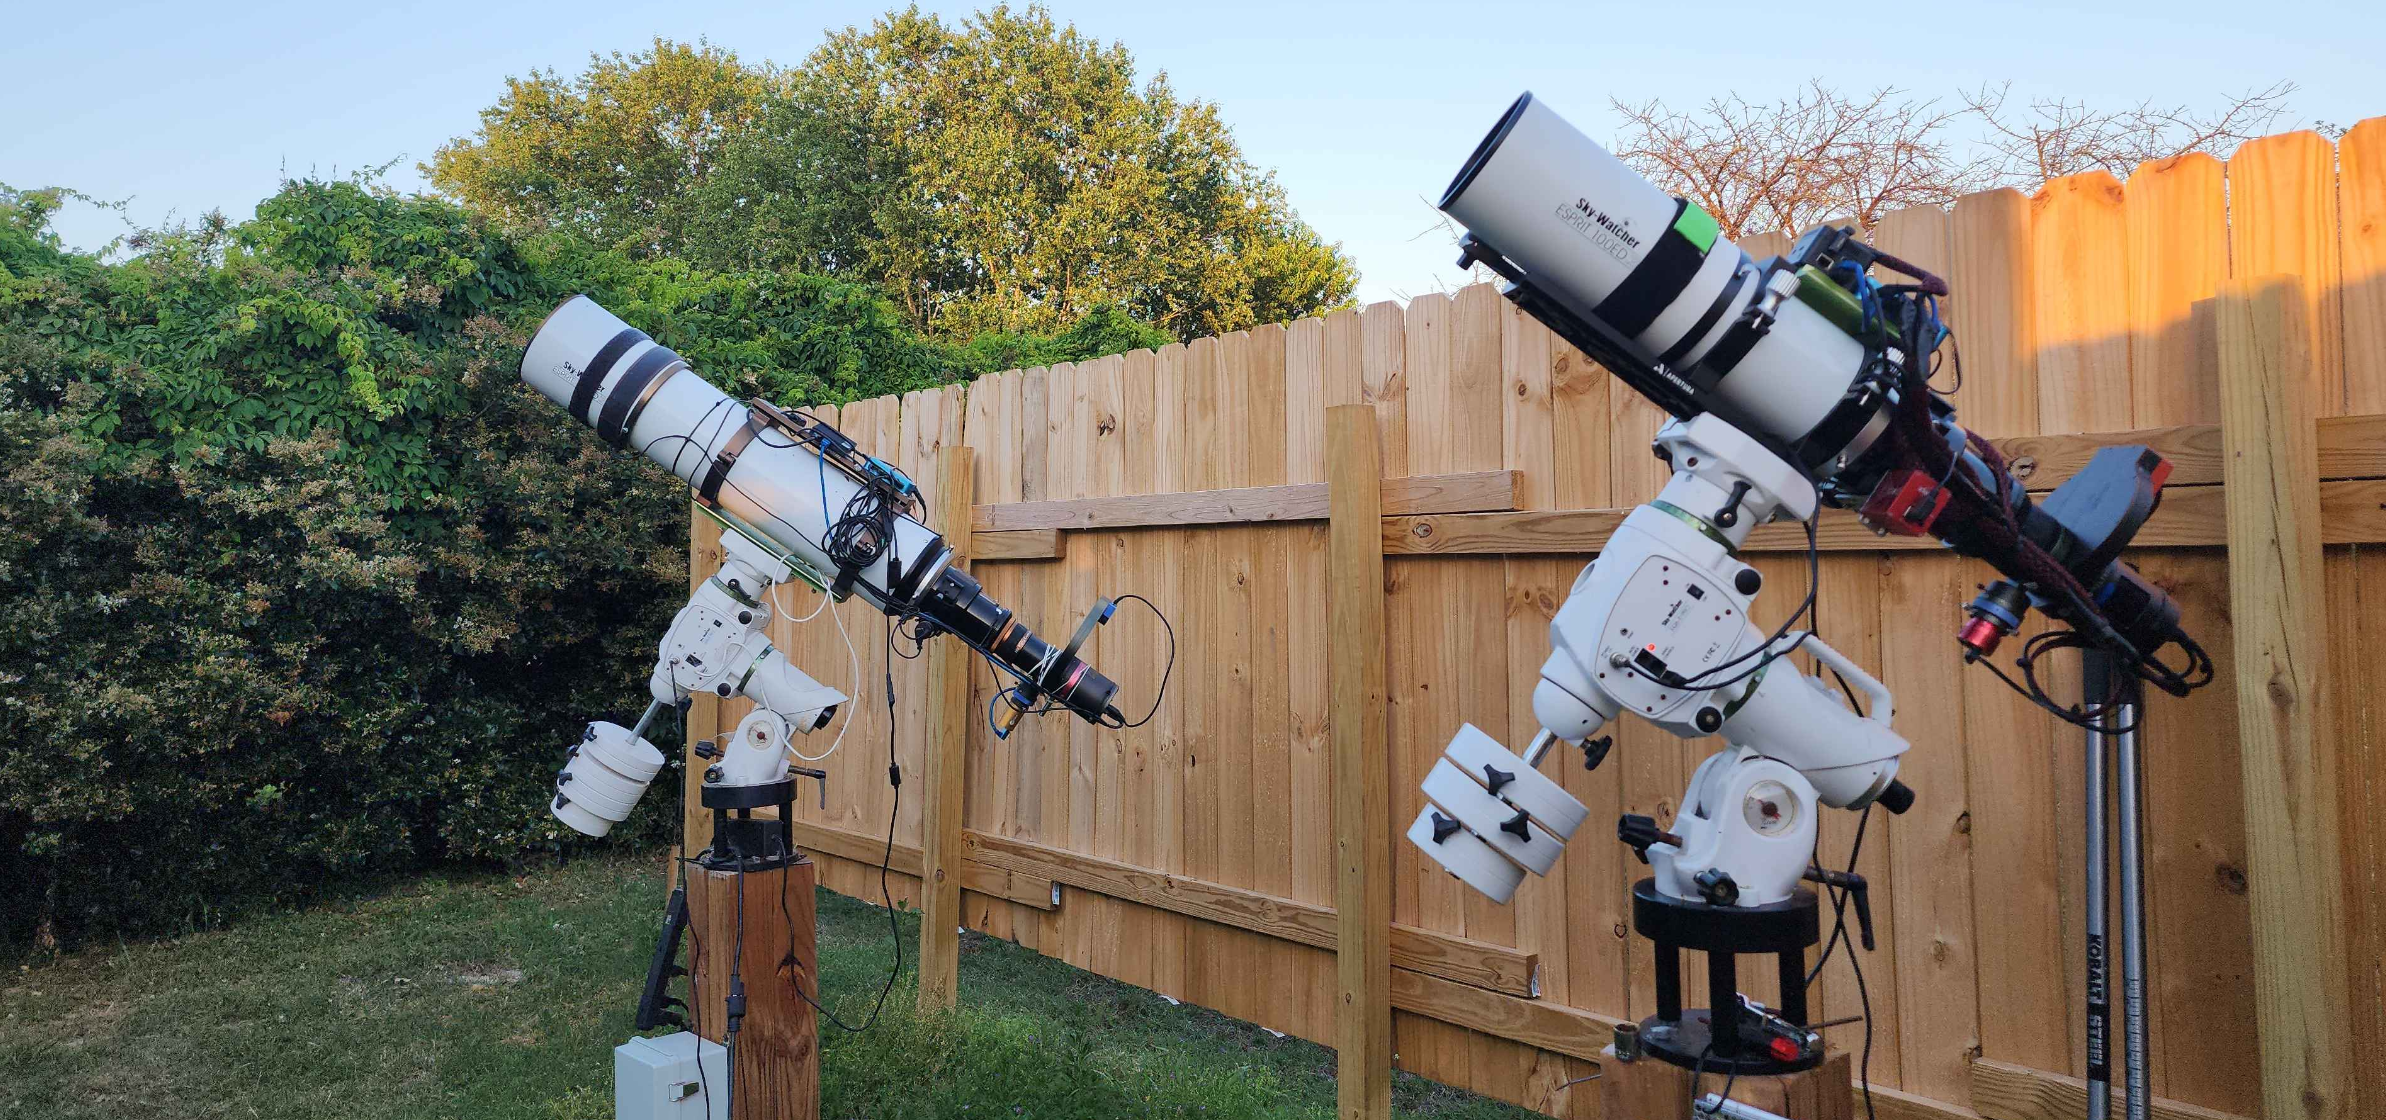
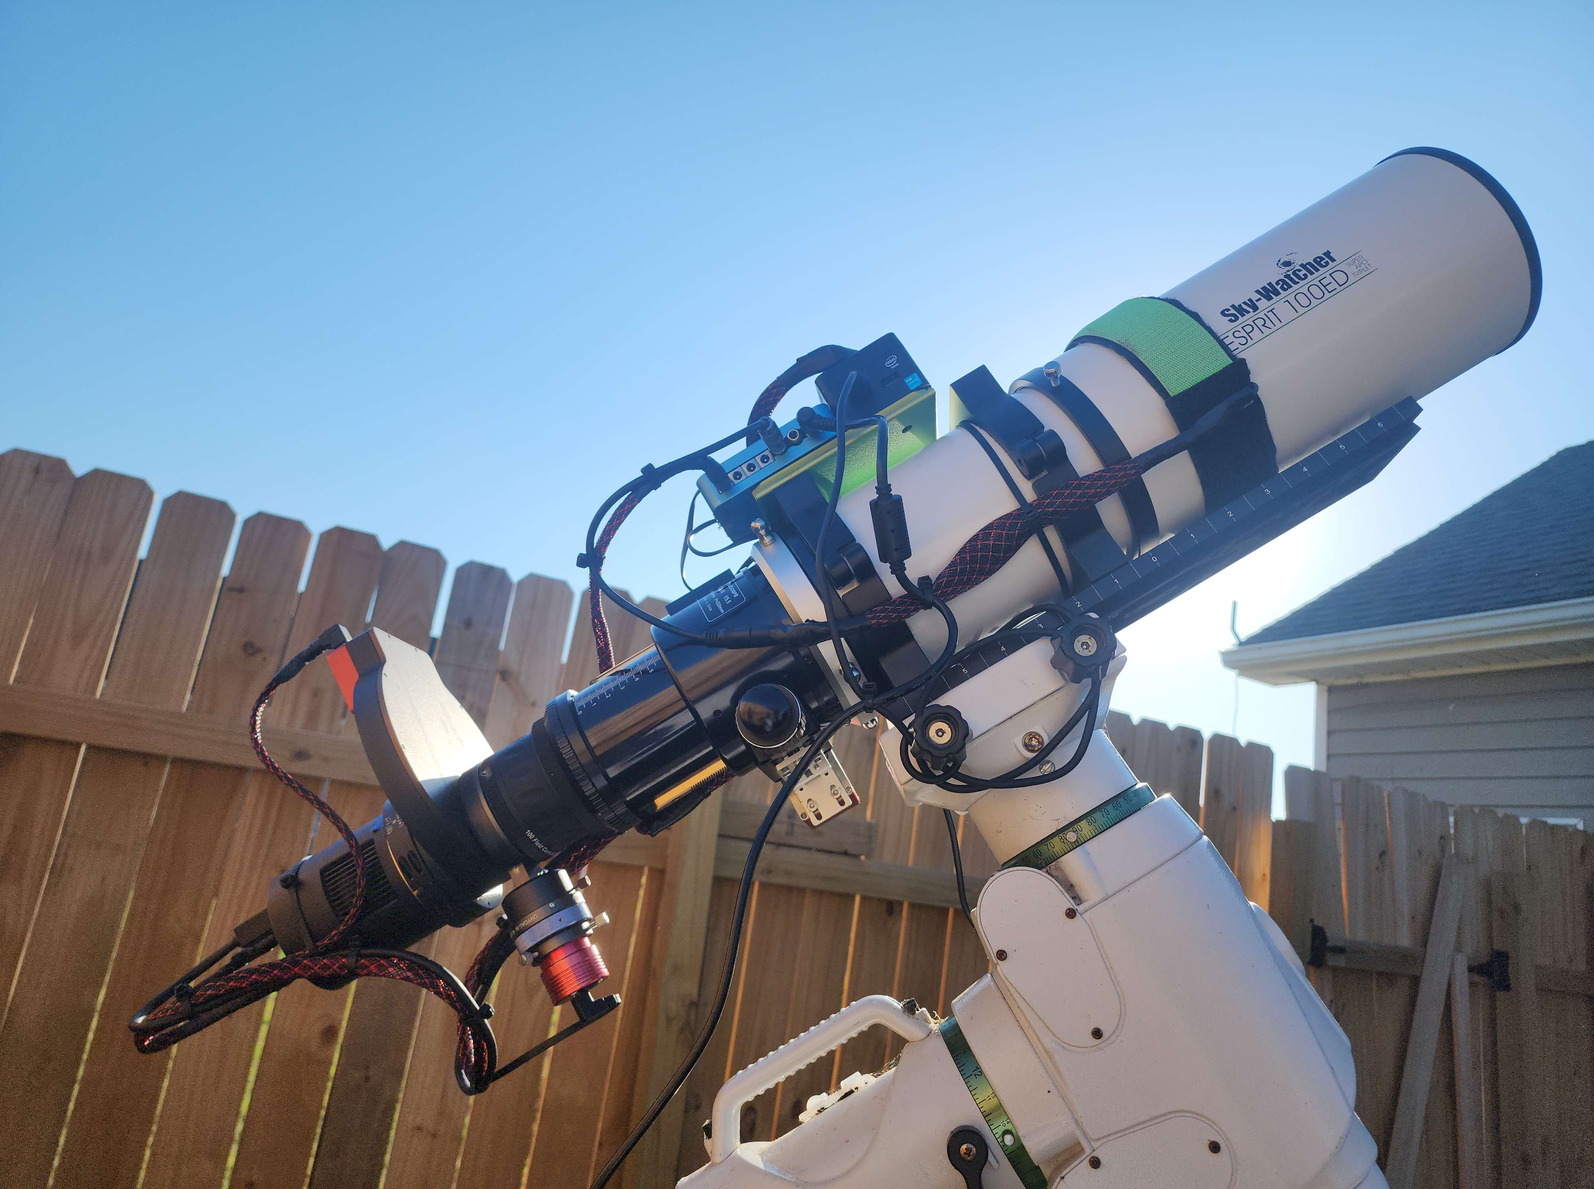
Mine’s only an Esprit 100 but here you go. I mounted a Vixen dovetail on the top of the tube rings that holds my Pegasus Pocket Powerbox Advanced gen 2 and a Mele Quieter 3Q. The mounts for the powerbox and PC came from Rouz Astro (rouzastro.com)—kind pricey but they do the job nicely and allow me to move the powerbox and PC from one scope to another. My cabling could probably be a bit more tidy but it’s good enough to keep from snagging, and wind generally isn’t an issue for me. I take advantage of the two USB 2 ports on the camera to connect the filter wheel and guide camera, and that helps to keep the cabling manageable. (Not seen in either image is the Pegasus FocusCube focus motor.)

📷 esprit1.jpgesprit1.jpg📷 esprit2.jpgesprit2.jpgThe whole works sits on an iOptron GEM45 mount which has nice cable management features. I run a 12V power cable, a USB cable connected to the mount, and a USB cable connected to the iPolar polar scope up through the mount to the powerbox. My other three telescopes (an Esprit 80, a C8, and a 6” RC) are similarly configured.
Well written Helpful Respectful Concise Engaging Supportive
Brian Puhl avatar

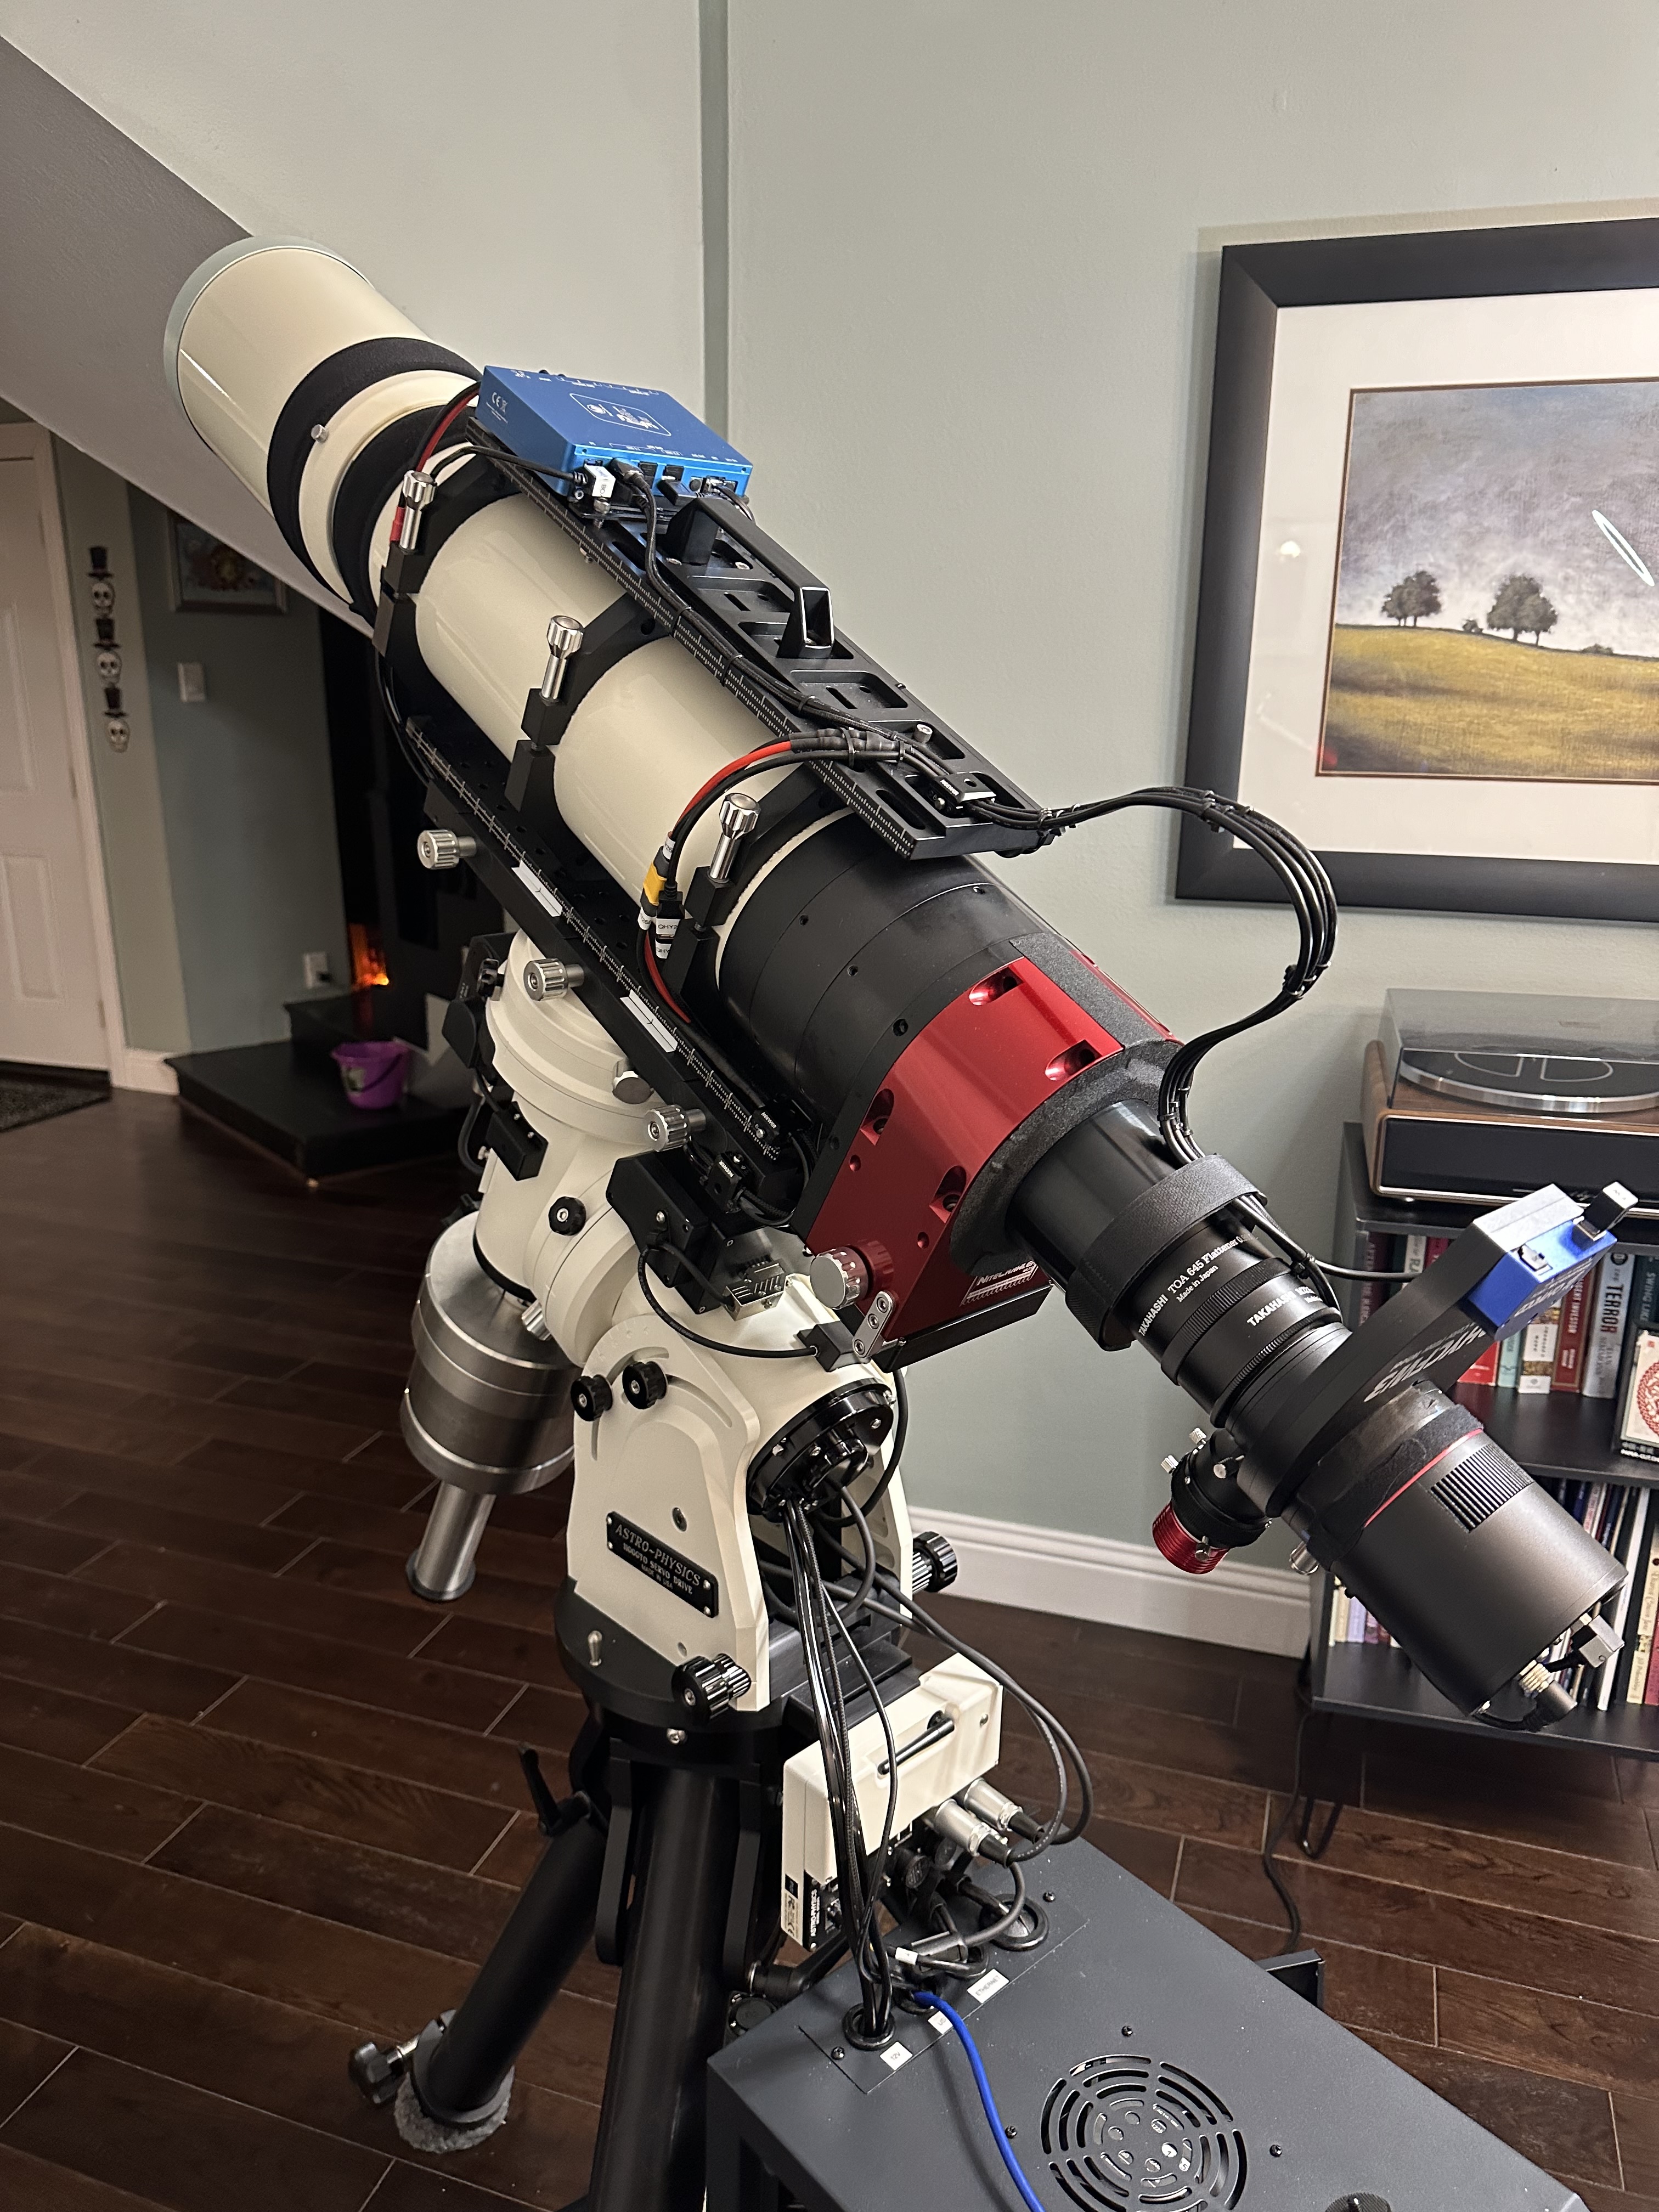
I hesitated posting, as I haven’t spend time managing the cables on the 150 yet. I might not fit your biil. The cables on my 100 are good to go though. I just need to get some shorter cables for the 150 and then design, 3D print some wrap posts for the pigtails.


📷 image.pngimage.png

📷image.png

kullumm avatar

Esprits two for two! Thanks to you both, pretty much what I had in mind. My system, albeit with a few cables disconnected looks like this (stout imaging newt arrangement), so managing the right angle connections to the back of the camera on a long train is my main goal now to protect the USB connections from strain.

📷 5038.jpg5038.jpg

Alex Nicholas avatar

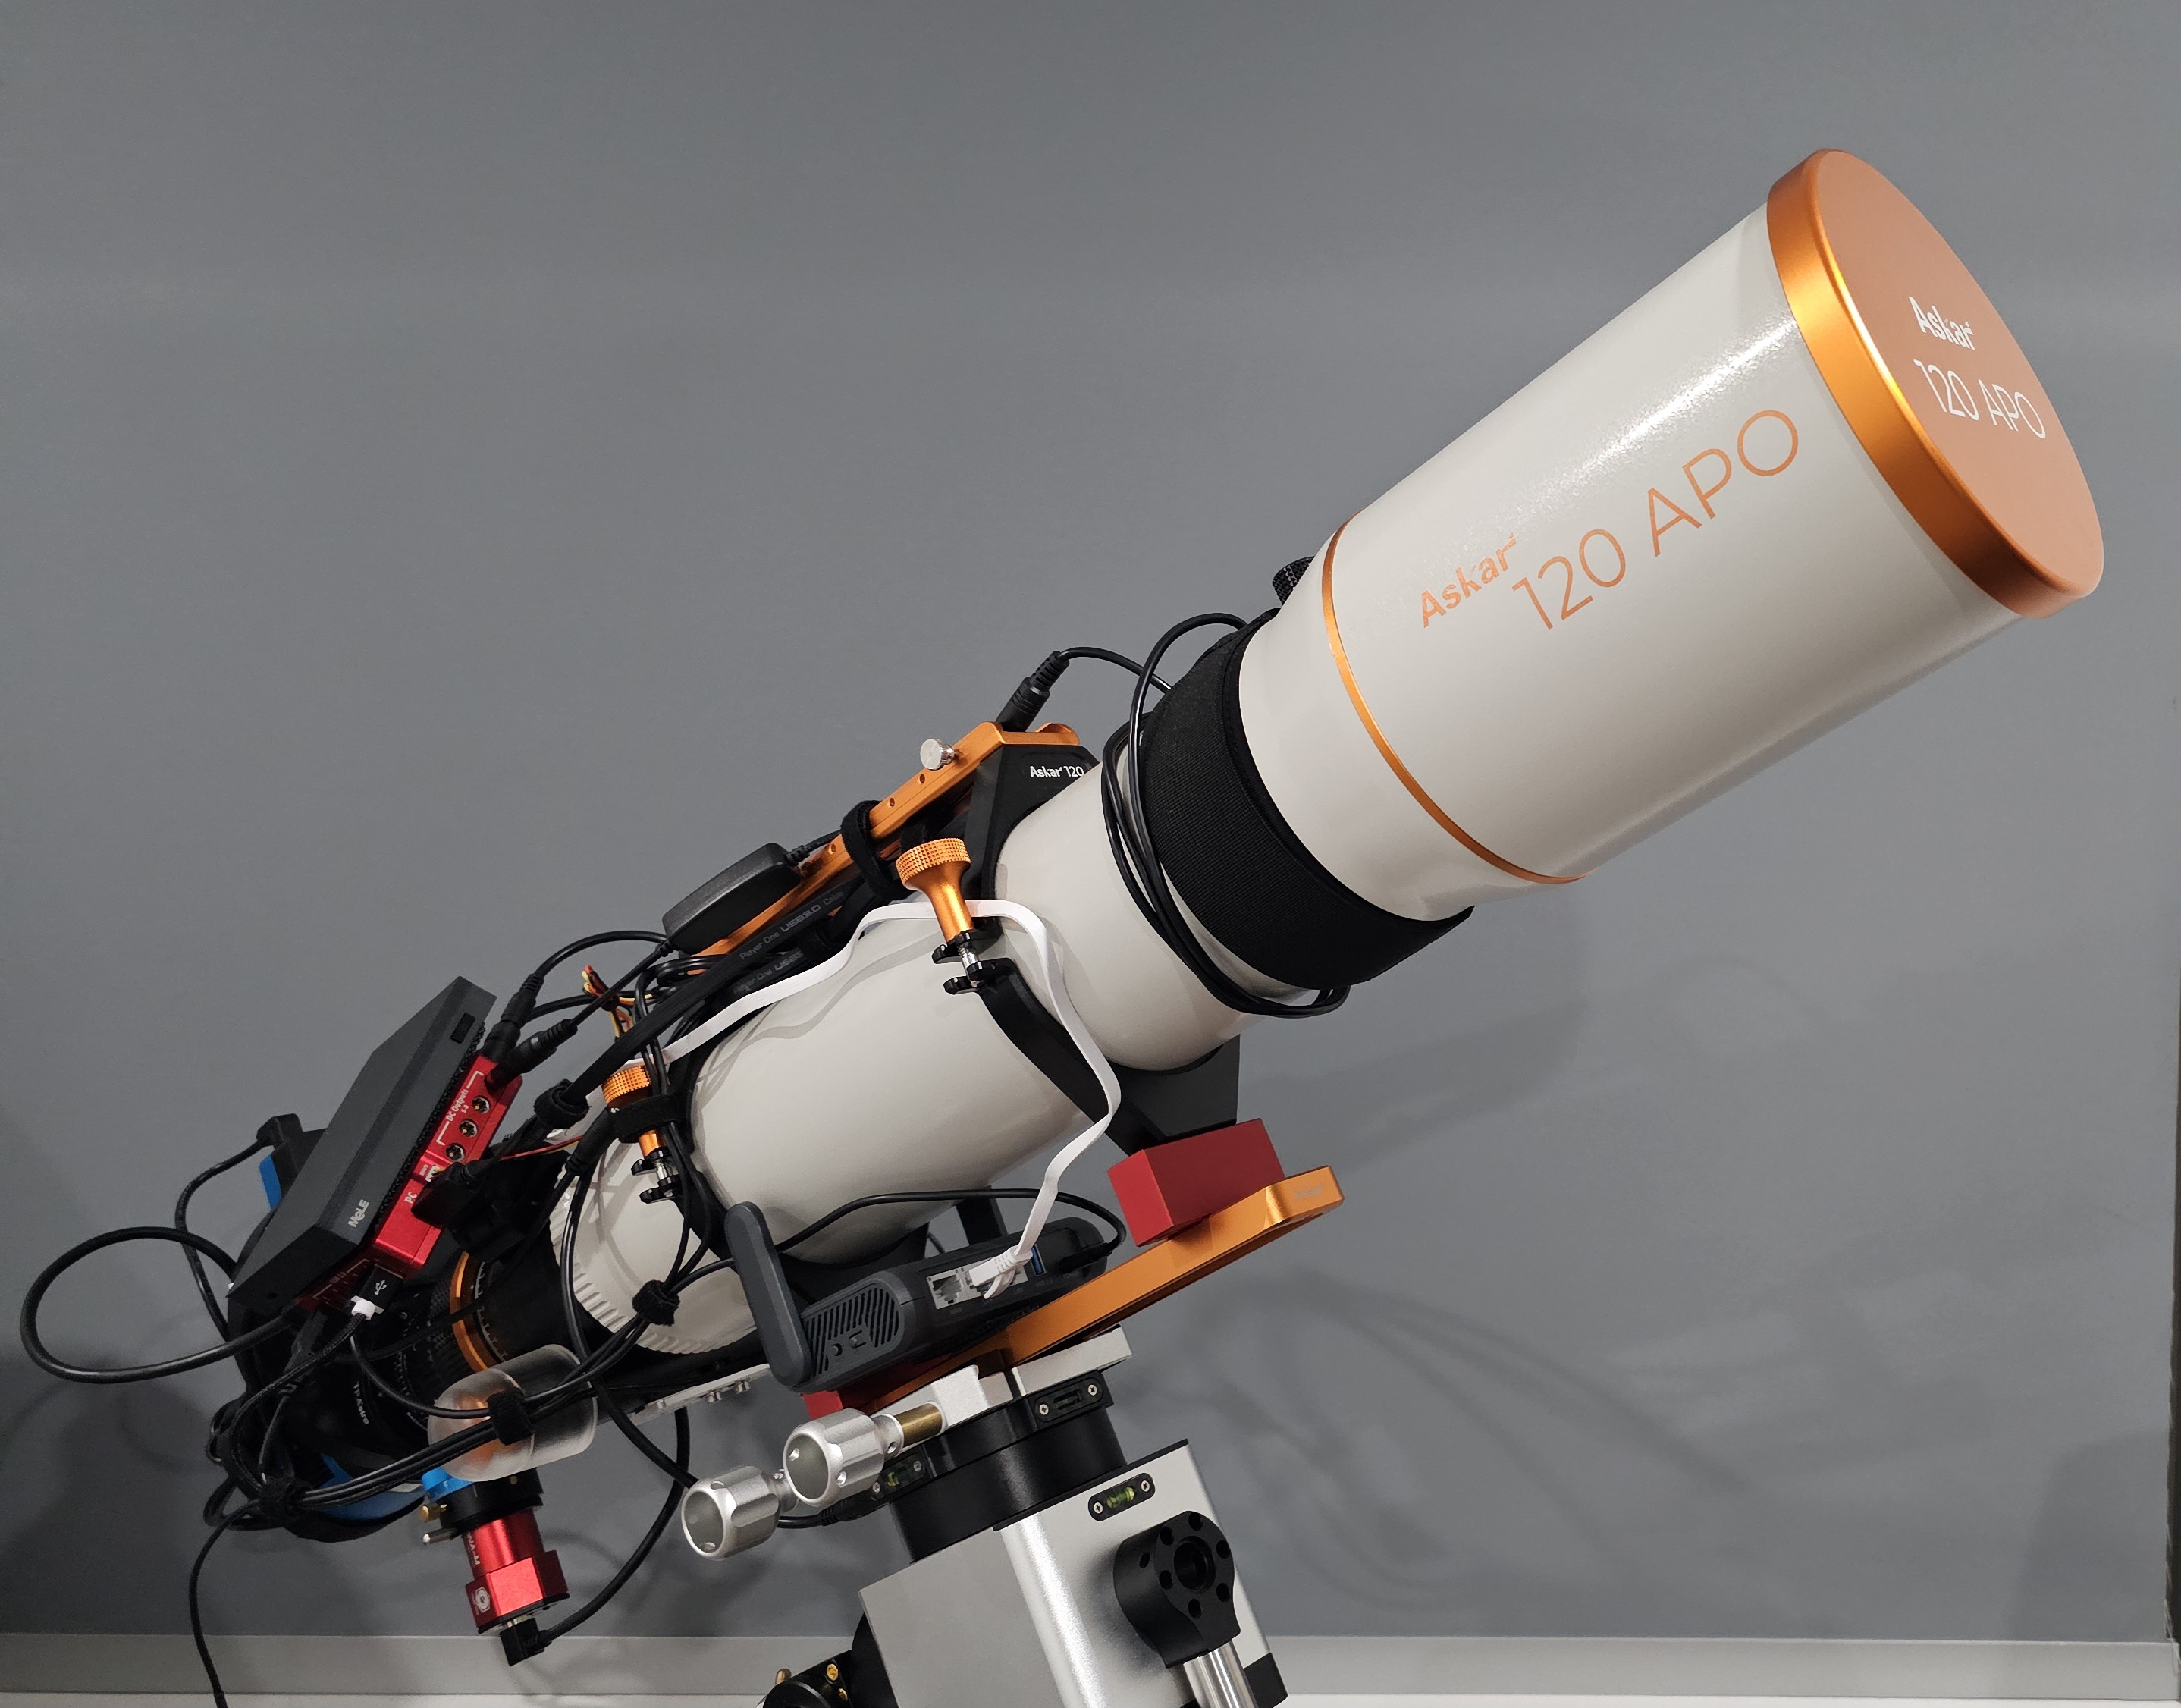
Heres my 120APO setup
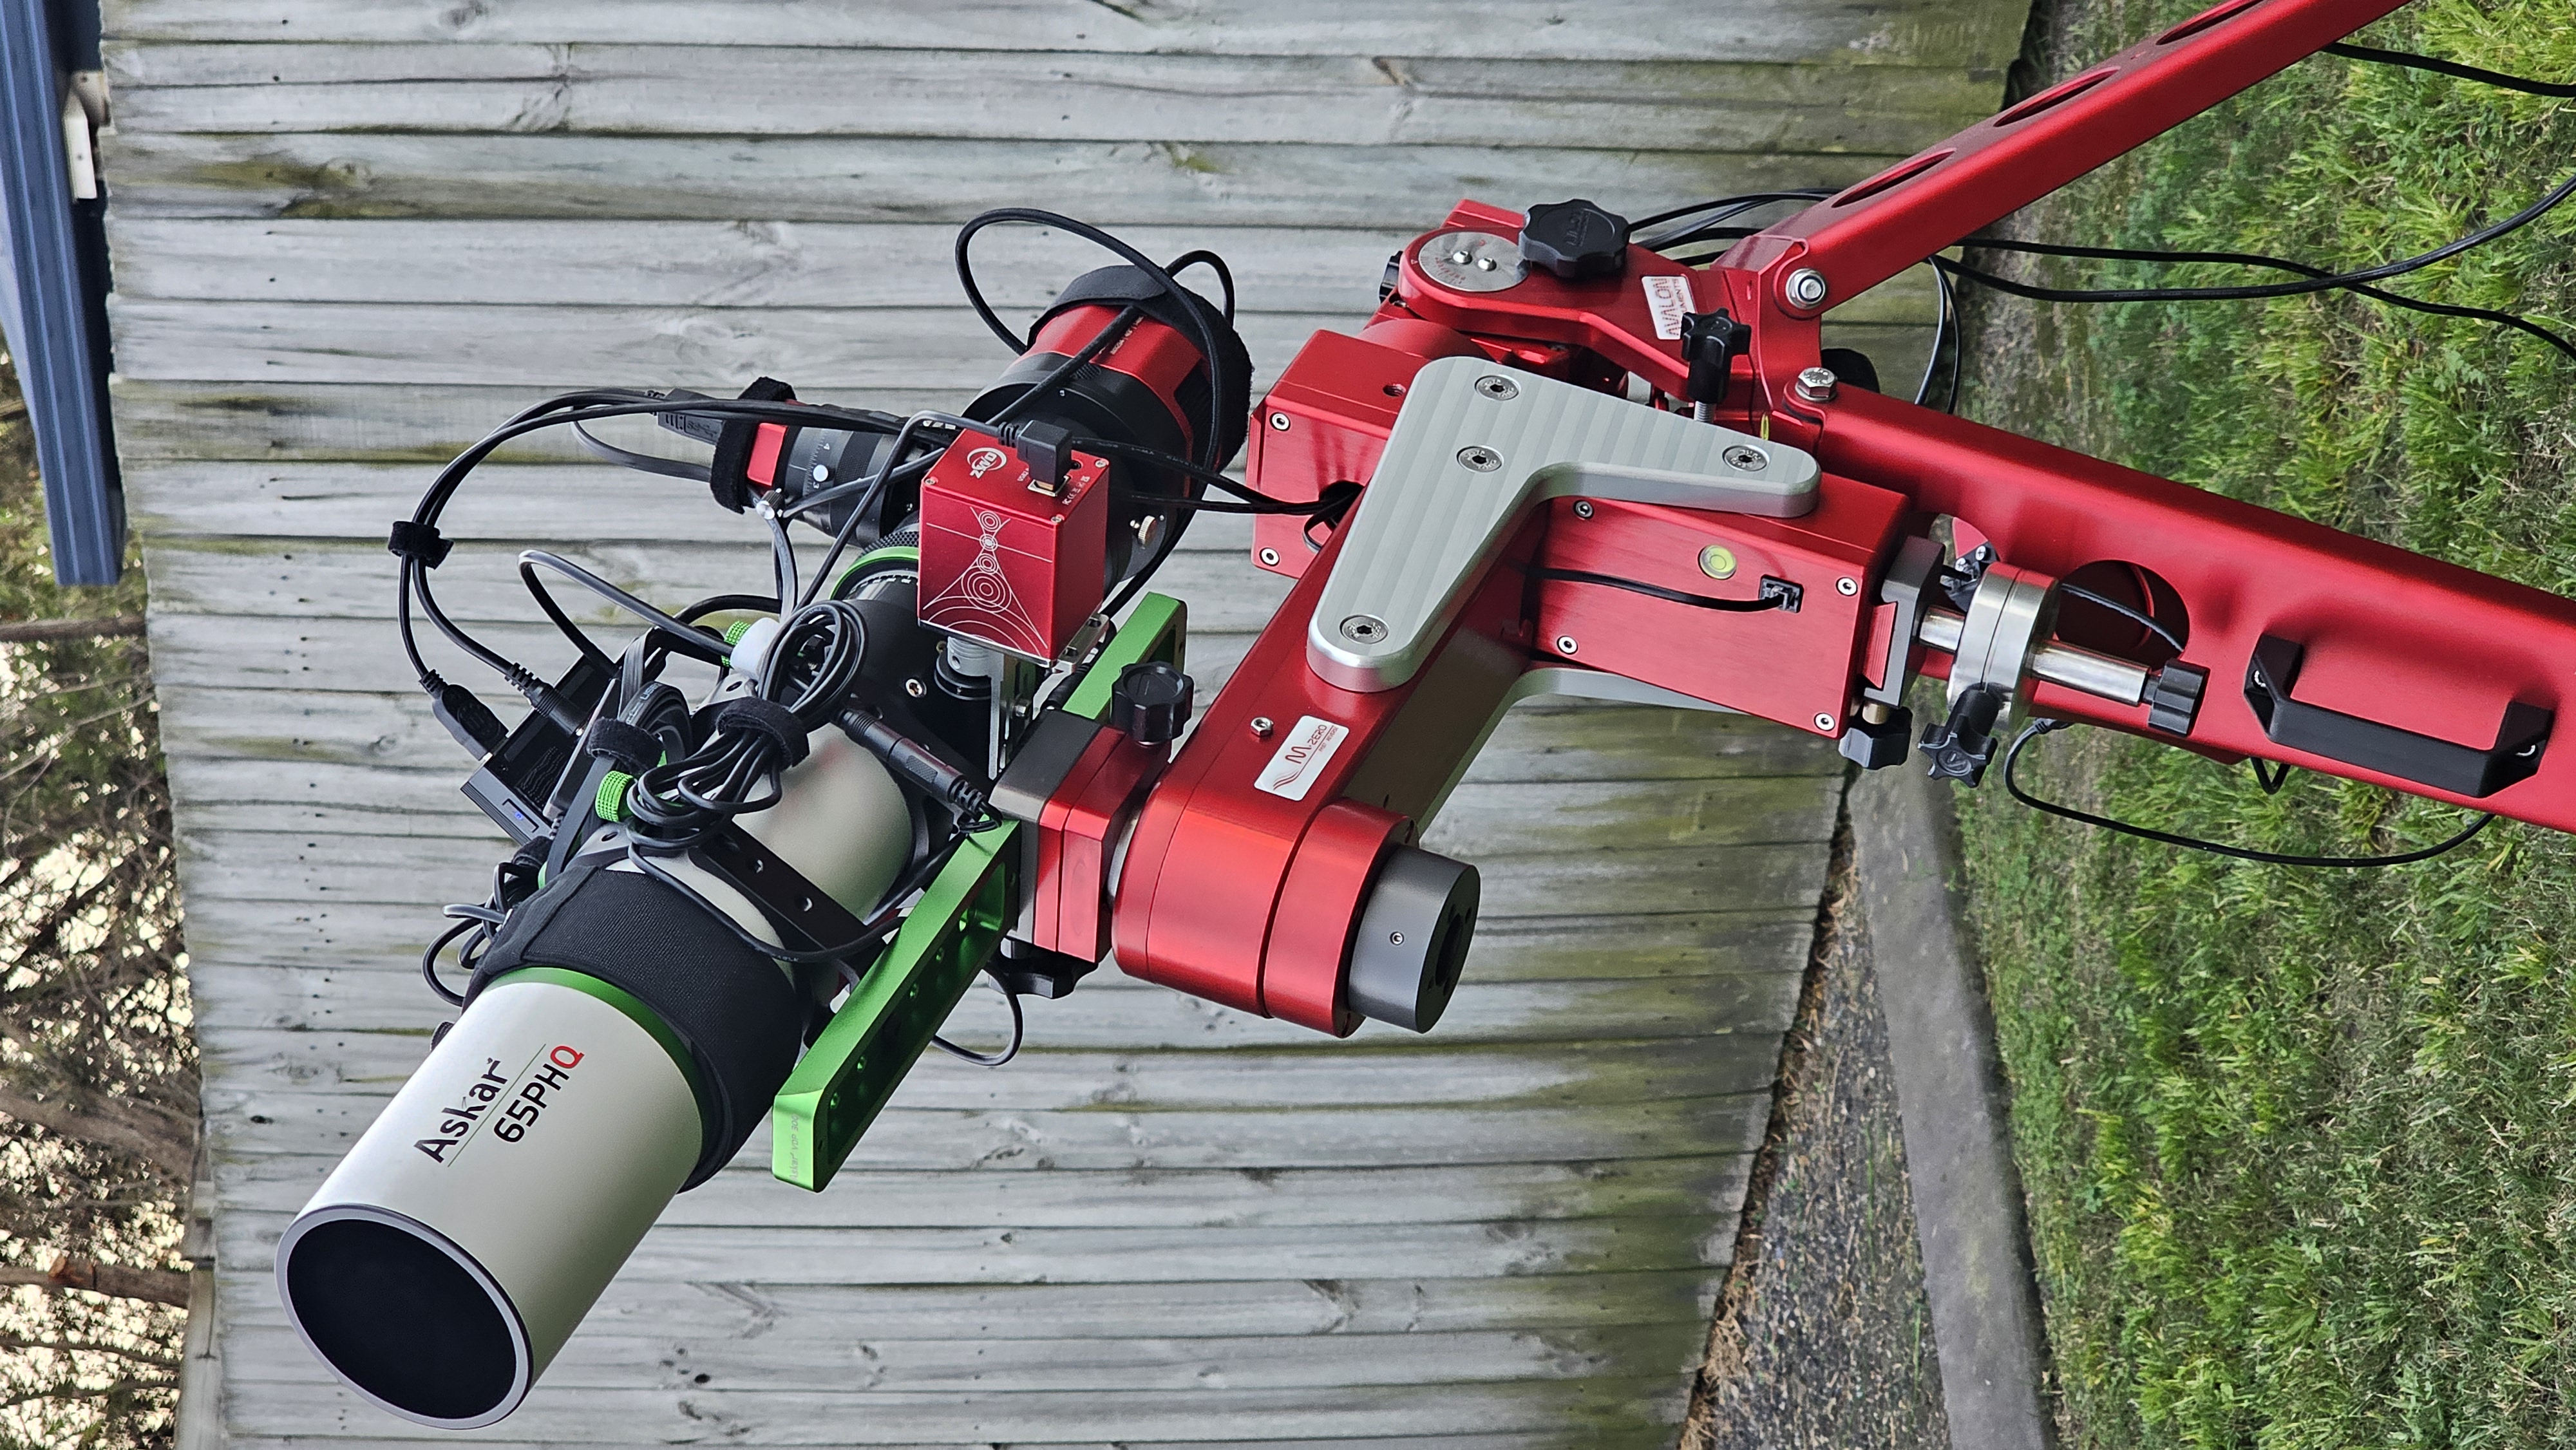
📷 20250404_180449.jpg20250404_180449.jpgAnd the 65PHQ (not a long frac)
📷 20240902_172819.jpg20240902_172819.jpgI do miss the days of of the 65PHQ on the M-Zero… It was lovely to not do a meridian flip for those couple of years I had it :D

Shannon Foye avatar

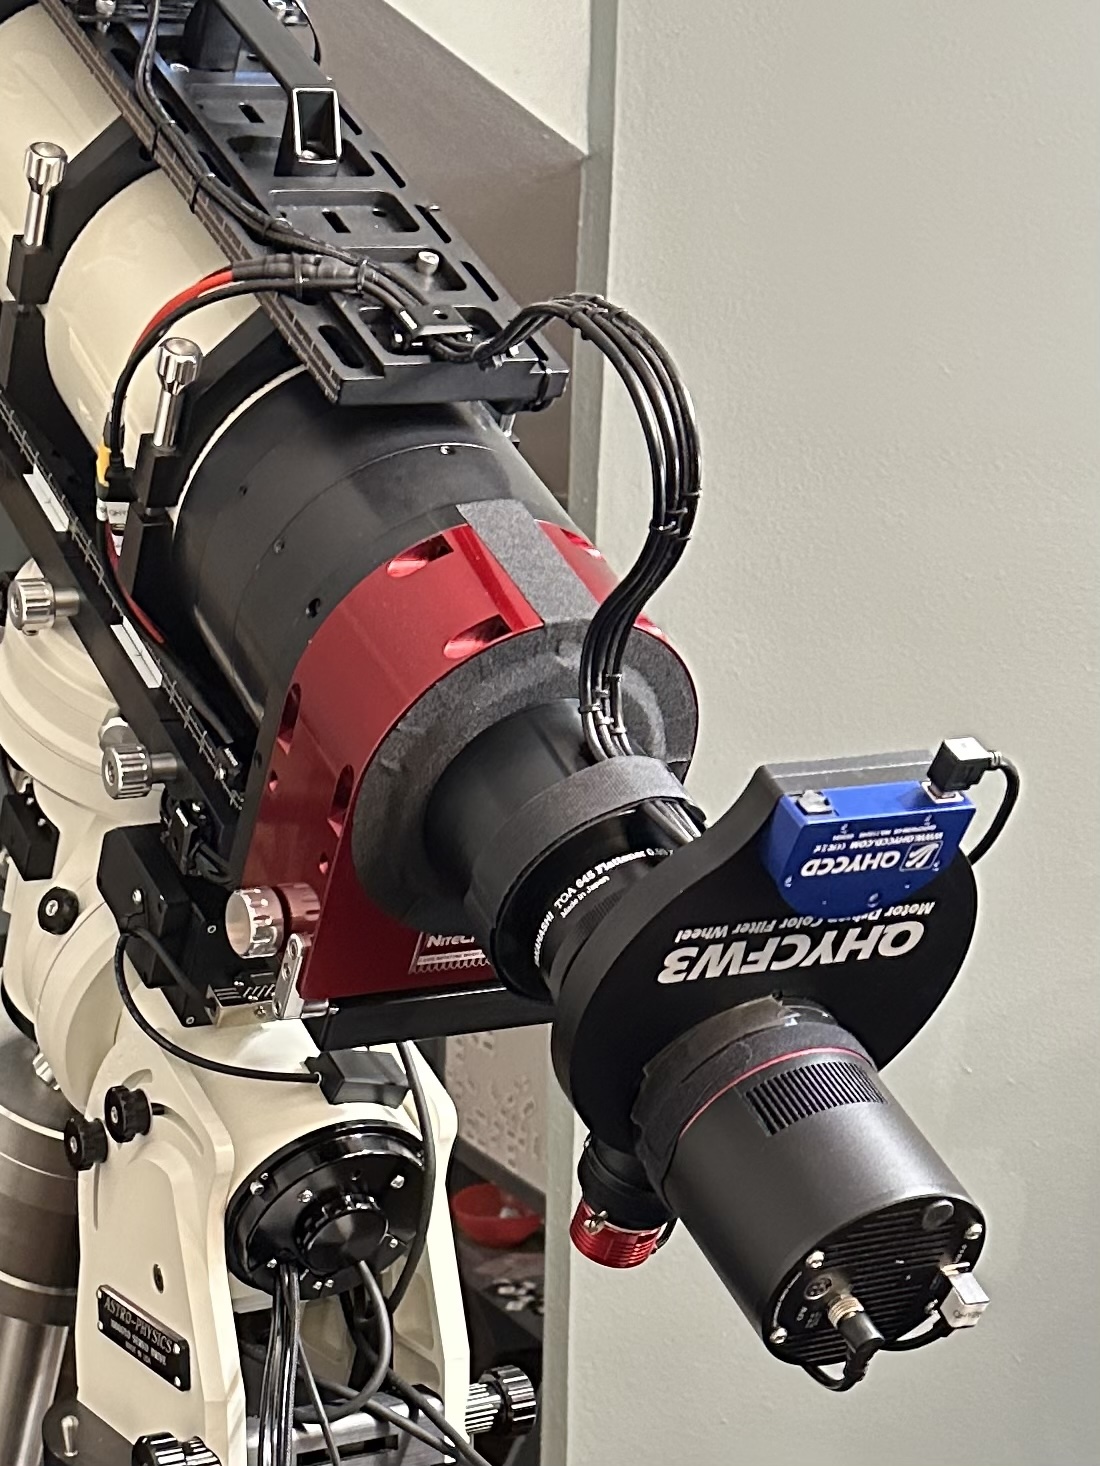
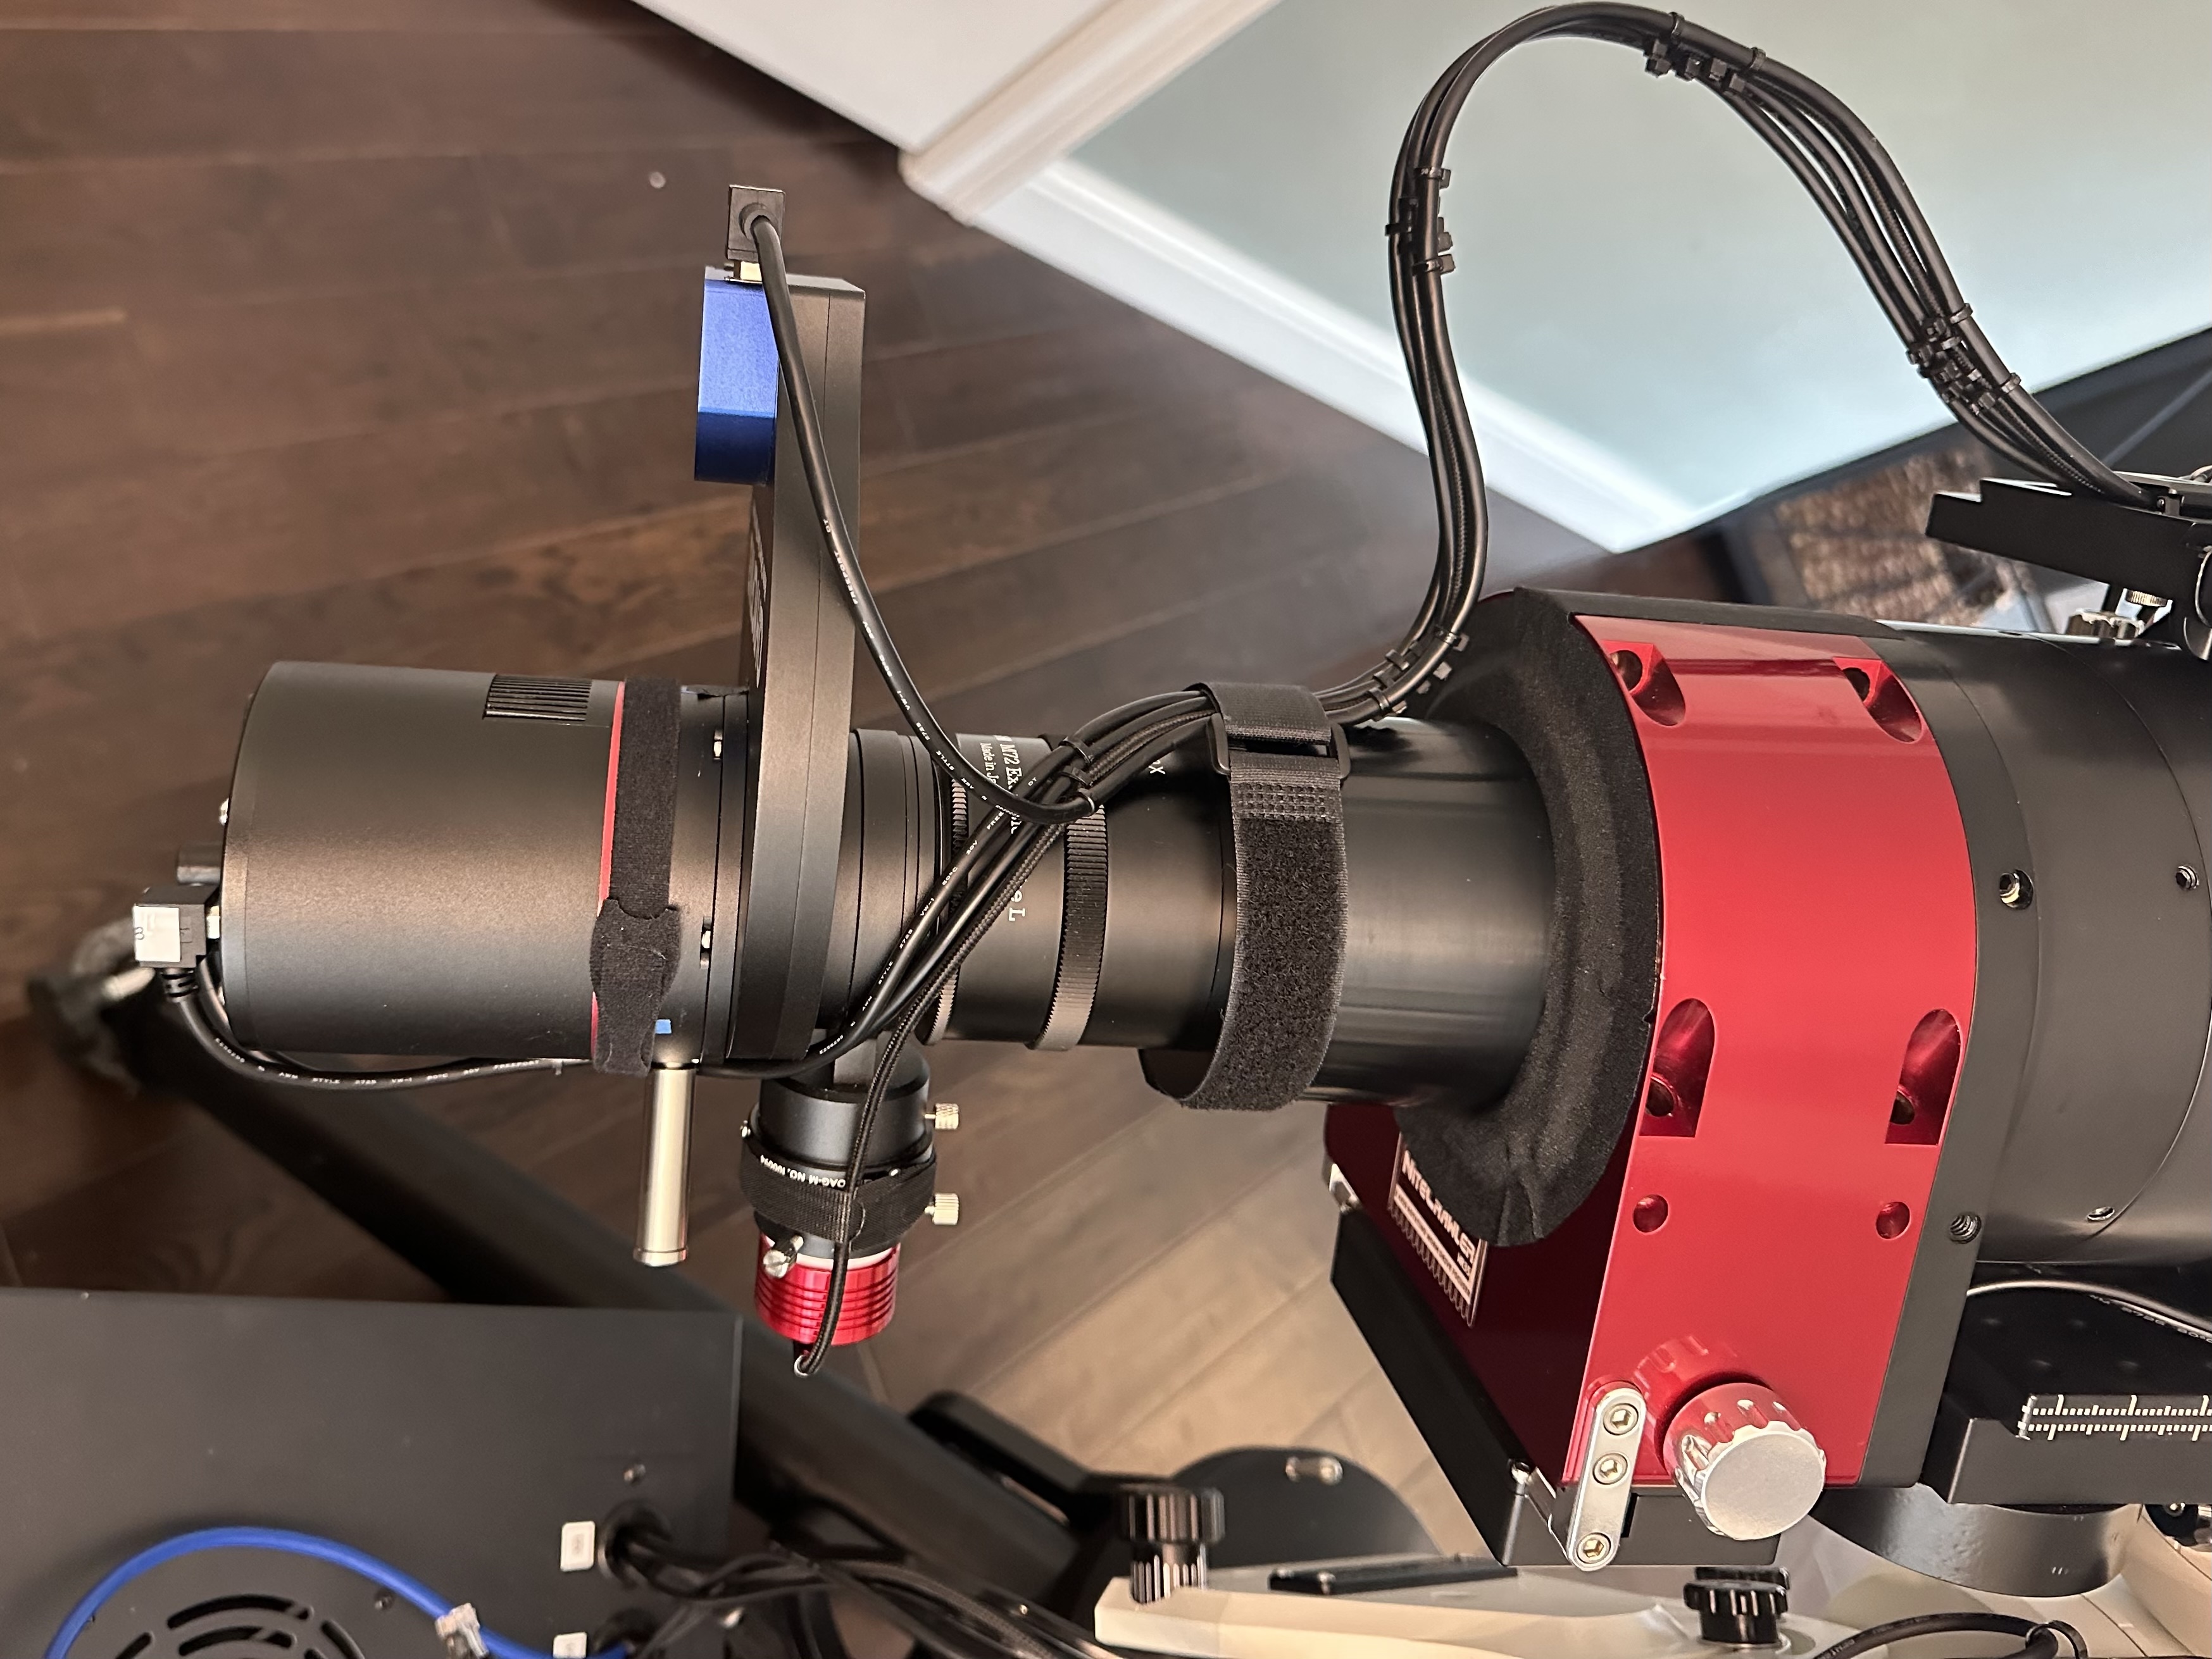
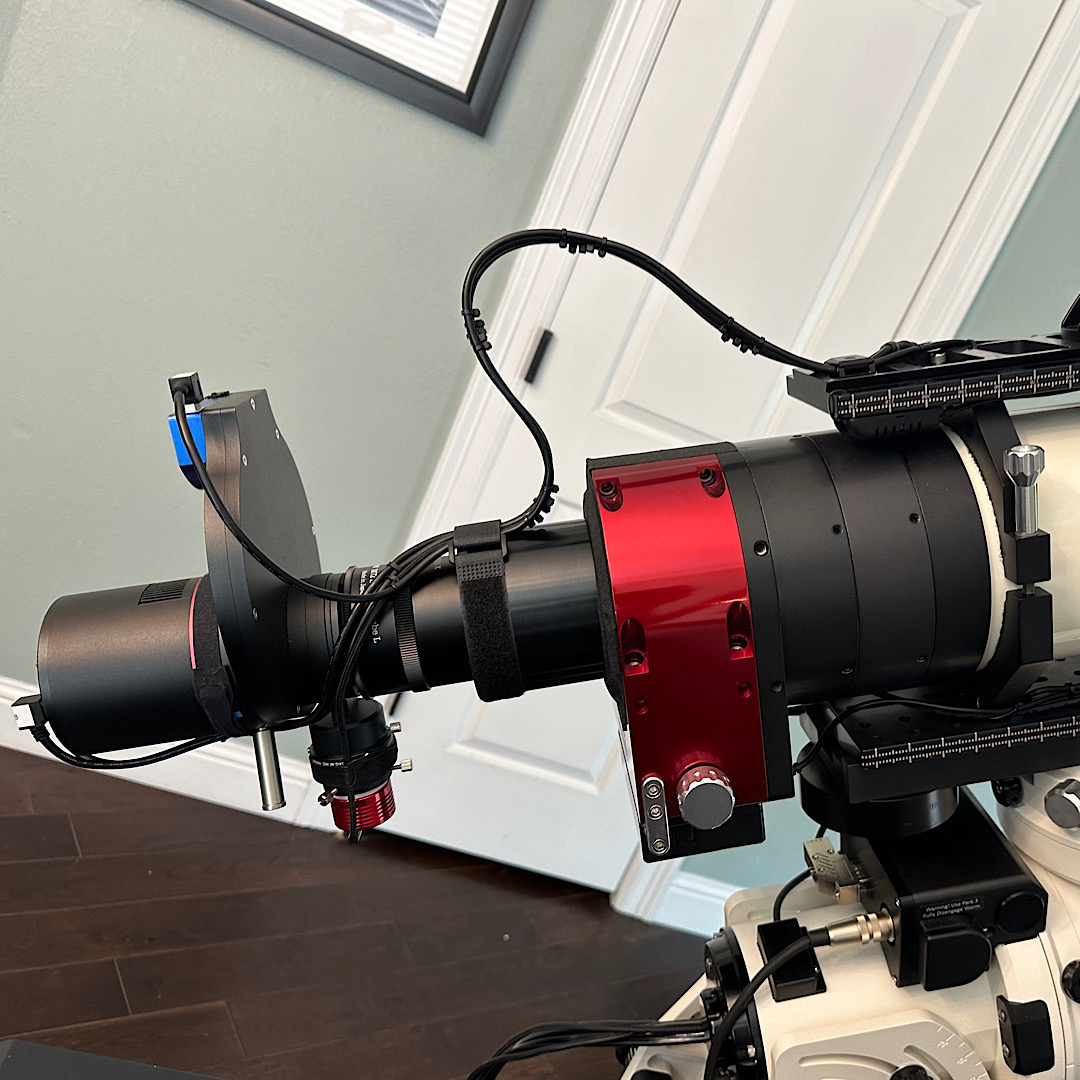
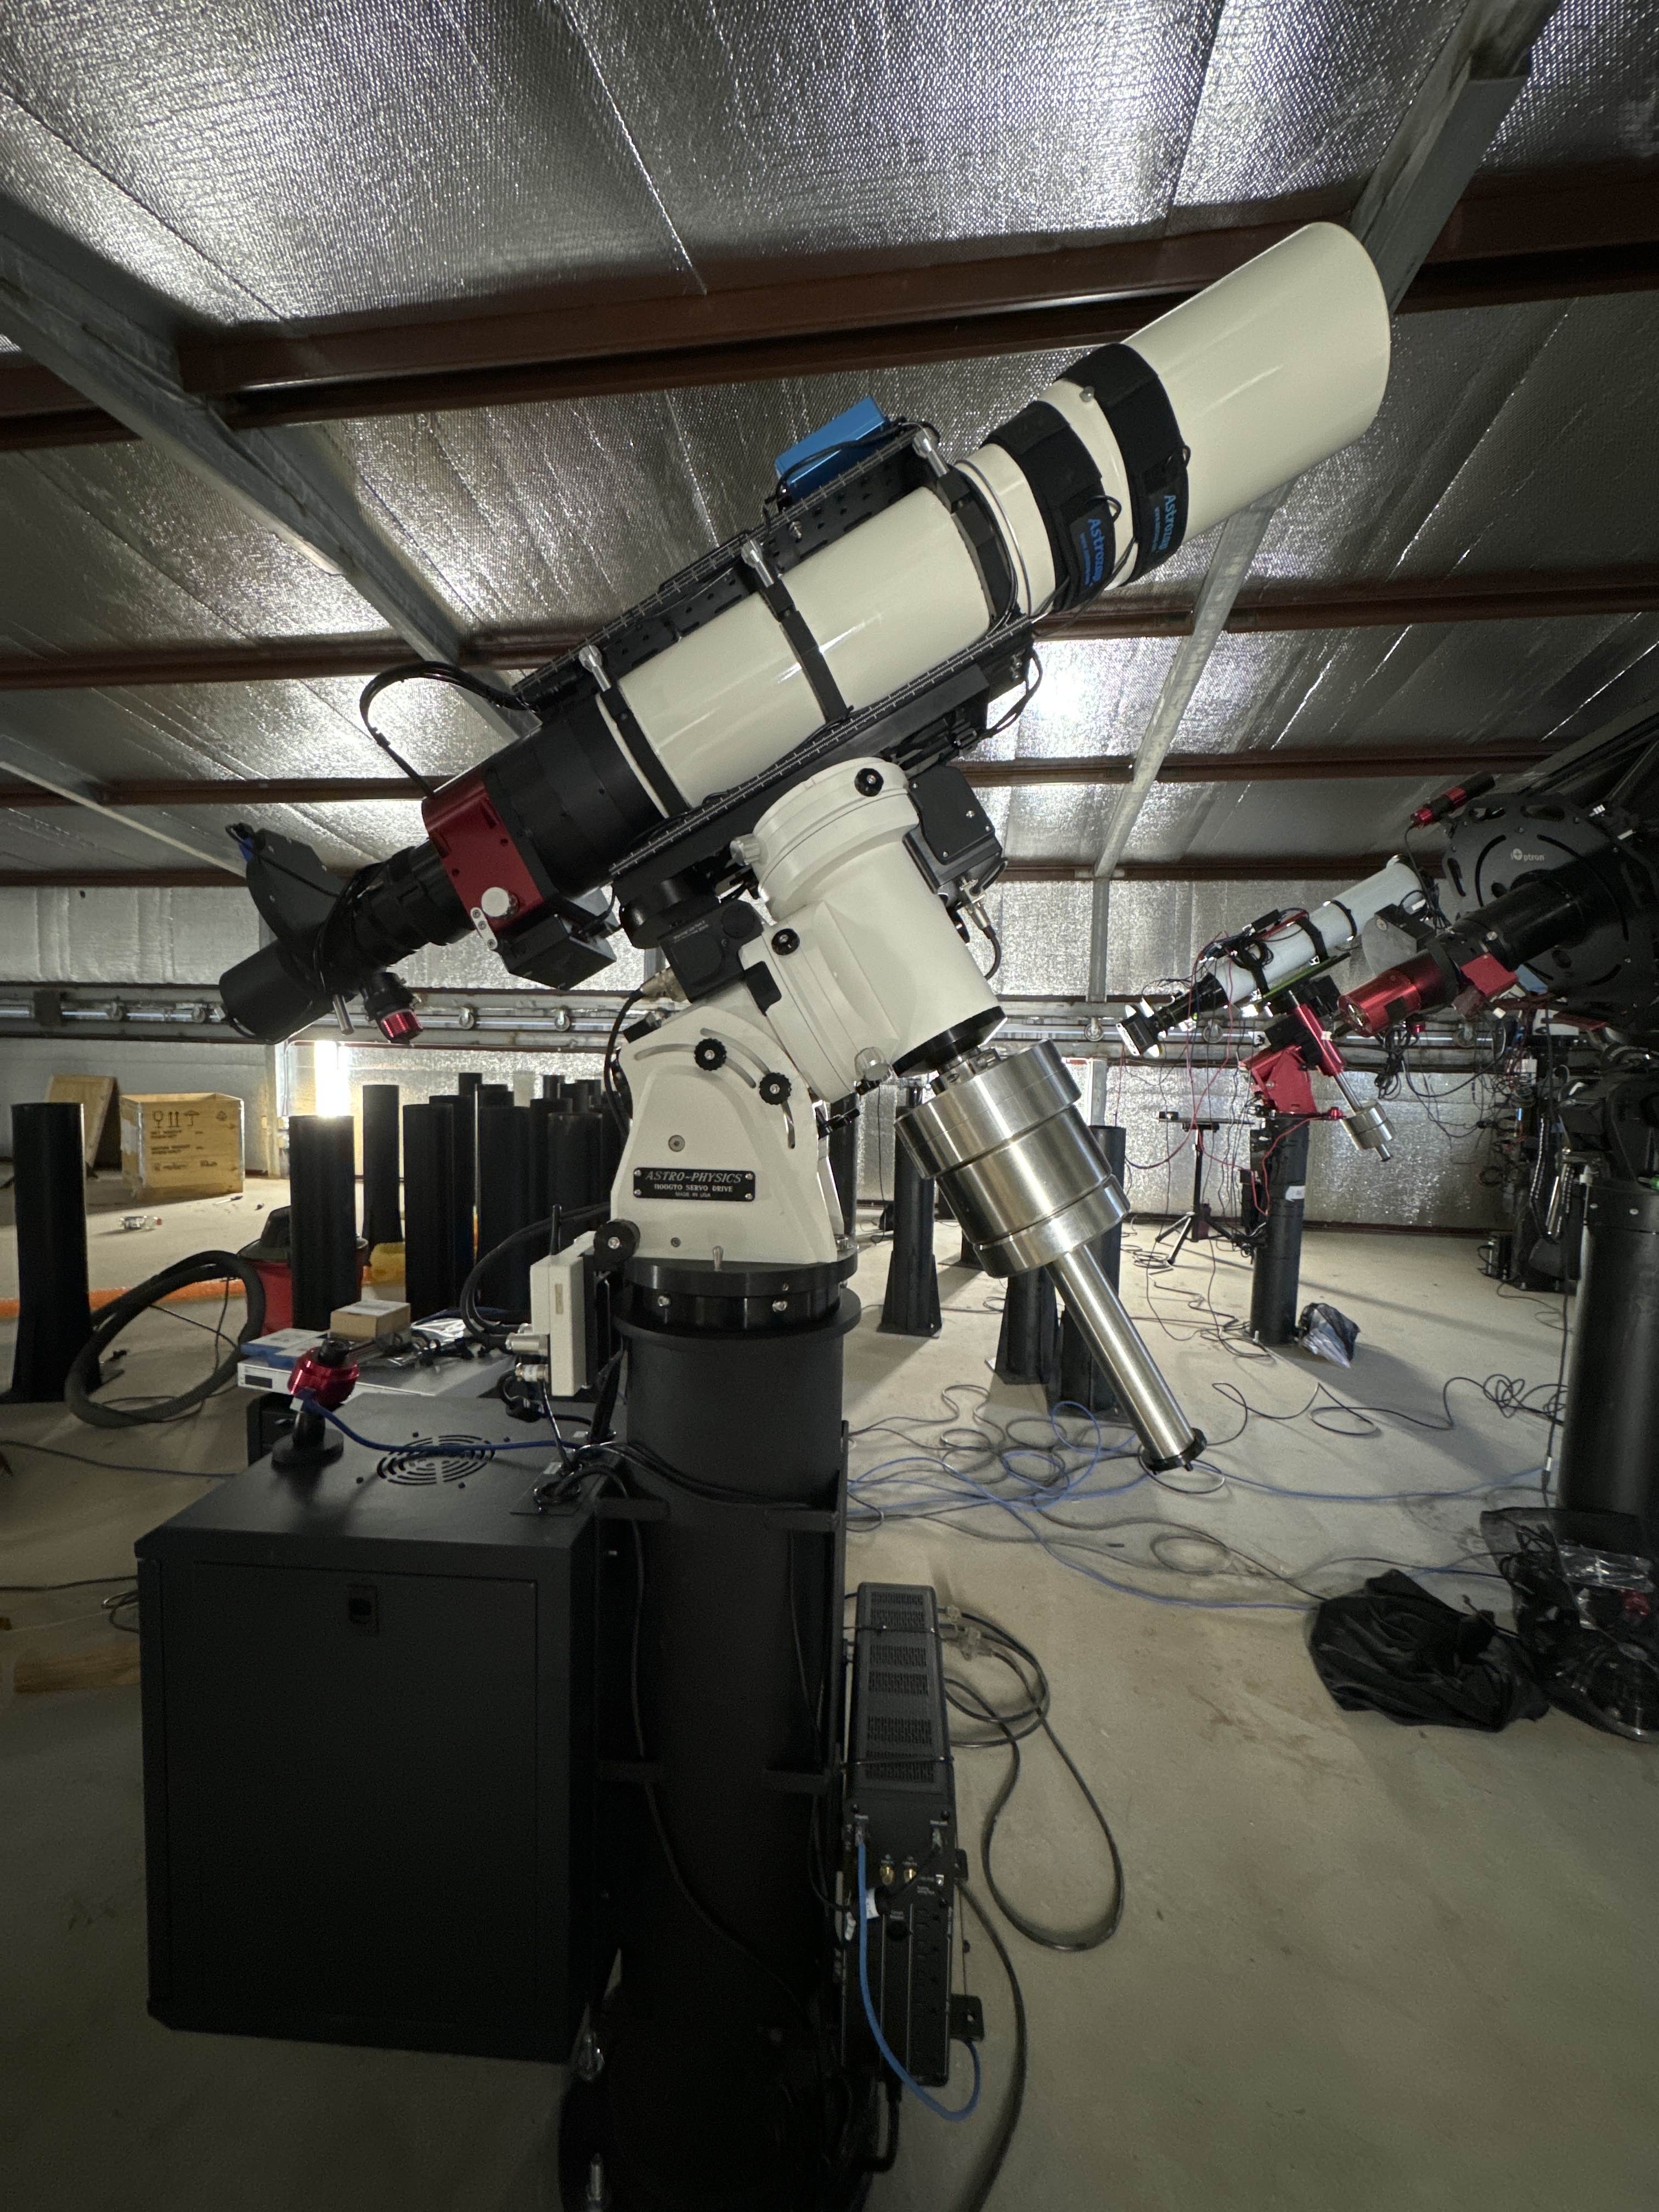
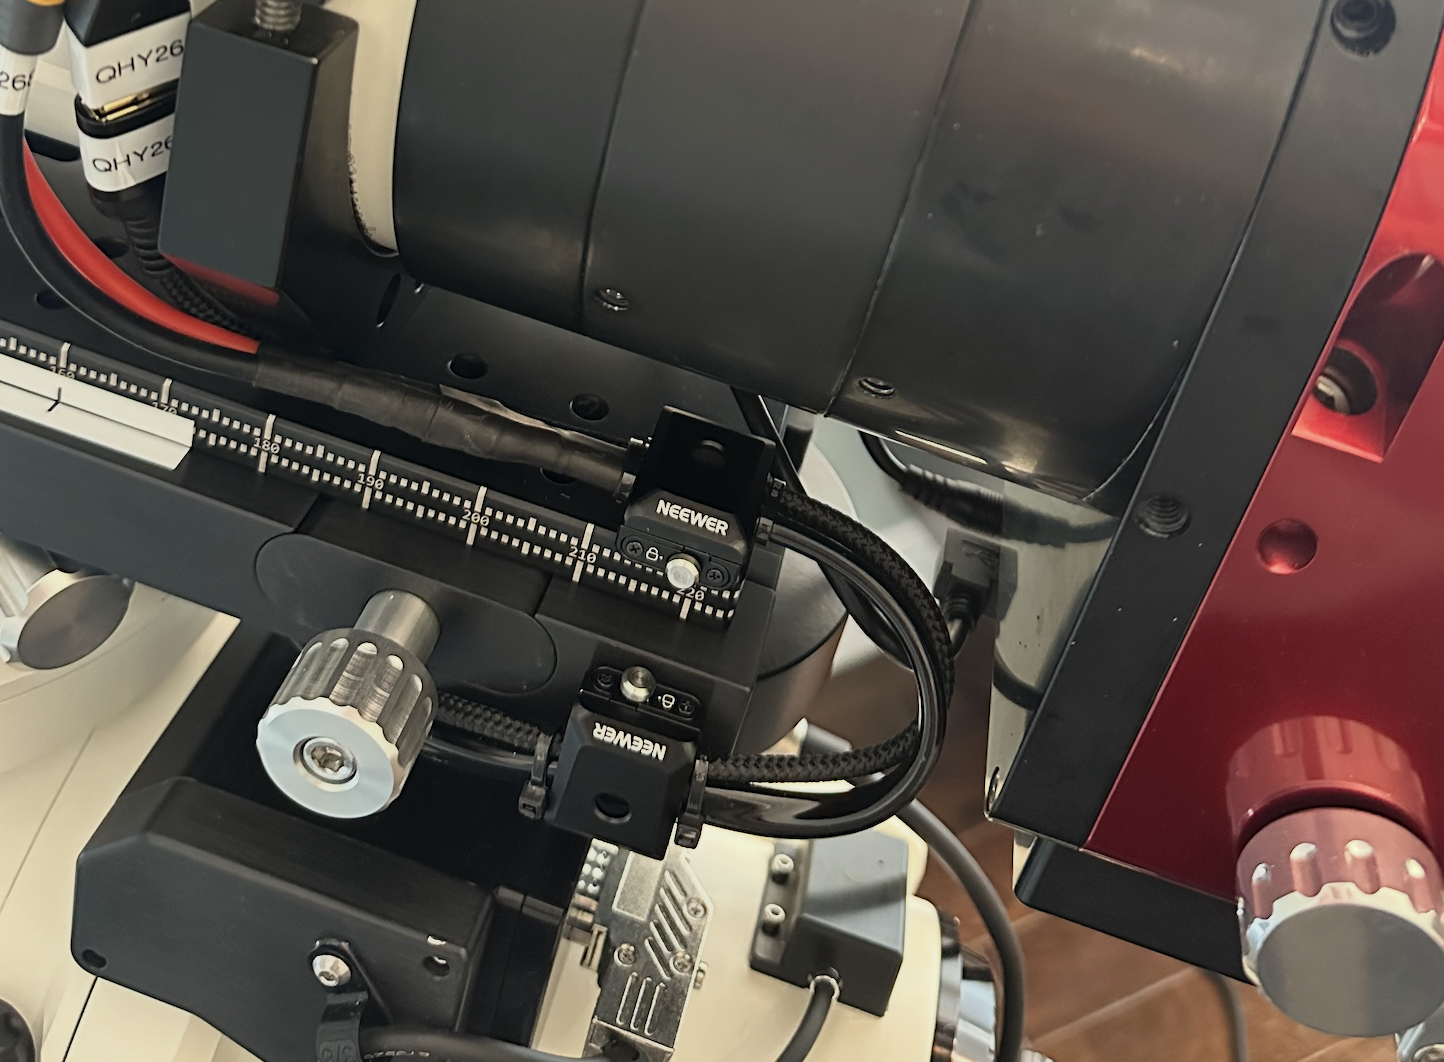
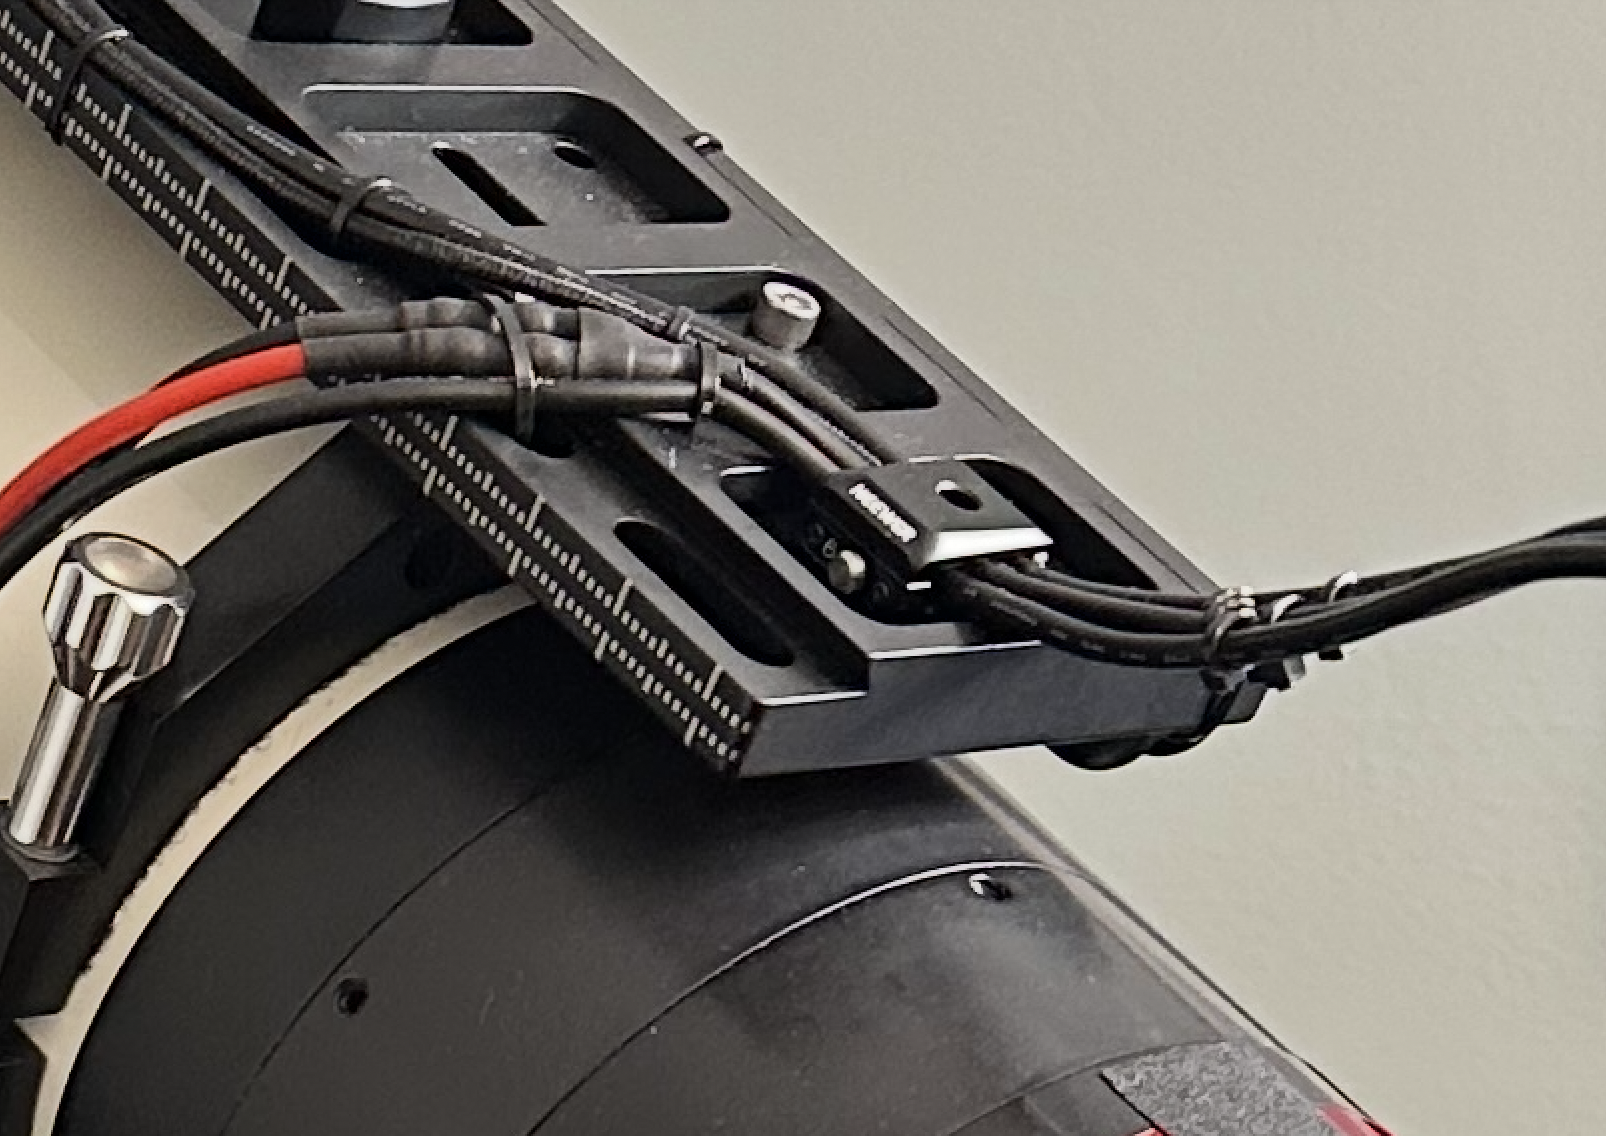
📷 IMG_5502.jpgIMG_5502.jpg📷 IMG_5503 2.jpgIMG_5503 2.jpg📷 IMG_5357.jpgIMG_5357.jpg📷 IMG_6033 2.JPGIMG_6033 2.JPG📷 d80af126-f6e0-4eca-91f8-1e65653ab49e.jpgd80af126-f6e0-4eca-91f8-1e65653ab49e.jpg📷 92418c35-0ae7-4c3a-a18d-a3b3113fbc02.jpg92418c35-0ae7-4c3a-a18d-a3b3113fbc02.jpgCable clamps that I used:

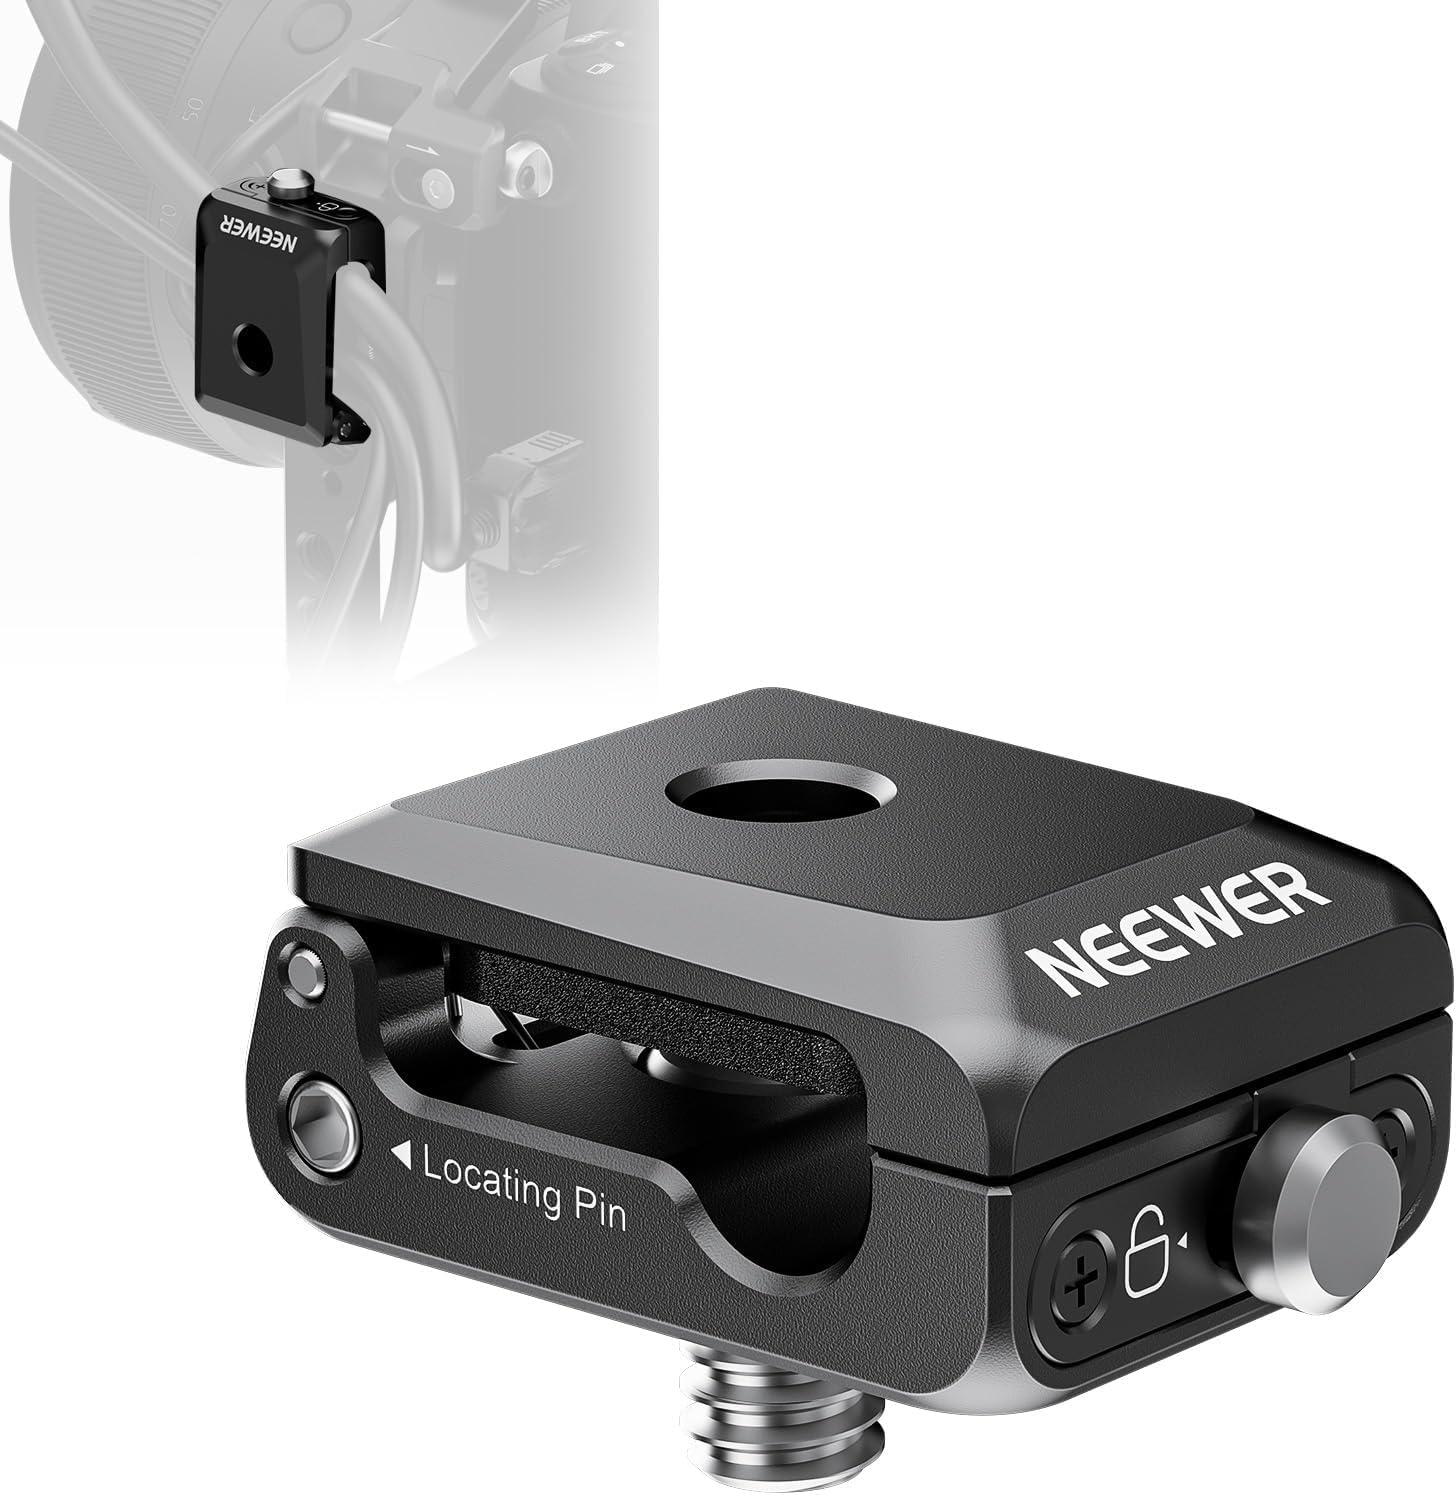
https://www.amazon.com/dp/B0D3LMDK14?lv=shuf&channelId=500&plpRedirect=mhFallback

📷 71Kyv5M8aIL._AC_SL1495_.jpg71Kyv5M8aIL._AC_SL1495_.jpg📷 Screenshot 2026-08-06 at 2.38.52 AM.pngScreenshot 2026-08-06 at 2.38.52 AM.png📷 Screenshot 2026-08-06 at 2.39.18 AM.pngScreenshot 2026-08-06 at 2.39.18 AM.png

kullumm avatar

Do you guys opt for USB 3 cables with right angle necks for the back end? Or have a decent curvature with minimum strain and a printed cable holder or cable ties/cable mesh to hold in place?

kullumm avatar

Thanks @Shannon Foye .

Close to a model example. I appreciate all the little considerations such a dust and light leak prevention and the organization of cabling. 2-to-1 heat shrinakable dovetailing and the little neware clamp are well thought out. Somethign for everyone to think about if it were to matter to them. It does to me for this type of setup, and I guess the optimization here accommodate long term-ish and redudancy as a remote system?

I will shamelessly copy elements of this setup given the OTa and train length are similar to my option (FS 102 NSV with FT+riser backend).

Dave Ek avatar

codwyer · Aug 6, 2026, 08:27 AM

Do you guys opt for USB 3 cables with right angle necks for the back end? Or have a decent curvature with minimum strain and a printed cable holder or cable ties/cable mesh to hold in place?

I haven’t had any luck finding right-angle adapters that will operate at USB3 speeds. I’ve tried a few from Amazon but they all failed to work with USB3. If you find any right-angle adapters or cables that work at USB3, please post them here.

Well written Respectful
Shannon Foye avatar

codwyer · Aug 6, 2026 at 08:27 AM

Do you guys opt for USB 3 cables with right angle necks for the back end? Or have a decent curvature with minimum strain and a printed cable holder or cable ties/cable mesh to hold in place?

I don’t use USB 3 for anything. The exposure download speed advantage of USB 3 makes no real difference for deep sky imaging purposes. I am not aware of any reason to use USB 3 over USB 2 unless you intend to also do some lunar and planetary imaging.

On the other hand, USB 2 is much more stable and reliable than USB 3. I did have a USB 3 cable for my pier camera but I was routinely losing connection to it every few months, which required me to ask the observatory staff to re-seat the cable. I eventually had them replace the pier cam cable with a USB 2 and I have not lost connection to it since then

90 degree connections cleans up your cable management. I use them all over my setup, not just the imaging train. Cutting down 12v power cables and using the bare minimum length for USB cables goes a long way to eliminating cable clutter on the OTA. I cut down my dew heater cables as well.

You can find virtually every possible directional variation (left, right, up, down, 45 degree offset) of 90 degree cables (USB, ethernet, 12v power) that you need on Amazon. Here’s a link to the USB 2 cable I’m using for the camera:

https://www.amazon.com/dp/B00GOBM7IC?ref_=ppx_hzsearch_conn_dt_b_fed_asin_title_12&th=1

📷 IMG_5362.jpgIMG_5362.jpg📷 IMG_5383.jpgIMG_5383.jpgCut-down dew heater cables and another Neewer cable clamp.

📷 IMG_5377.jpgIMG_5377.jpg📷 IMG_5473.jpgIMG_5473.jpg

📷 IMG_5474.jpgIMG_5474.jpg

Helpful
chvvkumar avatar

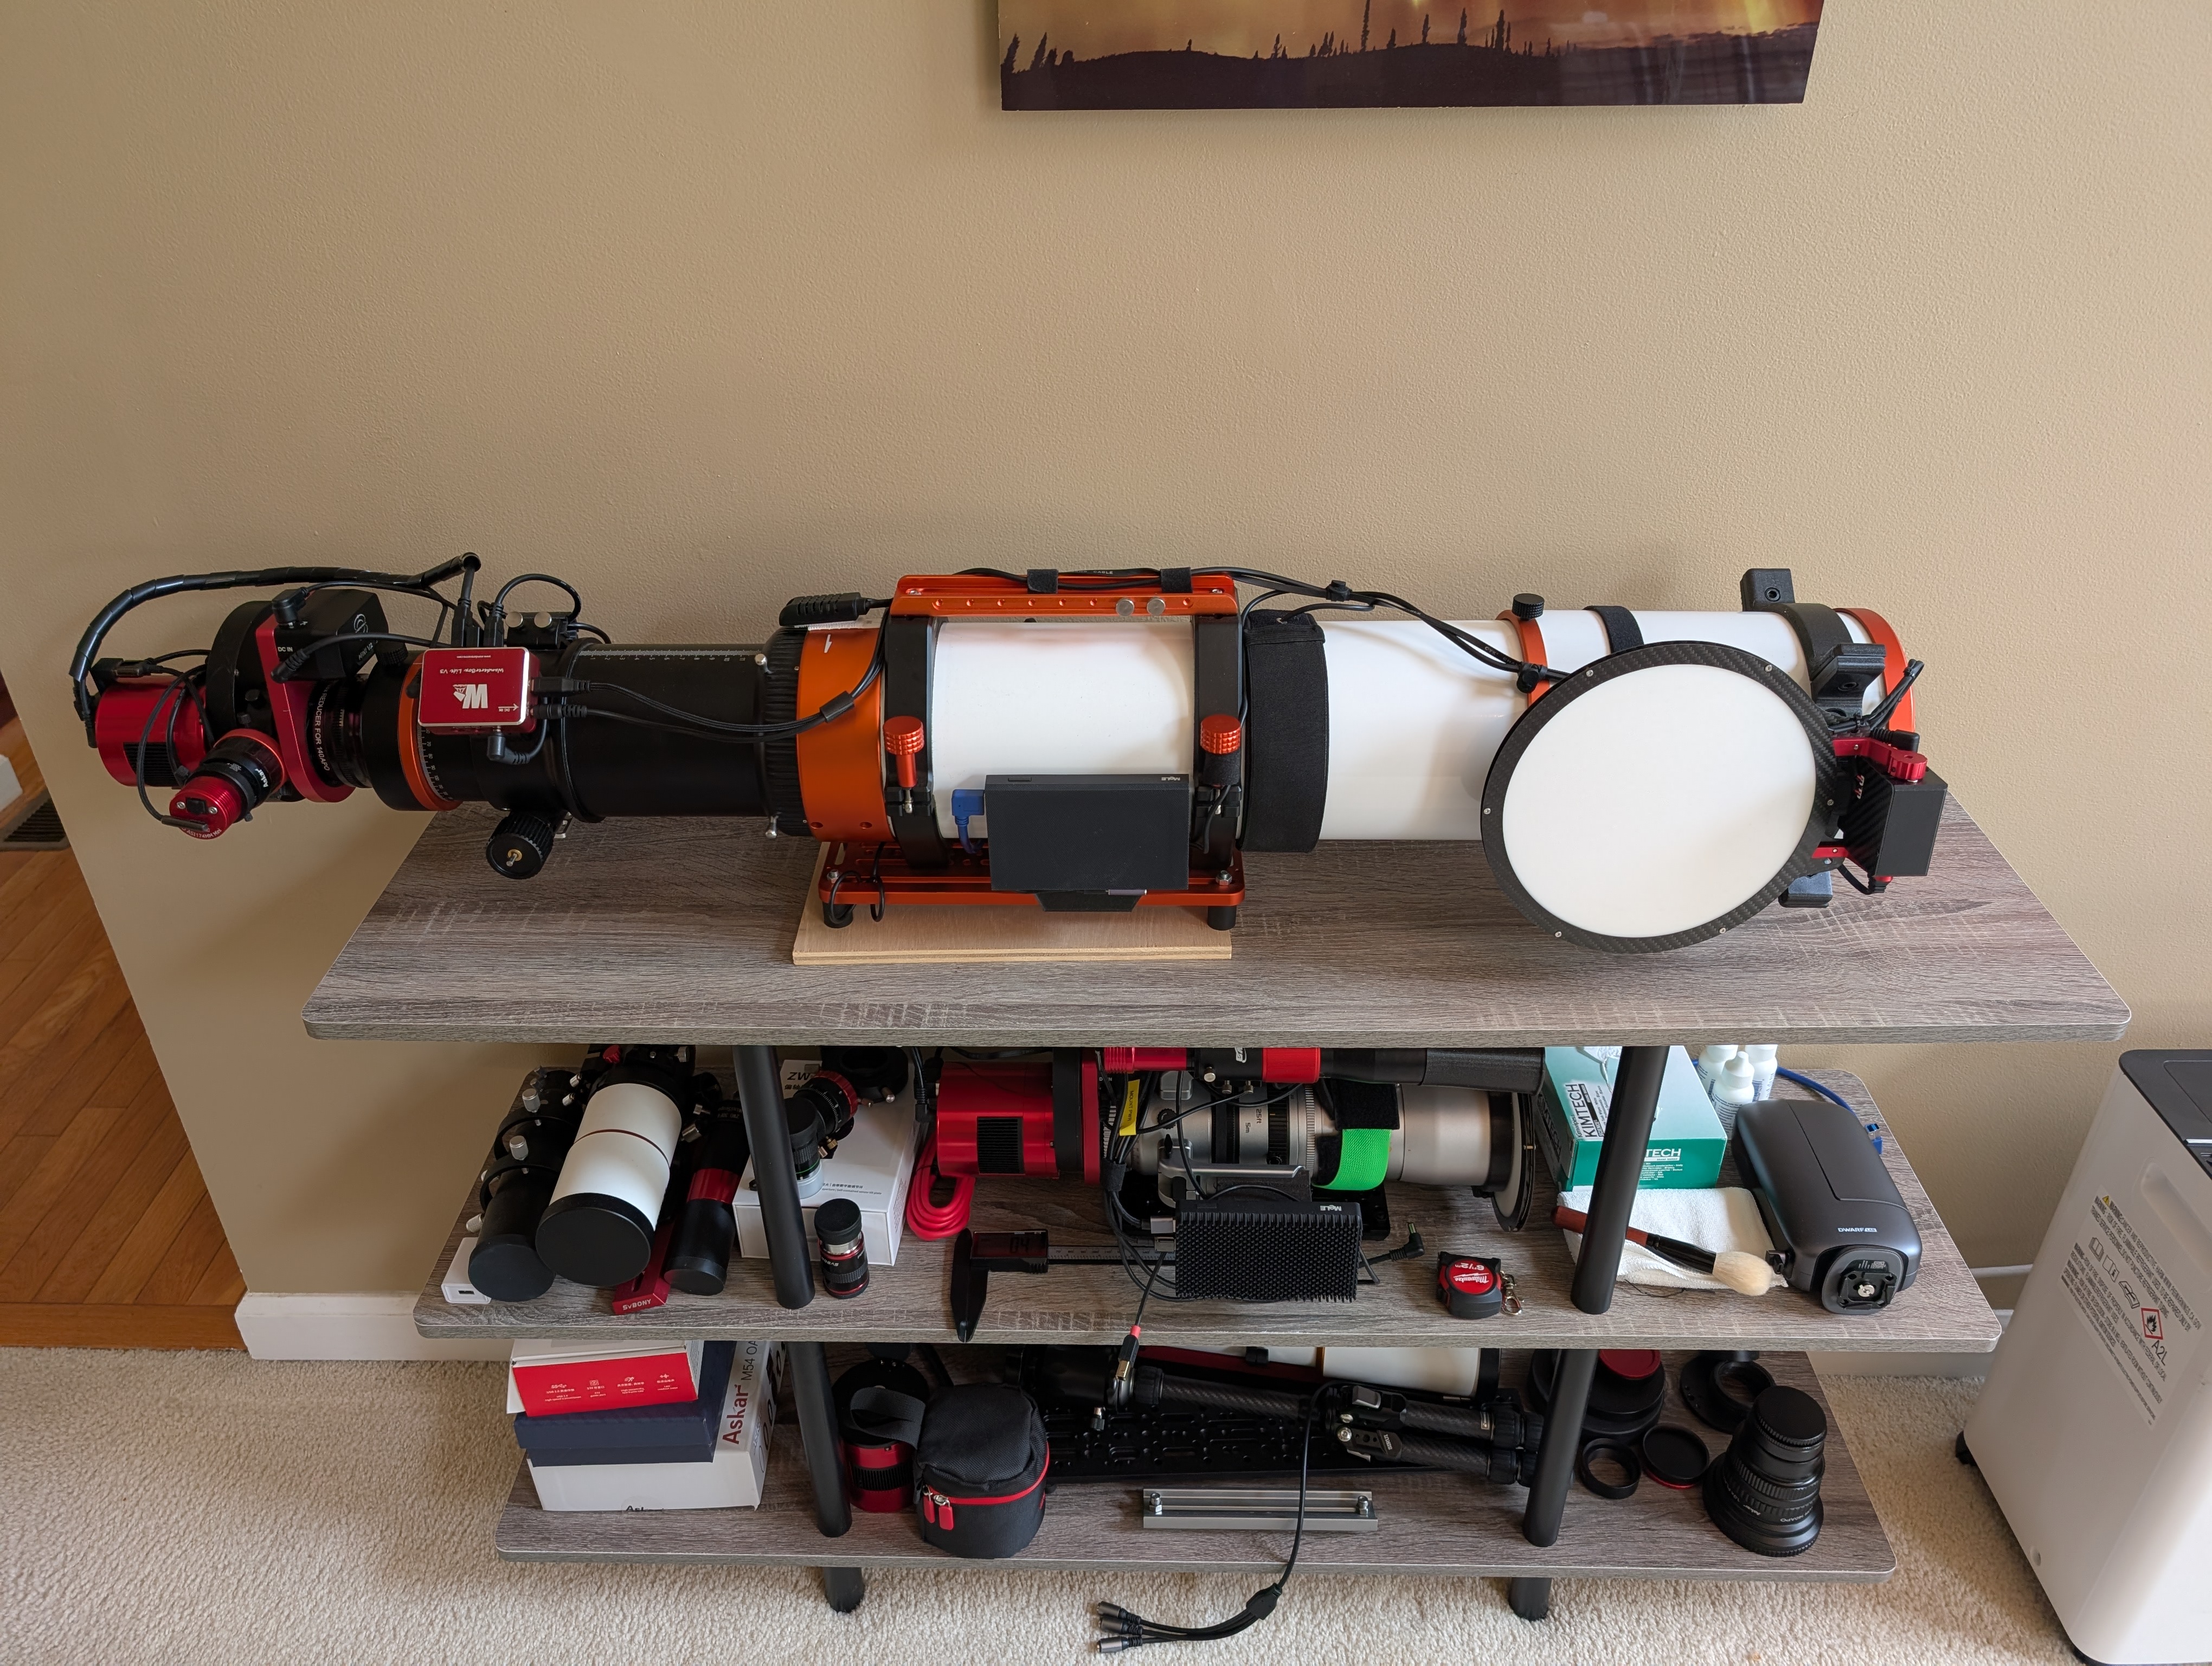
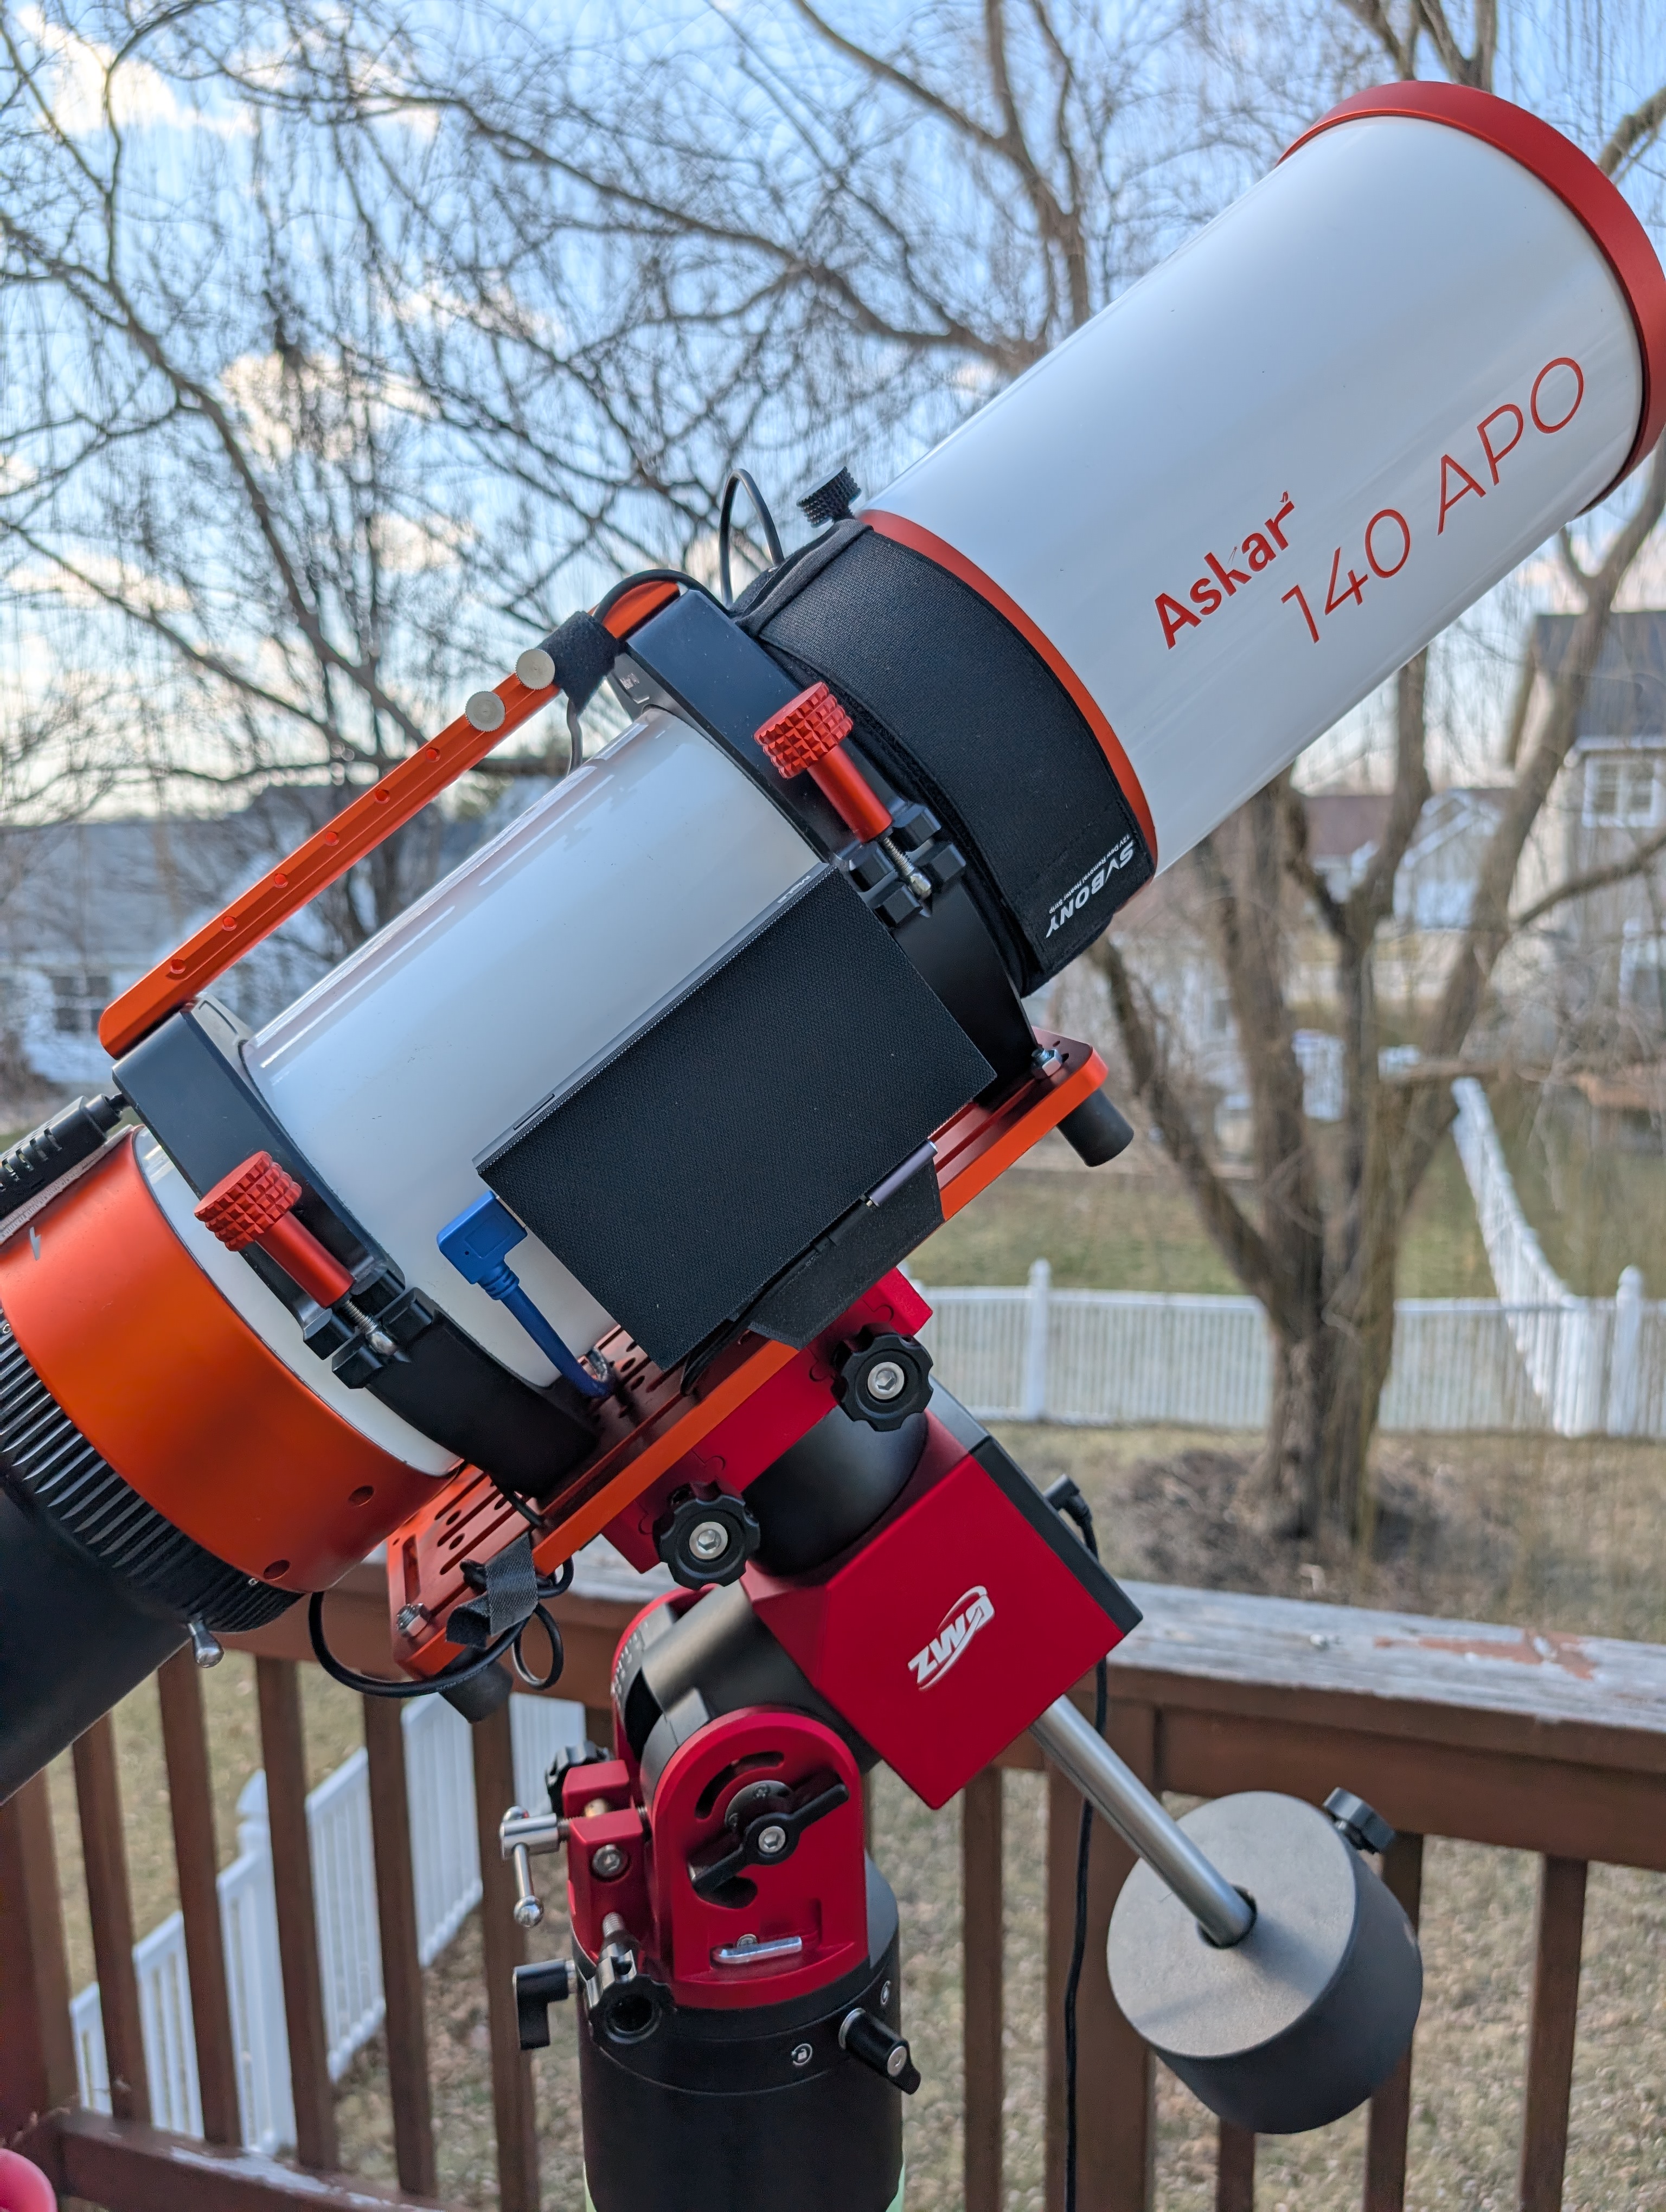
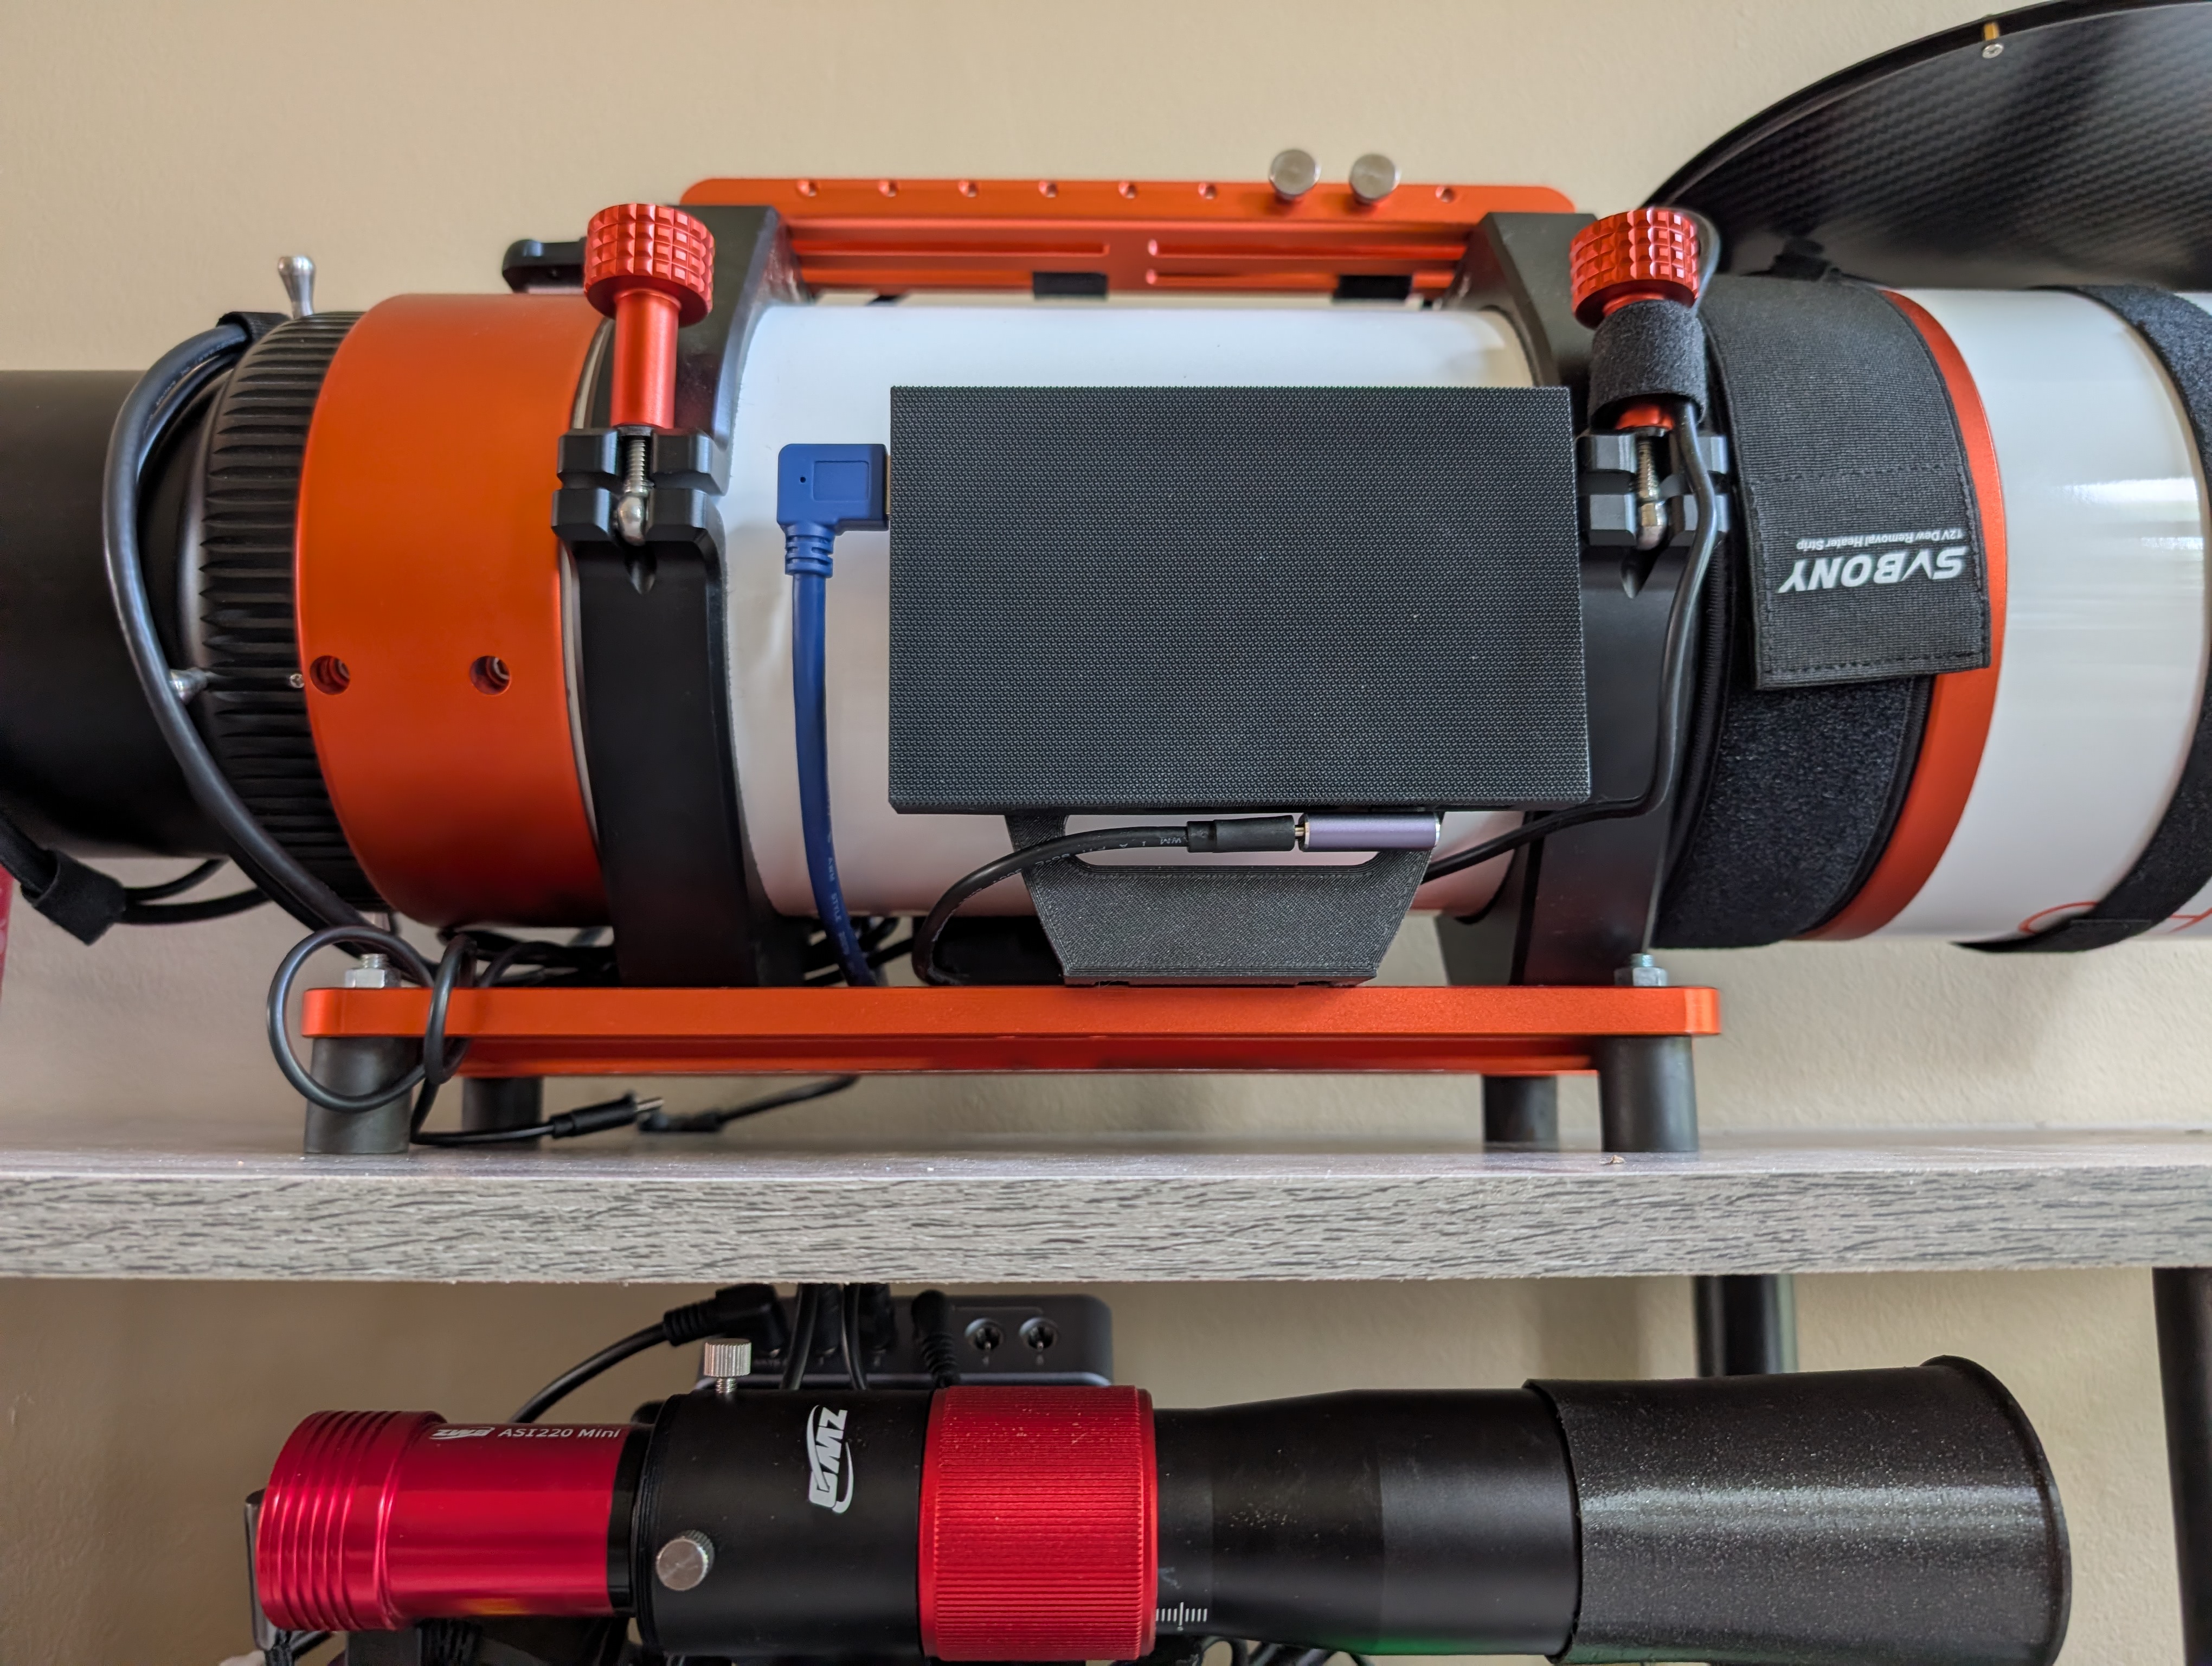
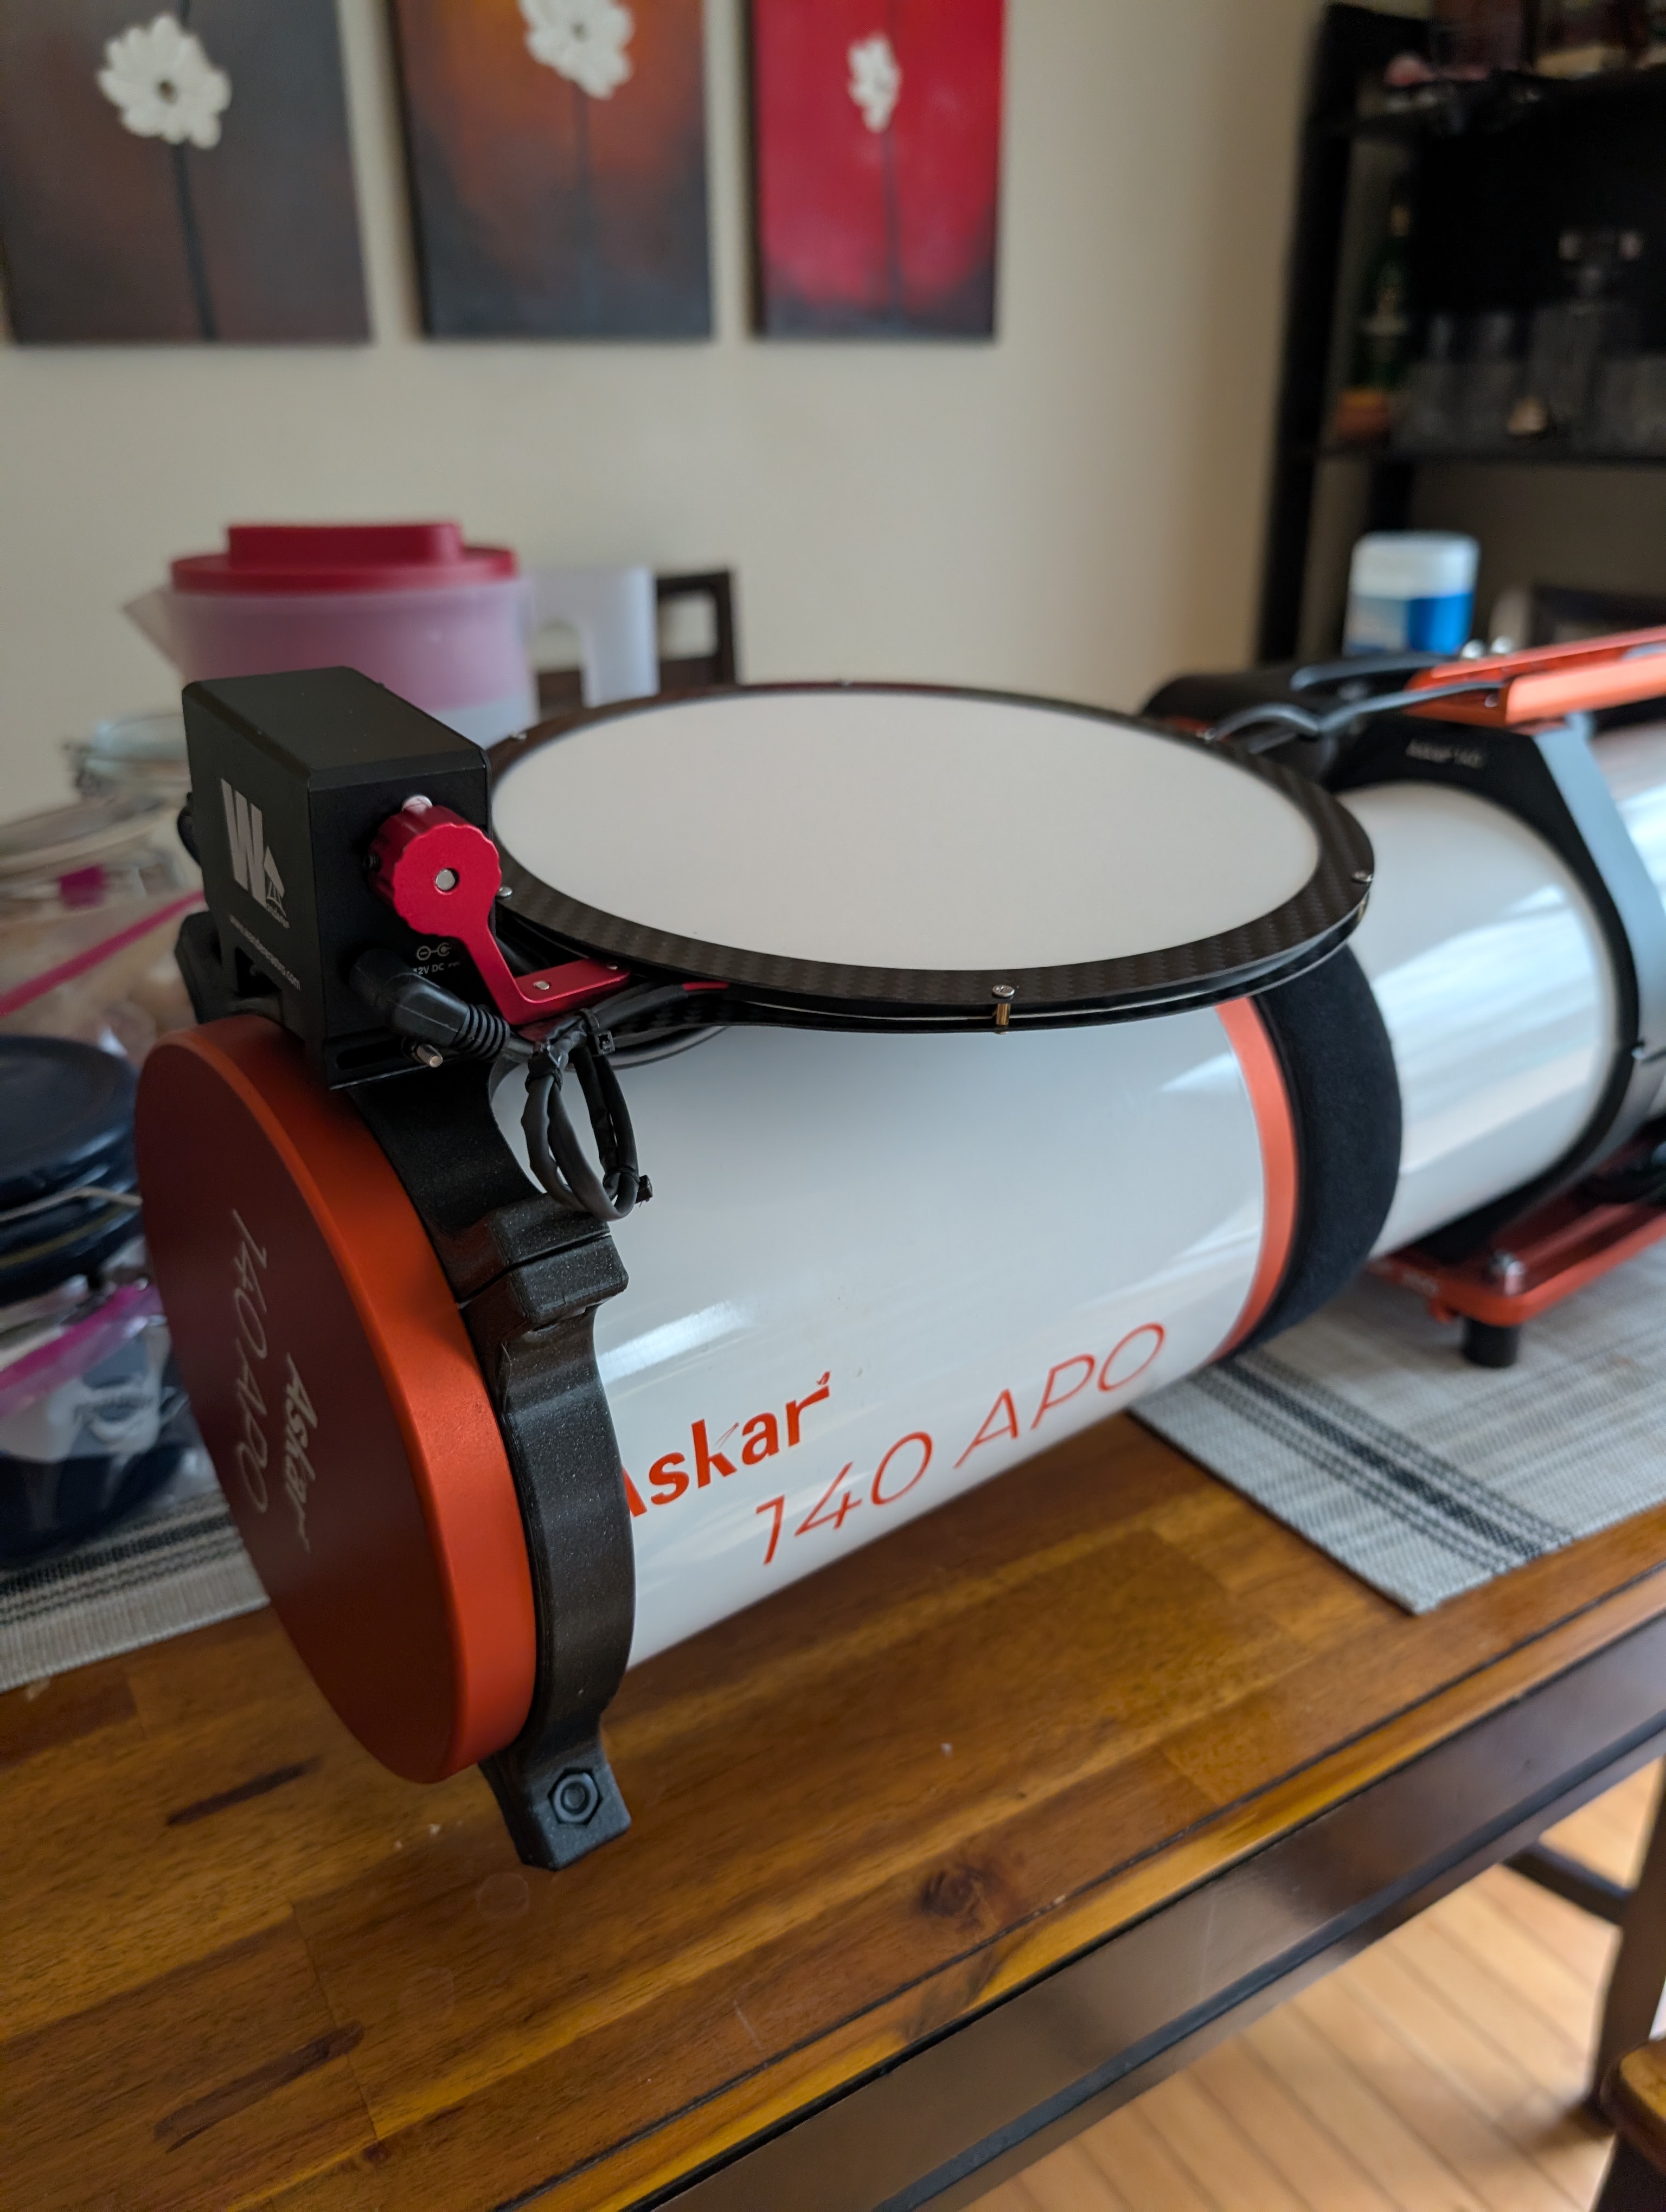
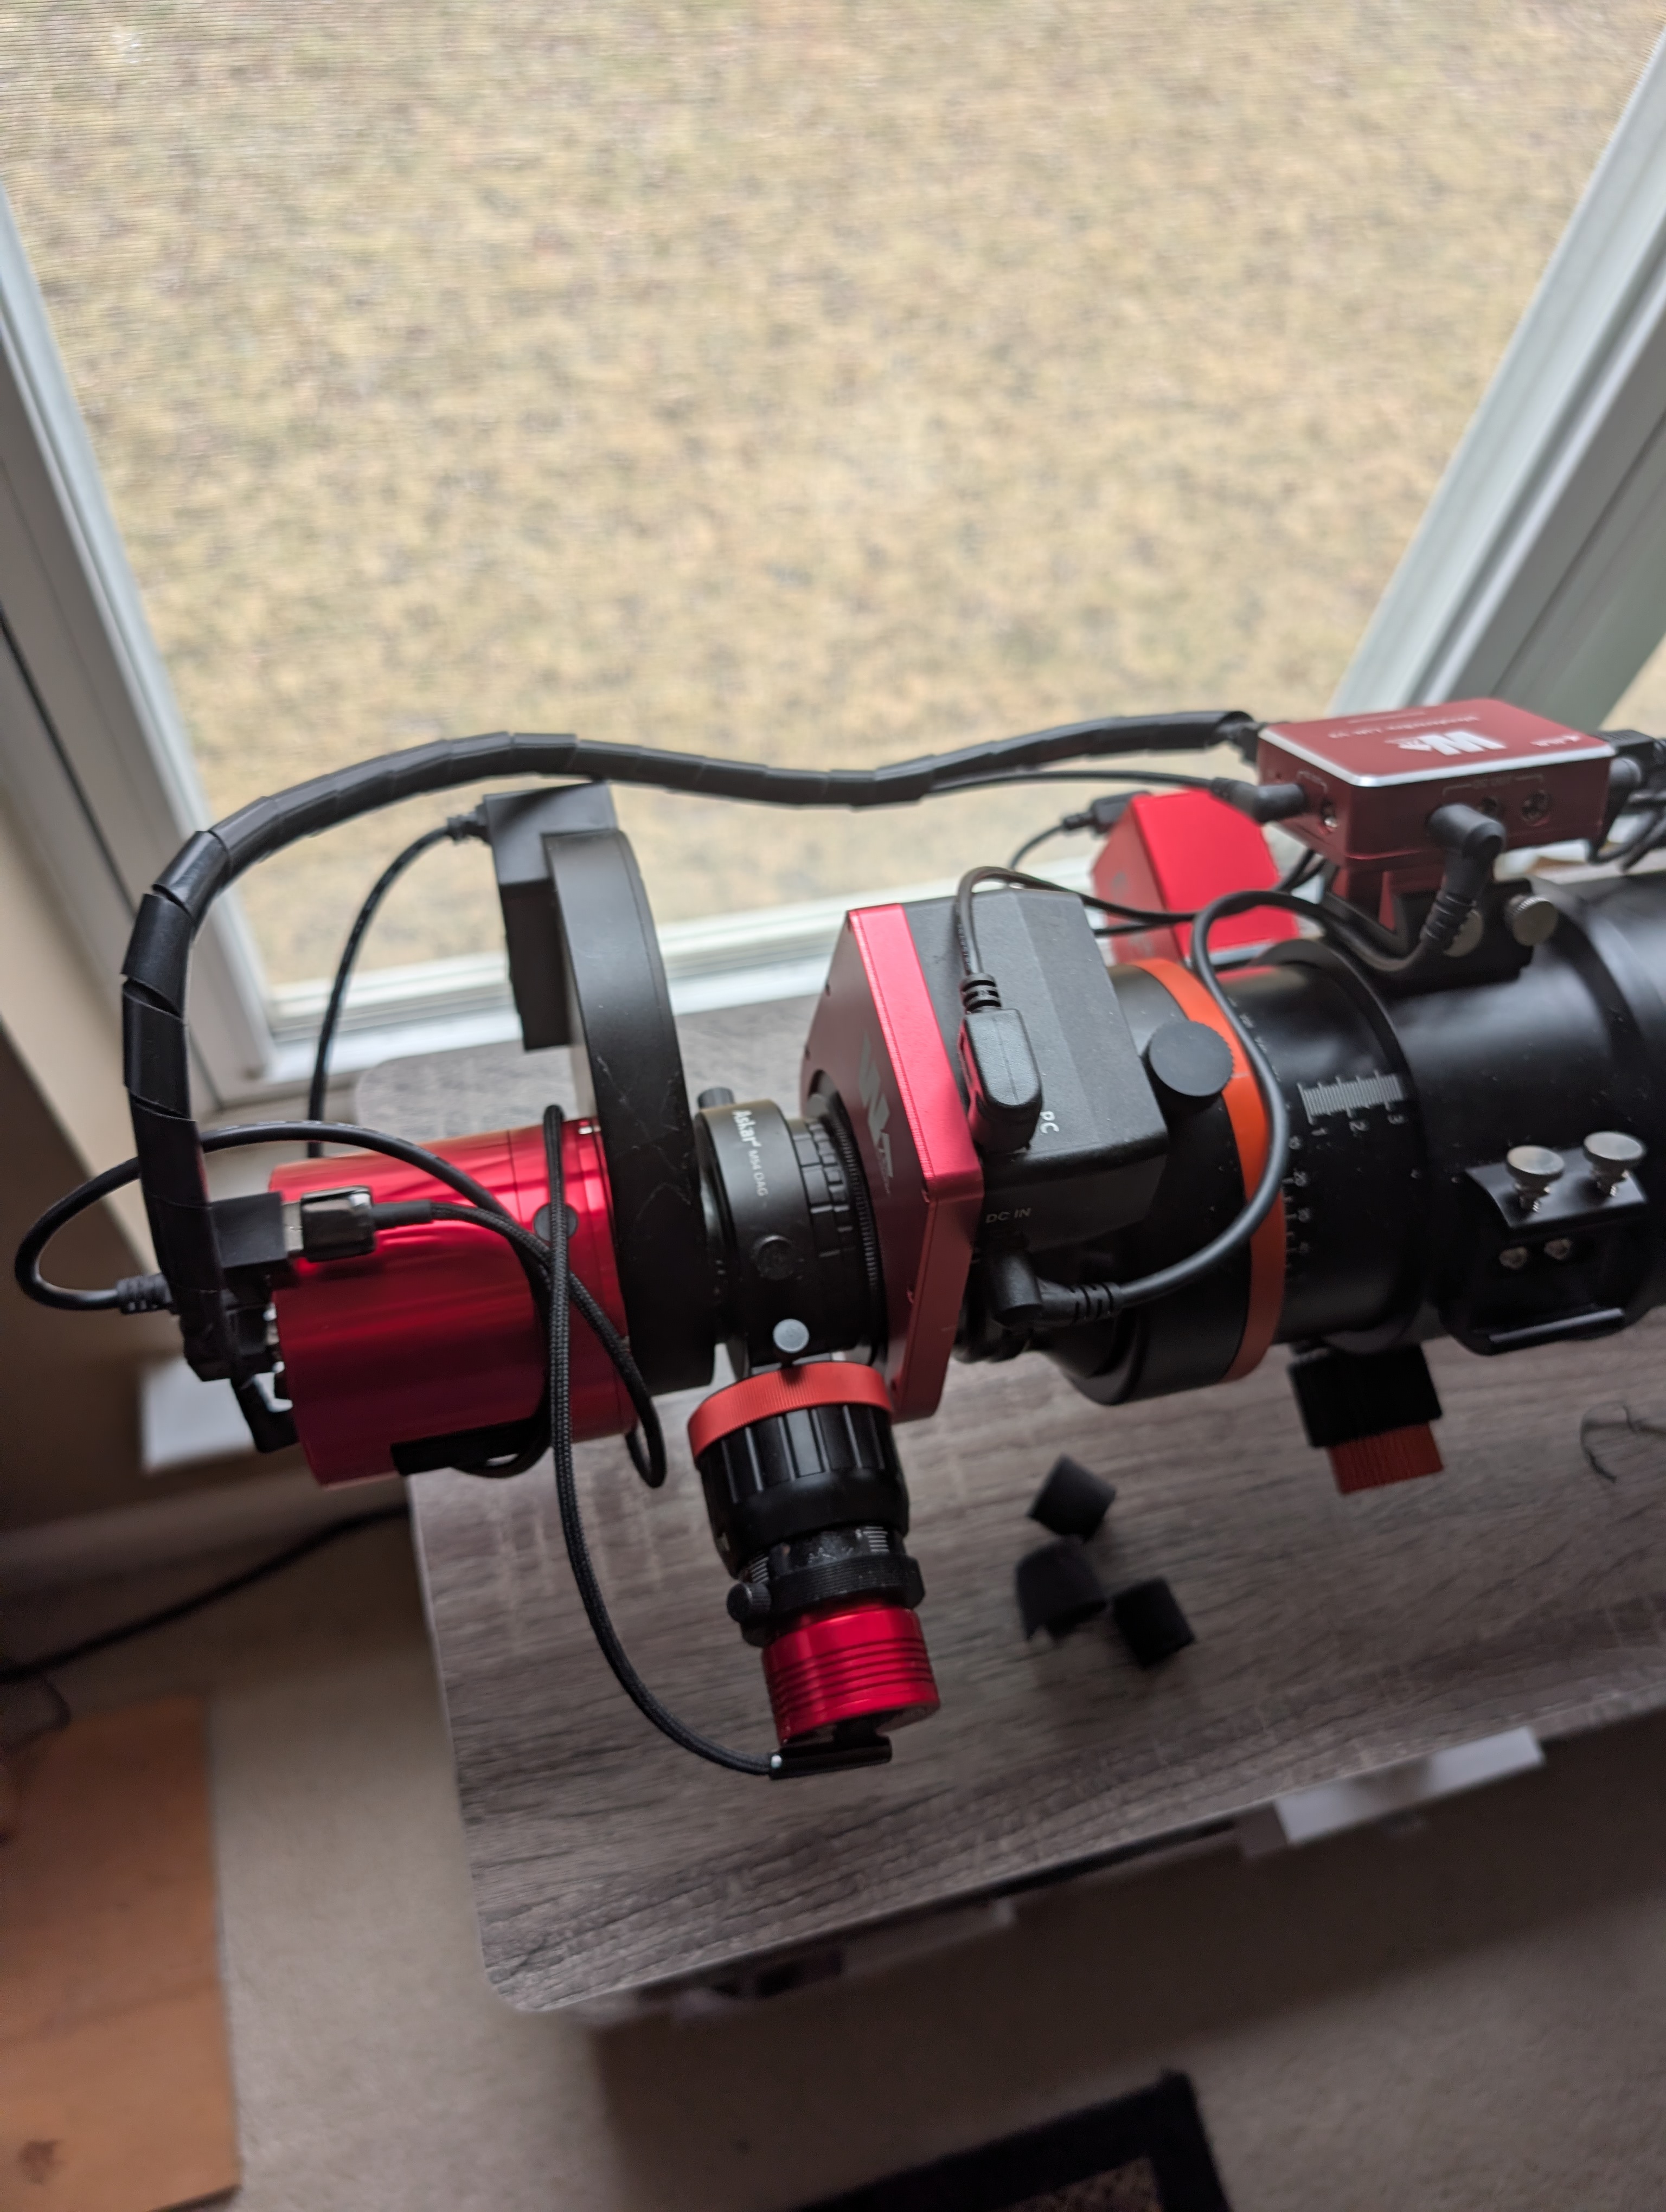
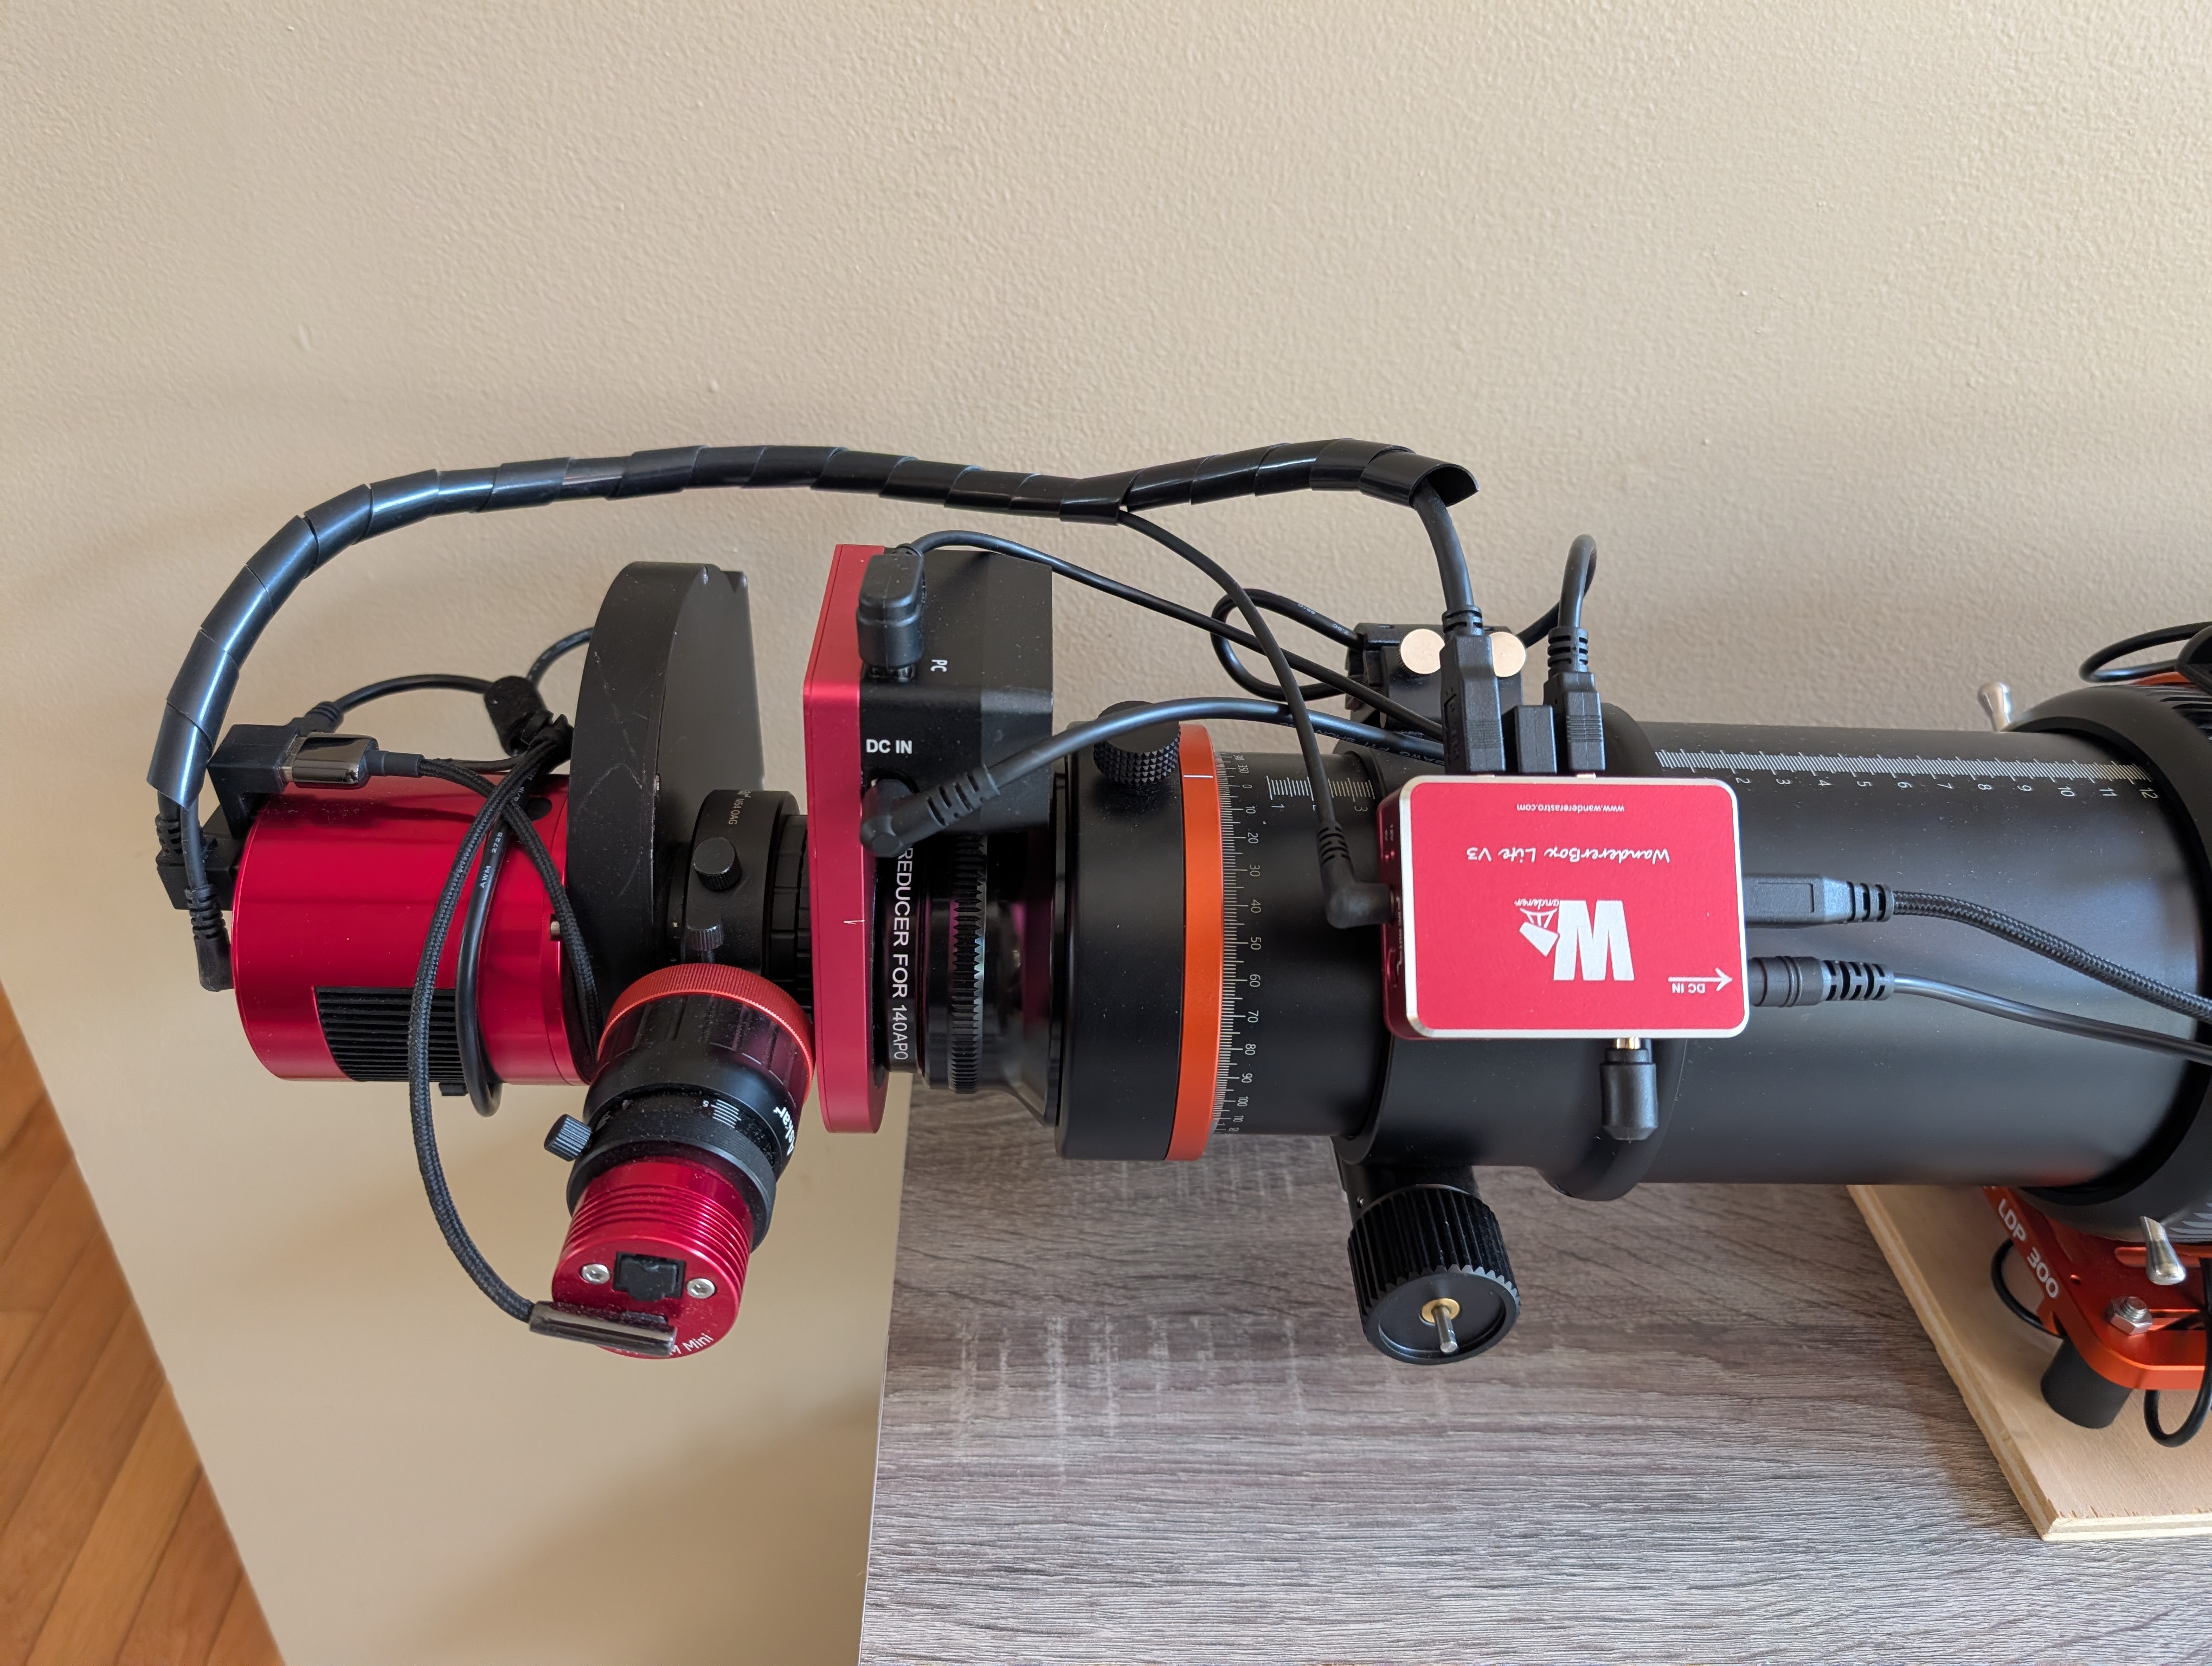
My 140APO with MeLe mini pc and Pegasus PPBAG2 as the main power box for the mini PC, dew heaters and the downstream power box and and extra Wanderer lite power box at the rear dedicated to the rear of the scope.

I used a self designed and printed flap panel mount to secure the Wanderer panel to the dew shield as well as other random self designed 3D printed parts to mount the mini PC and PPBA to the dovetail.

I also spent a lot of time going through a ton of cables to ensure the cabling is tidy and tangle free by purchasing the correct length cables and liberal use of Velcro or silicone c able ties.

📷 PXL_20260806_211422713.jpgPXL_20260806_211422713.jpg

📷 PXL_20260226_205948528.jpgPXL_20260226_205948528.jpg

📷 PXL_20260719_185813539.jpgPXL_20260719_185813539.jpg📷 PXL_20260307_154004064.jpgPXL_20260307_154004064.jpg📷 PXL_20260302_211313467.jpgPXL_20260302_211313467.jpg📷 PXL_20260806_211500282.jpgPXL_20260806_211500282.jpg

Engaging
Jeremy Jackson avatar

Dave Ek · Aug 5, 2026, 01:58 AM

Mine’s only an Esprit 100 but here you go. I mounted a Vixen dovetail on the top of the tube rings that holds my Pegasus Pocket Powerbox Advanced gen 2 and a Mele Quieter 3Q. The mounts for the powerbox and PC came from Rouz Astro (rouzastro.com)—kind pricey but they do the job nicely and allow me to move the powerbox and PC from one scope to another. My cabling could probably be a bit more tidy but it’s good enough to keep from snagging, and wind generally isn’t an issue for me. I take advantage of the two USB 2 ports on the camera to connect the filter wheel and guide camera, and that helps to keep the cabling manageable. (Not seen in either image is the Pegasus FocusCube focus motor.)

📷 esprit1.jpgesprit1.jpg📷 esprit2.jpgesprit2.jpgThe whole works sits on an iOptron GEM45 mount which has nice cable management features. I run a 12V power cable, a USB cable connected to the mount, and a USB cable connected to the iPolar polar scope up through the mount to the powerbox. My other three telescopes (an Esprit 80, a C8, and a 6” RC) are similarly configured.
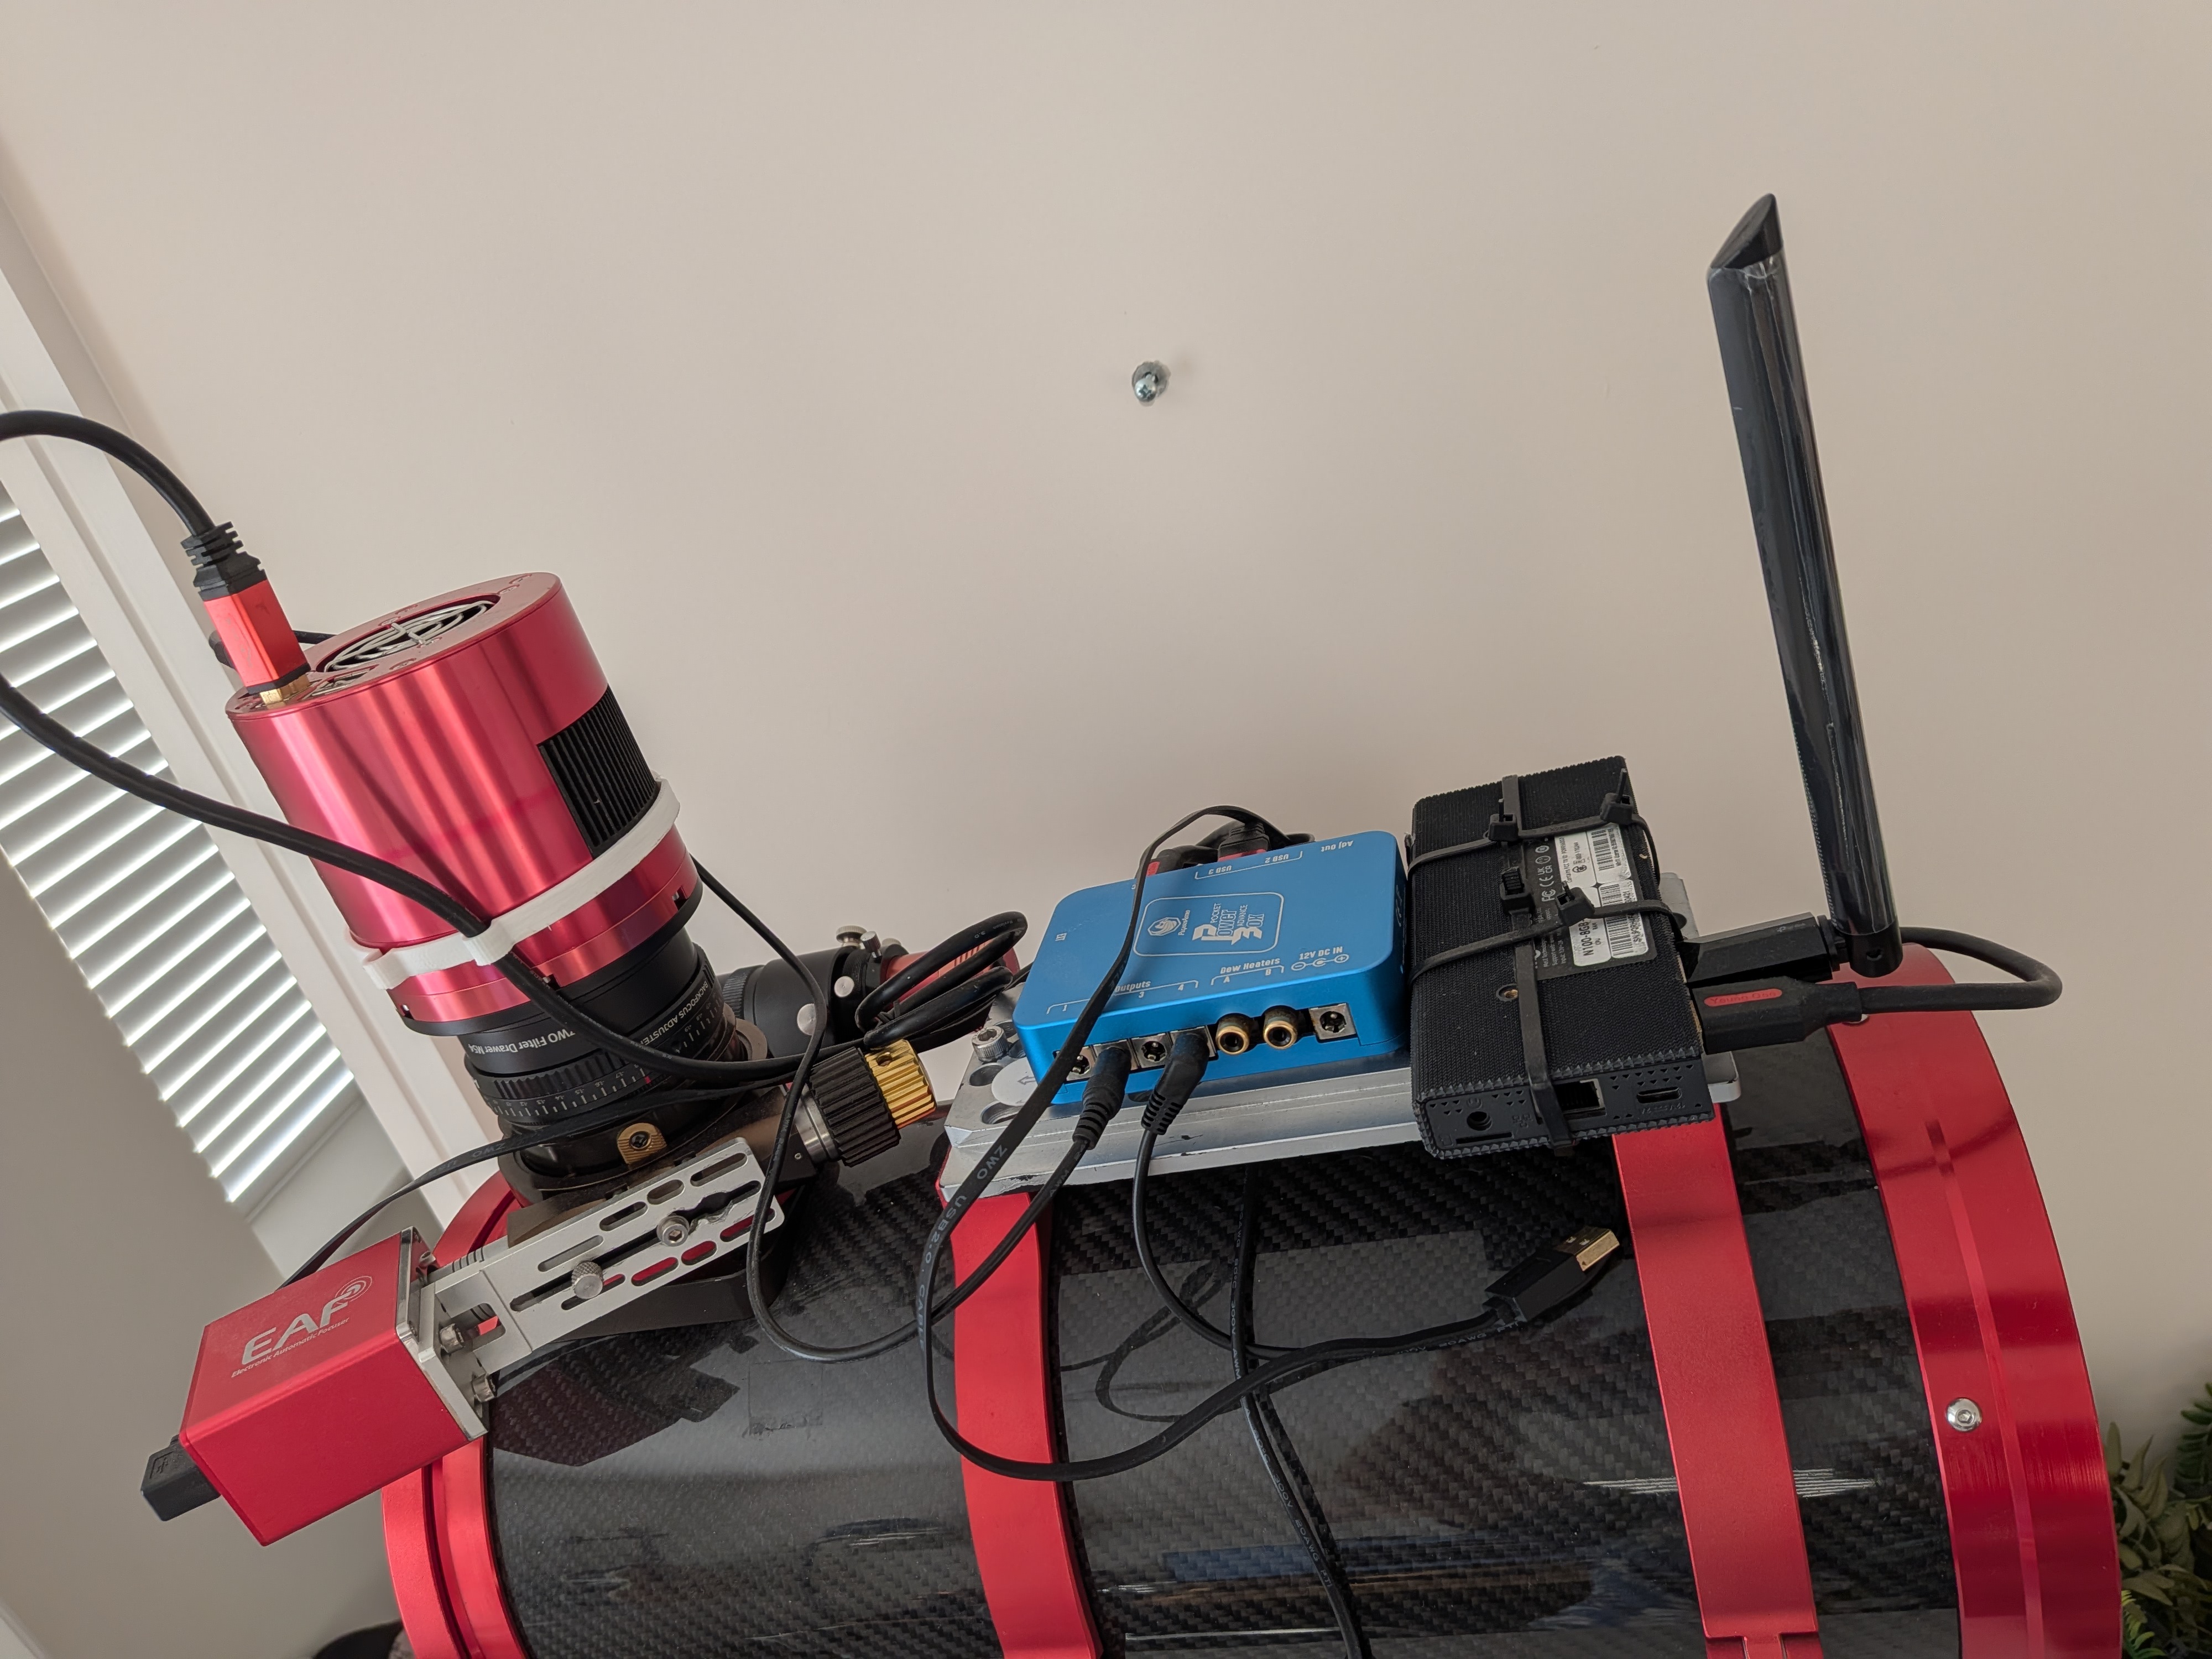
Nice setup, but you should remove all stickers from the MELE, the top plate is the heatsink for the computer.

JJ

Helpful Concise