


INTRODUCTION
I’m excited to announce a new, free Pixinsight script from Mike Cranfield at Cosmic Photons for producing synthetic luminance images. The idea for this script originated from a discussion here on the Astrobin forums about the best way to generate a synthetic Lum channel. I noticed that most us have our own favorite way to combine RGB data to form a synthetic Lum channel and to combine LRGB data to form a super-synthetic Lum channel. It also became clear to me that not all of the methods that folks were using are correct. In fact, I realized that there’s a bit more nuance to this whole thing than I realized at the onset and that even my own favorite method was slightly flawed!
Using high quality ‘L’ data can improve the SNR of a RGB image when it is properly combined in processing and it turns out that you can further improve the SNR of your Lum data by properly combining it with synthetic Lum data derived from the RGB data itself. The challenge is to figure out how to properly weight the contributions from the LRGB channels so that you arrive at a statistically correct super synthetic luminance image. The reward is that if you create the image properly, it will have the highest possible SNR that will be imprinted on your RGB data when you combine them to produce your final image.
At this point, a few of you may be thinking, “So what! I can just denoise the result no matter how I do it, so why bother?” And that’s a fair question that I can address in two ways. First, if your goal is to maximize detail and to stay as true to your data as possible, the optimum starting point is the one with the best possible SNR. The goal should be to use the least amount of denoising as possible. Second, this tool is so easy to use, why bother doing anything else? Once you load your data, it only requires pushing two buttons…and bingo, you are done. You’ll still use denoising but you’ll be starting from the highest SNR that your data can produce.
HOW TO USE IT
This new “SyntheticLuminance” script reduces the process to just a couple of operations. Let’s take a look.
📷 image.png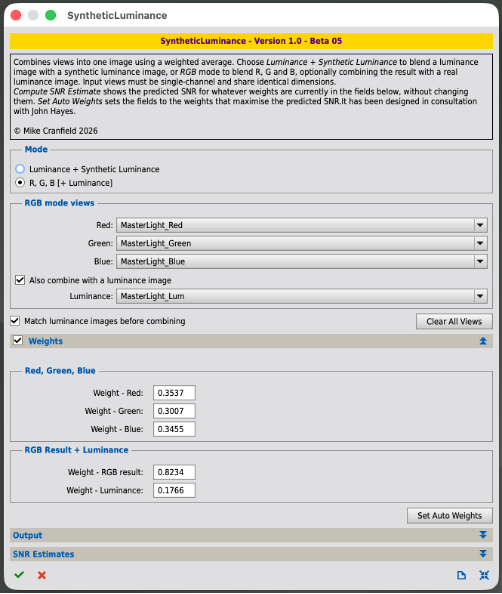 The first step is to simply load your R, G, B, and L channels into the script. Then press the “Set Auto Weights” button. The script will compute the appropriate weighting scales based on the SNR of each channel. Next, press the checkmark to execute the process and get the results. There is an option to allow computing a new synthetic luminance from your original data plus another synthetic image that you’ve computed by some other method. There is also an option for using mismatched luminance images but that’s really just for experimentation. It doesn’t properly normalize the images with respect to gains and offsets so the result will not be statistically correct. The script also shows the predicted and actual SNR of the results, which you can compare with your original data to see the improvement.
Here is my recommended work flow for creating a statistically correct synthetic Lum image. Start with four integrated LRGB channels in linear space.
1) Use your favorite tool to gradient correct the individual integrated LRGB channels. It is important to do this before channel combination or you may see spatially varying color artifacts that may be difficult to remove. Gradient correction before RGB combination should result in a nearly perfectly "flat" image.
2) Perform RGB color combination
3) Perform SPCC color calibration on the RGB image
4) Extract the RGB channels from the color calibrated image created in step 3.
5) Load those RGB channels along with the gradient corrected Lum channel in to the SyntheticLuminance script to create a synthetic super Lum channel (SSLC).
6) Now you are ready to process and combine the SSLC + RGB data from step 3 as you normally would—normally in non-linear space.
AN EXAMPLE
Here is a close up comparison of LUM (from the scope), Synthetic LUM from the RGB Image, and the SSLC image displayed with a very heavy stretch. This is pretty clean data to start with and it includes a lot of RGB relative to the LUM data but you can see a clear improvement in the SSLC image over the straight LUM channel.
📷 image.png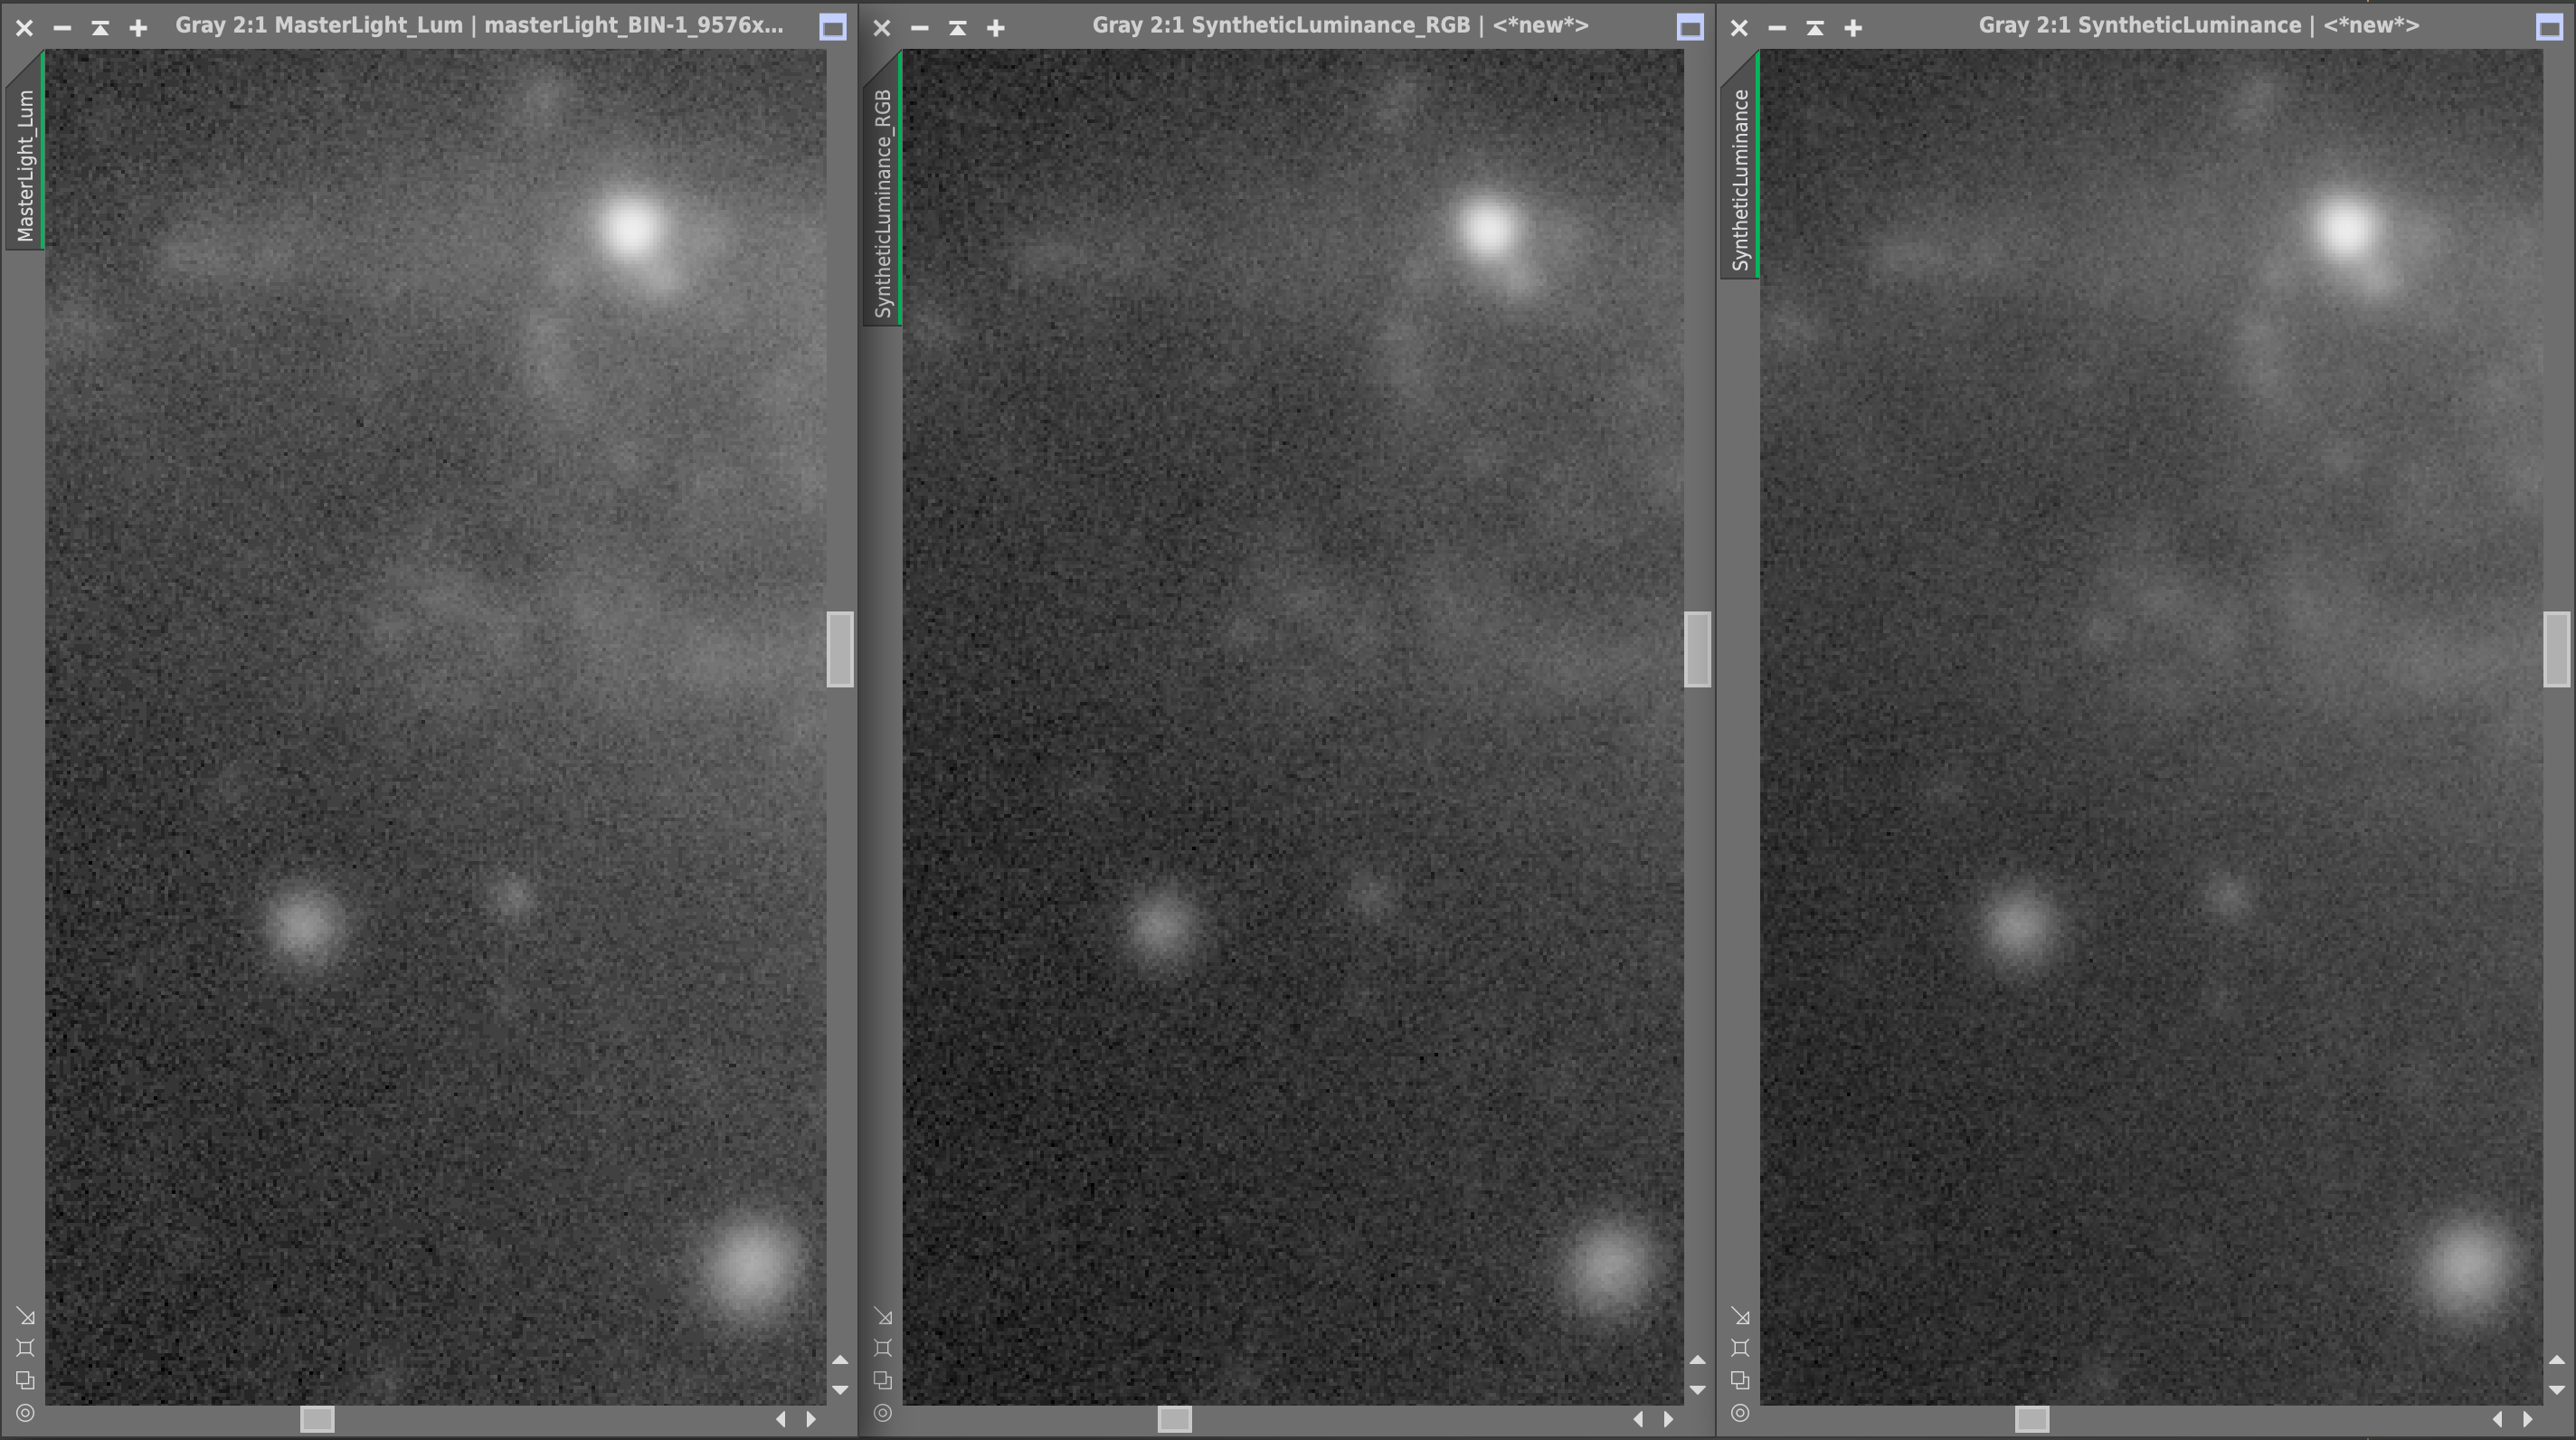 By loading these images into the RGB channels, the script is also useful for evaluating the results. Here is what it shows.
LUM: SNR = 3.2492e+05 (55.12 dB)
SynLUM: SNR = 1.0896e+06 (60.37 dB)
SSLC: SNR = 1.3664e+06 (61.36 dB)
You can see that by combining all of the channels to form the SSLC, we improved the SNR by 6.24 dB over the raw LUM data, which is a factor of 4.2 times better. That’s pretty good!
WHERE TO FIND IT
You can find installation instructions and the repository address for this script at Mike’s website at: https://cosmicphotons.com
THANKS TO MIKE!
Although I suggested this idea to Mike and acted as an advisor, it’s really a stretch to call this a collaboration because Mike did all of the heavy lifting on this project. As he normally does, he produced world class documentation for using and understanding the inner workings of this script. So…BE SURE TO READ THE DOCUMENTATION!! Mike put a huge effort into it and it is worth your time to check it out. If you have questions, that should be your first stop.
Finally, I want to personally thank Mike for all the hard work he put into this project. When I first proposed it, I thought that it would be absolutely trivial but like many other things, nothing is ever as easy as you think it’s going to be and Mike did an amazing job of digging through all the details!
Have fun with it. I think that it should be a really useful tool for just about everyone doing LRGB processing in PI.
- John


